Introduction: TMNT Plushies for Less Than $5 Each


My little ones recently discovered Teenage Mutant Ninja Turtles for the first time and wanted to have the turtle toys.
So I decided to make them a simple TMNT plushies and here is how I did it:
My local craft store sells the 1mm 9x12 felt sheets for $0.33 each. They had them on sale for 50% off and so it cost me about $1.25 for the fabric. The polyester fill was $3 and I already had the needle and thread from previous projects. So in total each 10.5" tall plushy cost me about $4.30 plus time spend making it.
Step 1: Materials


SUPPLIES FOR 1 TURTLE:
- Quilting Thread (This is thicker and holds better when hand sewing, but you can use regular thread and just double it)
- Embroidery Needle (These are a bit sturdier, but you can use whatever needle you have)
- 2 x Lime Green Felt Sheet - 9" x 12" x 1mm
- 1 x Dark Green Felt Sheet - 9" x 12" x 1mm
- 1 x yellow Felt Sheet - 9" x 12" x 1mm
- 1 x dark brown Felt Sheet - 9" x 12" x 1mm
- 1 x white Felt Sheet - 9" x 12" x 1mm
- 1 x Red/Orange/Blue/Purple Felt Sheet - 9" x 12" x 1mm
- 1 bag of polyester fiber fill (1 bag will be enough for 4 plushies)
OPTIONAL:
- Super Glue (Some of the pieces can be glued instead of sewn )
- Orange Embroidery Floss (detail on front of shell)
- Brown Embroidery Floss (detail on back of shell)
Ready? Lets get started...
Step 2: Mark and Cut


1. Use two pieces of heavy cardstock to draw out your pattern, you can download the one I have included or draw your own. Just make sure it is no larger than 9x12 so that it will fit on your felt sheet.
NOTE: if you choose to draw one of your own, make sure you make it a bit fat so that you have room to sew and still get the shape you want.
2. When cutting it out, I always fold the paper in half and cut out just half the shape so that both side will be symmetrical when making the mold.
3. Place the mold on the felt sheet (the body on the light green, the shell on the dark green and the smaller shell on the yellow) and trace it with a pencil or a thin sharpie.
NOTE: the line will not show on the plushie since that is what you will be sewing together and it will be inside the plushie
4. Cut out the shapes you will need for your turtle:
-. 2 bodies from the two light green sheets of felt
- 1 dark green oval for the back shell
- 1 yellow oval for the front shell
- 2 white circles (I used a dime as my measure) for the eyes
- 2 small brown circles for the pupils
- 4 2mmx6in strips. 2 for the arm bands and 2 for the leg band.
- 1 2mmx12in strips.1 for the tail of the mask
- 1 4mmx12in strip for the mask (I traced my ruler for this thickness)
Attachments

Step 3: Front and Back Shells


- Using a running stitch sew the yellow oval to the belly of one of the green bodies.
- NOTE: The running stitch is just running your needle up then down then up again. Keep your spacing as even as you can.
- OPTIONAL: Take the orange embroidery thread and using a Backstitch create the pattern on the front of the shell. One vertical line down the middle with two horizontal lines crossing the vertical one.
- OPTIONAL: Take the Brown embroidery thread and using a backstitch create the shell pattern on the dark green oval. I did not do it on this particular turtle, but it will add a bit of detail.
2. Using a backstitch sew the dark green oval to the middle of the second body. This is the shell. It needs the extra strength of the backstitch because you will need to stuff this shell
3. Leave a part of the shell without sewing to allow you to insert the fiber fill. DO NOT FILL IT YET.
Step 4: Sew the Body


- place the two shell parts together so that the outside is just green
- Sew along the edge of the body. I used the backstitch for extra strength, but you can use the running stitch with one backstitch every 5 stitches.
- leave a part of the turtle without sewing so that you can flip the turtle inside out.
Step 5: Flip and Fill


- Using the little hole you left, very carefully flip the turtle inside out.
- NOTE: take your time! if you rush, you will rip the stitches and that will cause you a huge headache.
- After you have flipped the turtle, use the fiber fill to stuff the turtle using the same hole you used to flip it.
- Use the eraser of a pencil to get those hard to reach places stuffed just how you like them.
- Once you are satisfied with how plush your plushie is, sew the hole up and you have the basic body of your turtle.
- flip the turtle over and fill the shell with fiber fill and sew up that little hole as well.
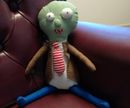
This is your turtle, without and identity. :)
Step 6: Details


Now that you got your turtle, decide who you want it to be:
- (Purple) Donatello
- (Red) Rafael
- (Orange) Michelangelo
- (Blue) Leonardo
Take those felt strip and sew them to the turtle. Any stitch will do. I used the backstitch just because i like it.
- Take the COLOR thick 4mm strip and sew it onto the face as the mask
- Take the COLOR thin 2mm strips and sew it onto the arms and legs
- Take the last COLOR thin 2mm strip and make a knot and sew it onto the back of the head.
- Take the brown strips and make the belt by sewing one diagonally and one horizontally onto the turtle
- OPTIONAL Cut out a small square from the yellow felt and paint it gold and glue or sew it on top of the brown diagonal strip.
- Take the two white circles and glue them to the mask
- Take the two brown smaller circles and glue them to the white circles.
That . is . it !
You got yourself a Teenage Mutant Ninja Turtle for less than $5
Hope you liked it!

Participated in the
Toys Contest


