Introduction: Tensegrity Desk
I designed and built this tensegrity desk for my room. It is 5'x by 2' with hanging shelves on either side. Tensegrity is when something is held up using tension. The top part of my desk is only connected to the bottom part using steel wire, creating an illusion that the top part is floating. The illusion does not come from the thin wire, but from how the top part hangs above the bottom. The desk is made from wood 2x4s that I painted black, the aforementioned steel wire, metal i-hooks, metal brackets, and wire rope clips. I personally used a piece of acrylic for the top. The desk is mostly supported from the four lengths of wire in the back and on the sides where the bottom piece diagonally sticks up above the top piece. The four lengths of wire in the corners keep it stable.
Last fall, it became apparent that my old kid-sized desk wasn't going to cut it anymore. I needed more space for homework, working on projects, and a computer. Using the engineering skills I learned in school, I decided that I would make my own desk that would both suit my needs and be super unique!
Attachments
Supplies
I've attached the fusion file I made. It has all the dimensions for the wood and wire. To accommodate the acrylic top, I added one wooden 1x2 in the middle on the top part to support it. I've attached photos to show where the i-hooks and wire rope clips go. I used eight big i-hooks for the four corners (four on top, four on bottom). sixteen small i-hooks were used for the shelving wire (four for the top on the left side, four on the bottom left side, and same for the right). I used about fifty wire rope clips for securing the steel wire. forty feet of 3/16'' steel wire was used. Finally, I used ten large metal brackets for bracing the 2x4s wherever there was a 90 degree angle. For the 1x2 piece, I used an additional four small metal brackets.
Step 1: Get Your Materials
I was able to get everything I needed from my local Lowe's with my dad. The fusion file shows all the wood and wire you will need, and all the other materials I used are in the supplies section.
Step 2: Cut Your Wood
Measure the wood according to the file and cut it. We used a compound miter saw to make our cuts, and we could adjust the angle easily with it for our angled cuts.
Step 3: Prepare the Top and Bottom Parts
We used long screws and metal brackets to hold the wood together. After I drilled the holes for the i-hooks and where the steel wire travels through the wood. I then painted it all black apart from the top, which I painted white to match the best with my white acrylic top. Finally, I screwed in the i-hooks.
Step 4: Put the Top and Bottom Parts Together
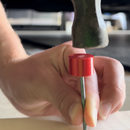
I used chairs and spare wood to position the top part above the bottom at the correct height. I made sure the desk was level too. I then measured how much wire I needed for the support wires. These wires are the ones on the sides and in the back connecting the diagonal pieces (the picture for this step shows a previous version with straight instead of diagonal pieces, but this was a lot weaker, so I redid it with diagonals). I cut the wires with a chisel and a hammer (cheaper than heavy duty wire cutters). Then I looped the wire through the wood (see picture) and used the wire rope clips to secure it. It helps to have an extra pair of hands and gloves for this step! Then I added the four pieces of wire in the corners. The point of these is to prevent the top part of the desk from tipping. I made sure these were super tight so the desk didn't wobble or tip. Once all the wires were secured, I removed the chairs, and the desk stayed in place! If you notice your desk is wobbly, put the chair supports back and re-tighten your steel wires.
Step 5: Add Your Shelves
This part is pretty easy. I just cut the pieces of plywood into the correct sizes, drilled holes for the wire, painted them black, and hung them using steel wire from small i-hooks. They are supported with wire rope clips below them in all four corners. On the left, I opted for three shelves, while on the right I just have one one for
Step 6: Add the Top of Your Desk
You can really use whatever you want as the top. I personally used a piece of white translucent acrylic so that light could shine through. I ordered it from home depot and it came two weeks later.
Attachments

This is an entry in the
For the Home Contest


