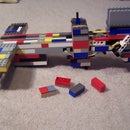
Introduction: The A1.2 Mini Lego Assault Crossbow
This is the second modification of the A1, and probably the most significant one. This new crossbow can be disassembled into 5 pieces, and then reassembled into the crossbow in under 30 seconds (my record is 27 seconds anyway). It also features a new type of trigger: a modified gear trigger, which instead of having the interlocking gears inside the gun, the interlocking gears are to the side of the crossbow (this saves on space). The length of the crossbow has also been slightly shortened, and a new sight added. The gun fires a 2x4 (F) brick (F means with a flat piece on top). It has a range of 35+ feet (depending on rbs) and it is very powerful and accurate.
Improvements over A1.1:
-Can be disassembled into 5 pieces, then field assembled in under 30 seconds
-A new, reliable gear trigger
-Slightly shorter in length.
-Better sight
My Website: http://sites.google.com/site/bblegobrickworks/Home
Improvements over A1.1:
-Can be disassembled into 5 pieces, then field assembled in under 30 seconds
-A new, reliable gear trigger
-Slightly shorter in length.
-Better sight
My Website: http://sites.google.com/site/bblegobrickworks/Home
Step 1: Bottom Connector Piece
This is a very simple piece which is used to connect the bottom pieces of the crossbow when you assemble it.
Step 2: The Rubber Band Holder/Forward Piece
Fairly easy to make.
Step 3: Body/Runway Piece
Also very easy to make.
Step 4: Handle Piece
Short, easy step
Step 5: Mechanism/Back Piece Part 1
This step might take a long time, but it is still easy. The step is so large I had to split it into 2 parts.
Step 6: Mechanism/ Back Piece Part 2
The other half of the back piece.
Step 7: Assembly + RBs + Ammo
The ammo is a 2x4 brick with flat pieces on top. The rbs you will need are 2 regular sized rbs (which are usually pink coloured, but in this case white coloured)used for firing, and 2 smaller and thicker rbs used for the trigger counterweight. The gun can be assembled and disassembled easily, and with practice it can be assembled (with rbs and ammo on it and ready to fire) in under 30 seconds.


