

Introduction: The Clickwall (The Great Circular Wall)


Here you can see how to make a modular wall from recycled plastic. In this page you can see all the steps you need to go through to make the wall. Enjoy and have fun!
Step 1: Supplies
Materials:
- Plastic granules;
- 8 Steel plates 360x210x3mm;
- Steel square tube 1010x20x20mm;
- 4 Steel pins 40mm;
- Steel tube 180mm
Bolts:
- 2x M10x40 socket countersunk head;
- 8x RVS screw 4.0x40mm;
Machines/devices:
- Waterjet cutter;
- Extruder;
- Oven;
- Welding machine;
- Drill;
- Hydraulic press;
- Band saw+
Step 2: Solidwork Files for the Mold and Brick

Attachments


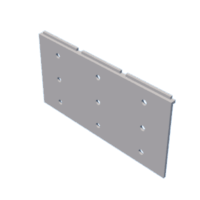

Step 3: Making the Mold 1 (Sheet)


The different parts of the mold are made with the waterjet cutter. After cutting the steel plates, we drilled small holes in it. These holes are meant to weld the different plates together. In the 4 corners of the mold we drilled 4 holes but not al the way trough the last plate. In these holes we weld 4 pins that guide the lid of the mold. On top of the mold we made a frame, this frame helps distribute the power of the hydraulic press. The frame is made from a square tube that we saw in pieces and welded together. After this we had our first mold.
Parts of the mold
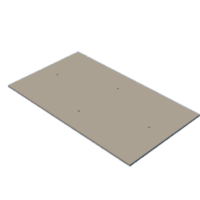
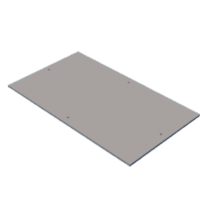
Bottom
- 2 plates 360x210x3mm
- 2 plates 360x210x3mm + a hole in the plate
- 2 plates 360x210x3mm + a hole with a rails contour in the plate
- 4 steel pins 40mm
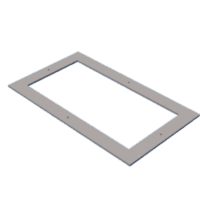
Top
- 2 plates 360x210x3mm
- 2 plates 300x145x3mm
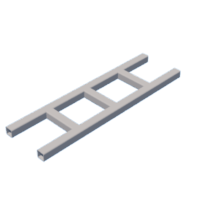
Frame
- 2 square tubes 420x20x20mm
- 3 square tubes 86x20x20mm
Step 4: Making the Mold 2 (coupling Piece)


The second mold we made is for connecting the 2 sheets together. This is a simple mold for the extruder. We made it from a steel tube that we welded on a steel square with screw thread.
Parts of the mold
- Steel tube 180mm
- 2 Steel plate 100x100x10mm
- Steel tube with screw thread 30mm
Step 5: Material

The weight of the quantity of plastic that goes into the block can be calculated using the following formula: m=ρ×V
The volume (V) mold 1 is 420,2 cm^3. (PS)
The volume (V) mold 2 is 63,3 cm^3 (HDPE)
The density (ρ) is different for each type of plastic.
Below are a few examples of densities of different plastics:
- HDPE: ρ=0,955 g/cm^3
- PP: ρ=0,902 g/cm^3
- PS: ρ=1,045 g/cm^3
Step 6: Using Mold 1


Roadmap
1. Switch on the oven and pre heat it till 220 °C
2. Weight you’re material and put it in the oven for 30 min
3. Take the material out and twist it to release the air bubbles
4. Put the material back in the oven with the mold
5. Pre heat the mold for 30 min with the material
6. Put the mold under the hydraulic press and place the lit on top then give pressure
7. Leave the mold for 2 hours under pressure
8. Take the mold out of the press and get the material out
9. Now you have your first Sheet! Remove the remaining plastic of the sheet to make it smooth
10. Repeat all steps to make another sheet

Step 7: Using Mold 2


Roadmap
1. Switch on the extruder and pre heat it till 220 degrees and set the speed of the screw to 0
2. Clean the inject mouth of the extruder
3. Mount the mold with fire resistant gloves by means of the screw thread
4. Weight your material and put it in the extruder
5. Wait for 30 minutes to let heat up the mold
6. Put on the speed of the screw by speed 5
7. Fill the entire mold with al the material
8. Unscrew the mold by the bolts and nuts and cut off the plastic with a sharp object
9. Unscrew the connector piece of the extruder
10. Let cool down the mold for 30 minutes
11. Repeat all the steps to make another pin
Step 8: Assamblage


Now that we have all the parts it's time to assemble the wall. A work drawing has been made to clearly see where the pieces come between. In addition, a click system has also been devised to connect the wall to the next wall. This is easy to make with a plastic sheet and the line bending machine.
Now you your first module is done. If you make a couple more you can make the wall as big as you want!


