

Introduction: The Tool Chest


Do you ever find yourself searching for your tools for hours? Do you ever get frustrated when you can't find the right tool for the job? If so, then you need a tool board! A tool board is a great way to keep your tools organized and accessible. It can also help you save space in your workshop or garage.
In this Instructable, I will show you how to build a simple but effective tool board.
Advantages of having a tool board -
- Organization: A tool board can help you keep your tools organized and easy to find. This can save you time and frustration when you are looking for a specific tool.
- Accessibility: A tool board can make your tools more accessible. This can be especially helpful if you have a lot of tools or limited space in your workshop or garage.
- Space-saving: A tool board can help you save space in your workshop or garage. This is because you can hang your tools on the tool board instead of storing them in drawers or cabinets.
- Professional look: A tool board can give your workshop or garage a more professional look. This is because it can help you keep your tools organized and tidy.
Supplies
- Wood
- Screws/ Nails
- Hammer
- Electric Drill
Step 1: Planning:
- Decide what tools you want to store on the tool board, and how you want to organize them.
- Consider the size and location of the tool board.
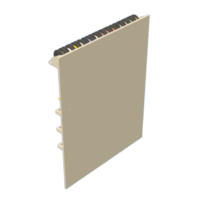
After planning i designed it on a CAD software and had an gist of how it might look ( Yeah ! Its a tedious process, but I believe in
Its not about the Finish line
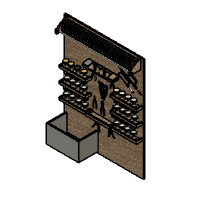
Step 2: Building the Tool Board:

- Having design as the reference, mark was done.
- Developed tool holder
- A holder for screws in the centre and drilling bits at either ends
- Some holder for jars (I had many jars with different nuts and bolts in it)
Step 3: Installing the Tool Holders:
Before installing the Holders ans drilling em
Marking was done to cross verify the diofferent positions in real world scenario.
once Coinfirmed holes are drilled for holder and tools
Attachments

Step 4: Organizing Your Tools:

- Put your tools in the holders on the tool board
- Make sure to mark the outer line of the tool on the tool board so that U'll get to know where a specific tool goes to and if any tools id missing or not.
Step 5: Voilaa !
I hope you enjoyed this Instructable on how to build a wooden tool board. With a little planning and effort, you can build a simple but effective tool board that will keep your tools organized and accessible.
If you have any questions, please feel free to ask me in the comments section.
Thank you for reading!


