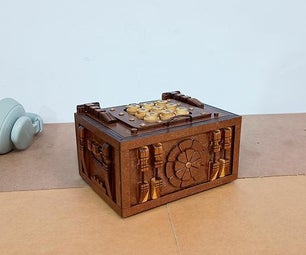
Introduction: This Is a Hidden Maze Puzzle!
This is not a Cryptex! It is much more nefarious!!!!
I wanted to create a hidden maze puzzle that has a high degree of difficulty even if you know the run through.
It is composed of 9 movable rings showcasing a variety of puzzle types. To solve this you will need to orient, balance, twist, rotate and manipulate the puzzle in all dimensions.
The ultimate goal here is to move the steel ball from the entrance through to the exit. While it can be done in reverse, the solving experience will be completely different.
The entrance and exit Have the only external markings on the puzzle
With 9 rings, I was toying of naming this something to do with Dante...One thing for certain, this puzzle is pure evil!
Yes there is a unique trick involved with solving each ring. The run through is provided in the build instructions.
Step 1: Make the Parts
From the drawings it is possible to make the parts from almost any media. Both wood and metal can be realized with either a router or milling machine. I went the plastic route...
I have included .stl files for plastic printing.
You will also meed a 3/8 inch ball or marble. I got this from Amazon.
Each ring is composed of 2 parts; a maze section and a cover.
The maze cover for each ring needs to be placed by aligning the key in the centre opening. If there is no key then the cover position is not critical, this is only on ring 1 and 9. Verify that each cover is correct for the ring and that it is not upside down.
Since I use ABS printing media, I use ABS cement to glue parts together.
Use the glue sparingly on all internal flats but fill the outer edge liberally and wipe off any excess.
Step 12 shows how to test the rings.
If you are looking to make this puzzle from other materials the drawings are available upon request.
Step 2: Ring 1
The natural tendency is to hold the puzzle upright after inserting the steel ball. This will become a problem in later steps. You will have to rotate the rings to get the ball to move from one ring to another...
The ball enters from the centre and can travel to 2 separate tracks.
The outer is a trap! the ball entering the maze will travel to the outer ring and stay in an endless loop until the proper balance can be maintained to get it back out of the trap.
The inner path has an opening to one side which will allow the ball to pass to the second ring only when the first and second rings are in proper alignment.
The second part of the inner path is trap accessible from the second ring if you position the puzzle in the wrong angle while turning the first and second rings.
The angled inlet hole has a small inward arrow inscribed. this is meant to be painted a high contrast colour. I chose red.
Step 3: Ring 2
The ball can only enter from the centre pathway into 1 of 3 compartments. One is a dead end. One is a trap with an exit into the third ring. The final one is the correct way which travels along to the outer path and out to the third ring.
The outer path is another trap which is a backtrack from the third ring.
It is also possible to enter the trap in ring 1 from here by inverting the puzzle
Step 4: Ring 3
This one has the potential to be the easiest one... Just one way, straight through but miss the target and you are in for a world of hurt.
The multi-hole cover greatly reduces the precision placement of the ball to the through hole.
The majority of this one is a three way trap which with a small chance of sending you back to the second ring to try again. or deeper into a trap in ring 4.
The smaller holes create false a pause which will hold the ball, creating more deception and thereby confusing you to fall further into the trap
Step 5: Ring 4
This is multiple path with only 1 true exit. 5 of the sevens are all identical shaped traps with entry points from either side of the ring.
The correct path takes the ball from the outer path to the inner path with the ball going to ring 5.
Step 6: Ring 5
This is the first time the ball needs to travel through the centre post. There is a capture hole from ring 4 that seems like a pit trap if the centre post is not aligned properly. Rotating the ring or post will allow the ball to enter to post then a 180 degree rotation will free the ball into the body.
Move too slow that the ball will fall into the trap just outside of the door.
Is is just a small matter or navigating to the outside of the ring to the back of the entrance to get to the outer ring where you need to be.
Step 7: Ring 6
Incorrect alignment will cause the ball to drop in any of a large number of pits. The trap openings from ring 5 drop into the inner path pits while the correct outer path still has 12 pits that need to be avoided
The ball needs to travel from the outer path to the inner.
Step 8: Ring 7
The is a standard lateral maze. tilting or rotating the puzzle will send the ball to the outside catches or into the trap located in ring 8.
the ball drops in from above right adjacent to a trap, it needs to be manoeuvred carefully from the inside path to the outside exit hole into ring 8
Step 9: Ring 8
The outer path has 2 sections, a blind trap and a through path to ring 9. The inner circular path is just a trap from ring 7.
The important element here is a ball catch which is only accessible from ring 9. this is the eventual way out...
The print shown in the first step has the wrong puzzle for ring 8 I have corrected this in the zip file.
Step 10: Ring 9
The final ring is a combination of pits, traps and misdirection. The orientation of the exit cover is not important.
There are 3 paths, the inner is a trap and the outer is a series of pits and the middle path has not been used before and the ball must travel from the outer through to the middle then back to ring 8 in the ball trap then the ring is rotated and released from the middle to the centre of the puzzle then out through the end cap.
This is the only section that is installed upside down from the rest.
The ball outlet has a small out arrow inscribed in it. this is meant to be painted a high contrast colour. I chose red.
Step 11: The Support Shaft
The centre support requires 3 cutouts to capture and transfer the ball as part of certain maze elements.
On the ends of the shaft is a hex portion that is meant to have an knob on it for proper operation.
I used a heat set insert at the ends of the shaft. this is a 6-32 brass piece which is heated with a soldering iron and pressed in place.
the knob is used to tension the puzzle and is held secure with a 6-32 screw. This it all hidden with a cap.
Once assembled all the rings are held together but are free to move independent from one another.
Quick tip, if using stainless screws, your wire cutter may have a cut off insert for this size...
Step 12: Test the Parts
Some of the parts may restrict the ball movement after the print is completed. It is best to try to solve each ring individually out of the assembly.
If the ball does not move freely then you will need to remove some material to make sure that the ball moves properly. I did my best to make the parts to require very little finishing but your printer may have other ideas.
All these parts with 10mm tracks and ports and the ball I used is a 3/8 inch diameter. This gives a whopping 0.475mm clearance...
I used a razor knife to clear the holes. Some of my cuts are not the cleanest, but this is not really important since all is hidden, but now the ball moves freely.
Step 13: Finish the Parts
The ring outer edge surfaces are meant to be smooth with no external indication of the relative position of the internal maze.
Printing the parts leaves imperfections which need to be removed or hidden.
The smoothing was done using automotive body filler which is sanded then primed and painted as shown.
The parts all needed some sort of surface smoothing to hide the print lines. The body filler is applied in small quantities and sanded when it hardens. The smoother the surface here the better the final finish.
I chose to use dark primer to make the colours richer and older looking.
I chose to paint the rings in an off white, kind of like ivory.
The knobs are meant to look like jade and the caps are gold. The computer model shows the colouring as desired.
Step 14: Assemble the Puzzle
Begin by fastening one of the knob pieces to the one end. I show the cap in place her but that may get in the way.
The 9th ring is placed first with the ring cap side down.
All others are placed in descending order with the ring cap side up.
Finally the top knob is put in place and secured with a screw. the pointy caps are then pressed into place.
Step 15: Display and Storage
I used some unusual shapes to create a stand for the puzzle.
It features a prominent visual with integrated storage for the ball when it is not trapped inside!
Painted gloss black to hide the oddball print colour scheme.
The two uprights snap into the hex holes on the base and the puzzle is cradled on the uprights.
If you liked this puzzle we have parts and plans available. Please check out my online shop HERE!

First Prize in the
Puzzle Challenge


