Introduction: TinyBots- BrushyBot
In this Instructable, you will learn how to make the first TinyBot- BrushyBot. This bot is easy to make and inexpensive. Whether you're a beginner looking for simple projects or an expert looking for a cheap weekend project, you've come to the right place.
Step 1: Part 1- BrushyBot
BrushyBot is probably the simplest TinyBot. All you really need is a disposable electric toothbrush, a button battery, and some duct tape. I used the Oral-B Pulsar, which came from Costco, but anything similar would probably work. I have also used the generic toothbrushes from Target, but they are harder to dismantle.
Step 2: Get Ready to Make BrushyBot
Are you ready to make your very first TinyBot? Great! Once you have your toothbrush, button battery, and duct tape, make sure to grab some pliers and maybe some wire strippers.
Step 3: Dismantling the Toothbrush
In order to make your BrushyBot, you'll need to get the motor out of the toothbrush. The one I used had an endcap that screwed off easily, although you might have to use pliers. Once you've gotten the endcap off, you'll need to take whatever guts you can see in your pliers and yank. You should now have a plastic thingie with a silver cylinder inside. That's your motor! Make sure to save the top part of the toothbrush.
Step 4: Extracting the Motor
If your toothbrush is like mine, then the motor is encased some sort of white plastic. There's probably a little part that acted as the switch. You'll need to remove that- it should be easy. There were two prongs that held my motor in place. You can simply bend these back and pull the motor free, taking care not to break the wires. Then you'll need to disconnect the wires from the battery clip. Gently tug on the solder joints until the wires pull free. Make sure not to break them. You now have the motor! You should strip the leads so that about 1/4" of bare wire is showing.
Step 5: Time for the Brush
Did you save the top of the toothbrush when you dismantled it? Good. On my toothbrush, there's a big crack down the middle of the brush head (on purpose!). If you have this, when you're cutting the brush head off, make sure that you cut a little bit past the crack so that you don't have two halves. You could use hot-glue to fill it, but I wouldn't let that seep into the bristles. If you don't have the crack, don't worry about it, just cut the brush head off. I used mini diagonal cutters, but whatever works is fine. Sand the edge if it's rough. You just made the main body of your BrushyBot!
Step 6: Putting It All Together
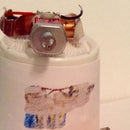
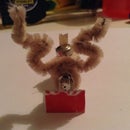
Yay! Time to put BrushyBot together! Make sure you have your motor, brush head, duct tape and battery. Start with your brush head with the plastic part facing up. To tape, make a loop so that the sticky part is facing outwards. Tape the motor so that the spinning end is hanging off the cut end of the brush head. Then put a loop of tape down for the battery. Attach the black lead (the positive lead) to the tape, then put the side of the battery with a plus on it on top of that. Leave the red lead (the negative lead) free. Put extra tape wherever you feel is necessary. When you're ready to test, tape the red wire down to the top of the battery. BrushyBot should be moving once you do this. Once you're done playing, you can remove the tape so the red lead isn't touching the battery. You could also use a rubber band to hold the lead in place, but you'd need a fairly long portion of the wire stripped. Run BrushyBot a few times to make sure it doesn't fall over. If it does, work on repositioning the motor and battery so it's balanced.
Step 7: Troubleshooting
I can't get the guts out of the toothbrush.
Make sure you're using pliers, as they make it easier, and tug a little harder.
My motor leads broke.
If you have a soldering iron, you can solder more wire to the broken leads. If you don't, you'll have to put the battery closer to the motor and add weights to compensate.
BrushyBot won't run.
Make sure both wires(the silver parts) are touching the battery and the right wires are touching the right sides of the battery (black wire should be touching the side with the plus). If that's all correct, try a new battery, as your other one might be dead or not powerful enough. The batteries I used were 3V watch batteries.
I can't get the red lead to stay down.
I would say using tape is your best option. You might want a fresh piece of tape, and make sure it's down tight.
BrushyBot is falling over.
Experiment with where you position your motor and battery. If that isn't helping, try trimming the bristles so that they are the same length.
My motor/ battery fell off.
If duct tape isn't holding your motor and battery, you could hot-glue them down. Keep in mind that hot-gluing the battery will make it hard to change!
Step 8: You're Done!
Congratulations! You have just completed your very own BrushyBot! I hope that you are able to make more and come up with some cool modifications. I'm working on some myself!
If you're ready for the next step, the next TinyBot is on its way! I will try to make a new one at least every month, and fun accessories more frequently.
Step 9: If You Want to Get Fancy...
You could take a battery holder (not AA, but button or coin) and solder the leads to the motor with the motor mounted normally and the holder where the battery would go. Put the battery in, and you can turn BrushyBot on and off with ease by slipping it in and out!
Step 10: In a Group Setting...
A great way to get people you know into robotics is to making BrushyBots together! You could make BrushyBots at...
Girl/Boy Scout meetings
Birthday Parties
Family Reunions (That's a lot of toothbrushes...)
Maker Faires
and much, much more!

Participated in the
Formlabs Contest

Participated in the
First Time Author Challenge

Participated in the
Tech Contest


