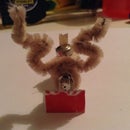
Introduction: TinyBots- CuppyBot
It's finally time! The second TinyBot has arrived. CuppyBot is just as simple and fun to make as BrushyBot. You may notice that there are many similarities between the two. However, I think CuppyBot is much better to modify and build off of. You can add legs, add more motors, and change the size of the cup. It's also similar to an ArtBot, and in fact you could make it into one. By the way, just mention if you'd like instructions for that! Anyway, all you need is a cup, a vibration motor (a toothbrush one works), and tape. Ready? Let's go.
PS. So sorry for the long wait! Many new TinyBots will be coming out over the summer, I'll have loads more time.
Step 1: Materials
The materials list is pretty short, but here goes:
A small cup (I re-used a plastic shot-size cup, but a small foam or paper cup should work too.)
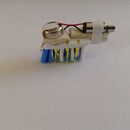
A vibration motor (Mine came from an electric toothbrush. It already had leads. If yours isn't like mine, you'll need to solder or tape some leads on.)
Some duct tape, double-sided foam tape, sticky Velcro, etc. I used sticky Velcro. (Adhesive.)
Optional: Pipe cleaners
Tools-wise:
Pliers (if you need to extract your motor from a toothbrush. Refer to BrushyBot's instructions if you need help!)
Wire strippers (to strip your motor leads)
Scissors (if you're adding pipe cleaners, and to cut your sticky Velcro if you're using it)
Optional: Soldering iron/solder (if you need to solder leads onto your motor)
And that's all! Let's get started.
Step 2: A Note on Cups and Size of Motors
Step 3: Motor Time!
Another good option for the adhesive would be carpet tape. It's double sided and as sticky as duct tape! Used it on a sweeping robot recently, worked well. I was fighting with another robot (don't ask) with something stuck to the tape. The other robot tried to pull it off and nearly flipped over!
Step 4: Add the Battery!
Step 5: OPTIONAL: Pipe Cleaner Upgrade
Step 6: All Done!
WheelieBot.
Think of that what you may, but be on the lookout for that sometime this month!
PS: Check out the Snowplow Upgrade Instructable for pictures of the components.

Participated in the
Move It

Participated in the
Unusual Uses Challenge

Participated in the
Reuse Contest


