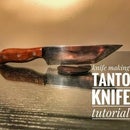
Introduction: WW2 Fighting Dagger Tutorial
In this instructable I will show you how to make a world war two fighting dagger out of an old piece of metal. For a best visual suport I made a youtube video where I go on step by step. -link at the end
Step 1: Drawing
make a template and copy it to the blade.
Step 2: Cut the Blade
cut the blade with the cutting wheel
Step 3: Finish the Profile of the Knife
finish the profile of the knife with the angle grinder or a
Step 4: Bevel
make the bevel with the angle grinder
Step 5: Make Everithing Nice
make everithing nice and clean with a file and diferent sand paper
Step 6: Heat Treat
heat the blade until it's non magnetic and then get it in oil for about 15 seconde. After put the blade in the oven to temperate it with mom's chicken ;)
Step 7: Final Sanding
Final sanding with different grid sand paper.
Step 8: Guard
cut a piece of alluminium for the guard and work it until it fit perfectly.This stage is rather difficult make sure not to exceed the thickness of the stalk. I have of to begin again this stage because I have to exceed the thickness
Step 9: Handle Pt.1
cut piece of leather that you stack on the knife and glue with epoxy.
Step 10: Handle Pt.2
shape the handle when it's drye
Step 11: Final Step
the last step is to dye the lether and sharpen the knife
Step 12:
the Dagger is ready to go! for a more detail visual suport go on my youtube chanel where I go step one by one for the realisation of this knife:

Participated in the
Leather Contest 2017

Participated in the
Metal Contest 2017


