

Introduction: Make and Solve a 3 Piece Burr Puzzle


You may be wondering what a burr puzzle is. According to Wikipedia, "A burr puzzle is an interlocking puzzle consisting of notched sticks, combined to make one three-dimensional, usually symmetrical unit." A lot of times they're made from wood, but they don't have to be.
When I was looking online for building plans of this, all of the plans were specific for the one size of square dowels used, which was usually 3/4 inches. This Instructable is planned out with more of a general set of steps that can be applied to any size of square dowel. For some of the steps, referring to the pictures for that step will be very helpful.
If you would like to see a video version of this Instructable, you can see that here:
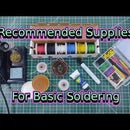
Supplies
Step 1: Cut the Lengths


To begin, you'll need 3 pieces cut from your square dowel. They need to be cut at the length of 3 times the width. For example, since my dowel is 1 inch wide, I cut mine at 3 inches long. You can make them longer if you want, or even slightly shorter. But the width to length ratio of 1:3 will give it a more uniform look.
Step 2: Mark the First 2 Pieces


Two of the pieces will be mostly identical. The gap that you need to cut out needs to be the same as the width, so I used another piece of dowel to measure the area. Make sure this area is centered along the length and extend the marks along all 4 sides.
Next, on 2 adjacent sides, draw a line between the 2 marks, centered along the width. Then to make it easier to see the section to remove, I shaded out the portion that needs to be removed.
Step 3: Mark the 3rd Piece - Part (a)


On the 3rd piece, you need to mark the width in the center just like you did the first 2 pieces. After that, mark a line half way between those marks along the width, and another mark half way along the length. This will give you 4 squares in the middle of the pieces.
Step 4: Mark the 3rd Piece - Part (b)


For this step, you'll need to look at the pictures to see which of the squares on each side to mark for removal. Between each picture, roll the down to the left.
Step 5: Cut Half Way Through the Blocks


Now that you have the portions to remove marked off, it's time to start cutting the pieces. This is easy to do, just cut along the inside edges of your marks. I used a hand saw to do this. Do not cut all of the way through the wood blocks, only cut half way through. I used my marks to let me know when I cut through it far enough. Again, check the pictures in this step if my description is confusing.
Step 6: Finish Cutting Out the Extra Section


To finish cutting out this section, you can use a chisel or a utility knife with a strong blade. Just cut along the final mark lines. Again, the pictures in this step should help understand this.
Step 7: File and Test Fit


If you didn't cut the grooves out perfectly, you'll need to file it to it's final size. To know when you have it sized correctly, you can use the blocks themselves to test fit. The 2 pieces that are the same, the groove needs to be able to fit the width of another block.
For the 3rd block, the grooves need to be able to fit the narrow portion of the other 2 blocks. This test fit will also help you know if those narrow portions are the correct size. And again, the pictures in this step will help understand.
Step 8: Final Adjustment


Now it's time for the last modification for the puzzle. On one of the blocks that were made the same, the narrow part needs to be rounded off. Just file it down until it's round. This part needs to be able to rotate within the narrow groove of the 3rd block.
Step 9: Now for the Puzzle Solution!


This step is all about the pictures. The pictures show the steps for the puzzle solution.
Step 10: And That's It!


Now you can build one of these simple burr puzzles, and you have the solution. I'm working on an Instructable for a 6 piece burr puzzle, so keep an eye out for that!


