

Introduction: 30 Minute Micro Waterproof Flashlight


This is the easiest, simplest way we've found to make a super bright, super mini flashlight using only 4 components, some solder, and a little help from your friendly neighborhood glue gun. And not only that, but if you do a good enough job with the glue gun, the flashlight is waterproof too! So on those rainy nights where you're fumbling with your keys, can't see a foot in front of your face because it's pouring buckets, and your keychain light just went dead because it short circuited, you can pull this little guy out, find your key, and be on your way as fast as you can say lickety split! ...Or as fast as you can say it with a mouthful of water.
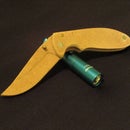
This project can actually be completed in about 10 minutes (maybe even less!), but what with taking pictures and all, it took a total of about 20-30 minutes for the flashlight seen here. Also, these things are pretty darn bright, that first picture doesn't do them justice.
Step 1: Materials
For this project, you'll need:
A 12 volt battery (About as thick as a AAA and about two thirds as long. We bought ours at Home Depot for a little less than a dollar each)
An LED (Whatever color you want! We chose blue for ours)
A resistor (You'll probably need about 100 ohms minimum. Without a resistor, your LED will just fry, and you really don't want that to happen.)
A switch (any kind you want and/or have on hand, we just happen to really like pushbuttons)
Soldering iron and solder
(Optional) Glue gun and extra glue sticks (holds components securely in place and provides waterproofing abilities)
(Also optional) Flux (helps solder bond to materials more readily and easily)
Step 2: Preparing the Battery
To make your life easy, prep the battery first. This can be done by simply scratching the terminals lightly with a pair of scissors, a knife, sandpaper, etc. Anything coarse you have on hand will work just fine. Now add a little flux to the scratched terminal (again, it's optional but highly recommended. batteries are a real pain to solder without flux), and add just a little bit of solder to it. This preliminary solder button will let you make the final joints much more quickly, leaving less time in which you could burn your LED or blow up your battery. Neither of those outcomes are very good.
Step 3: Prepping and Fitting the LED
Now that you have your battery prepped, you need something to solder to it. This is where your LED comes in. Find the positive lead (the longer one) and bend it so that there is a flat spot parallel to the base of the LED (see first pic). Now dry fit it onto your battery to see if it goes where you want it to. Right now's your last chance to change anything before you solder.
Step 4: Soldering the LED, Switch, and Resistor
Ready to solder? Carefully hold the battery (or better yet, make some sort of stand to hold it for you so there's no possibility of slipping and giving yourself a major burn.) and lightly touch the soldering iron to the LED lead. Make sure you don't linger too long or you might burn the LED, making all your hard work go to waste. Same goes for the switch and the resistor. Just be careful and you'll do fine :)
Step 5: Waterproofing!
Now for the best part! This is optional of course, but it really helps secure everything down and makes the flashlight look awesome! (IMHO)
Basically all you have to do is just add glue gun over the whole entire thing. It won't hurt any of the components, and this is your chance to get really creative! Again, be mindful of where your fingers are- this stuff burns really badly. It gets on your fingers and doesn't come off until you've got a great big blister, so please be careful. It really hurts.
So there you have it! We hope you have as much fun making it as we did! :D
Finalist in the
Flashlight Contest

![Tim's Mechanical Spider Leg [LU9685-20CU]](https://content.instructables.com/FFB/5R4I/LVKZ6G6R/FFB5R4ILVKZ6G6R.png?auto=webp&crop=1.2%3A1&frame=1&width=306)


