

Introduction: 3D Printed Honeycomb Led Lamp ( Arduino Nano - IR Proximity Sensor- 12v Led Strip )


3D printed Honeycomb led lamp Operated by IR proximity sensor with Arduino nano with 12v led
Step 1: 3D Printed Honeycomb Led Lamp ( Arduino Nano - IR Proximity Sensor- 12v Led Strip )


Using Fusion 360 i had designed and modeling the Honeycomb led lamp, it contain 5 parts each part can print individual
Step 2: Circuit Chmatic
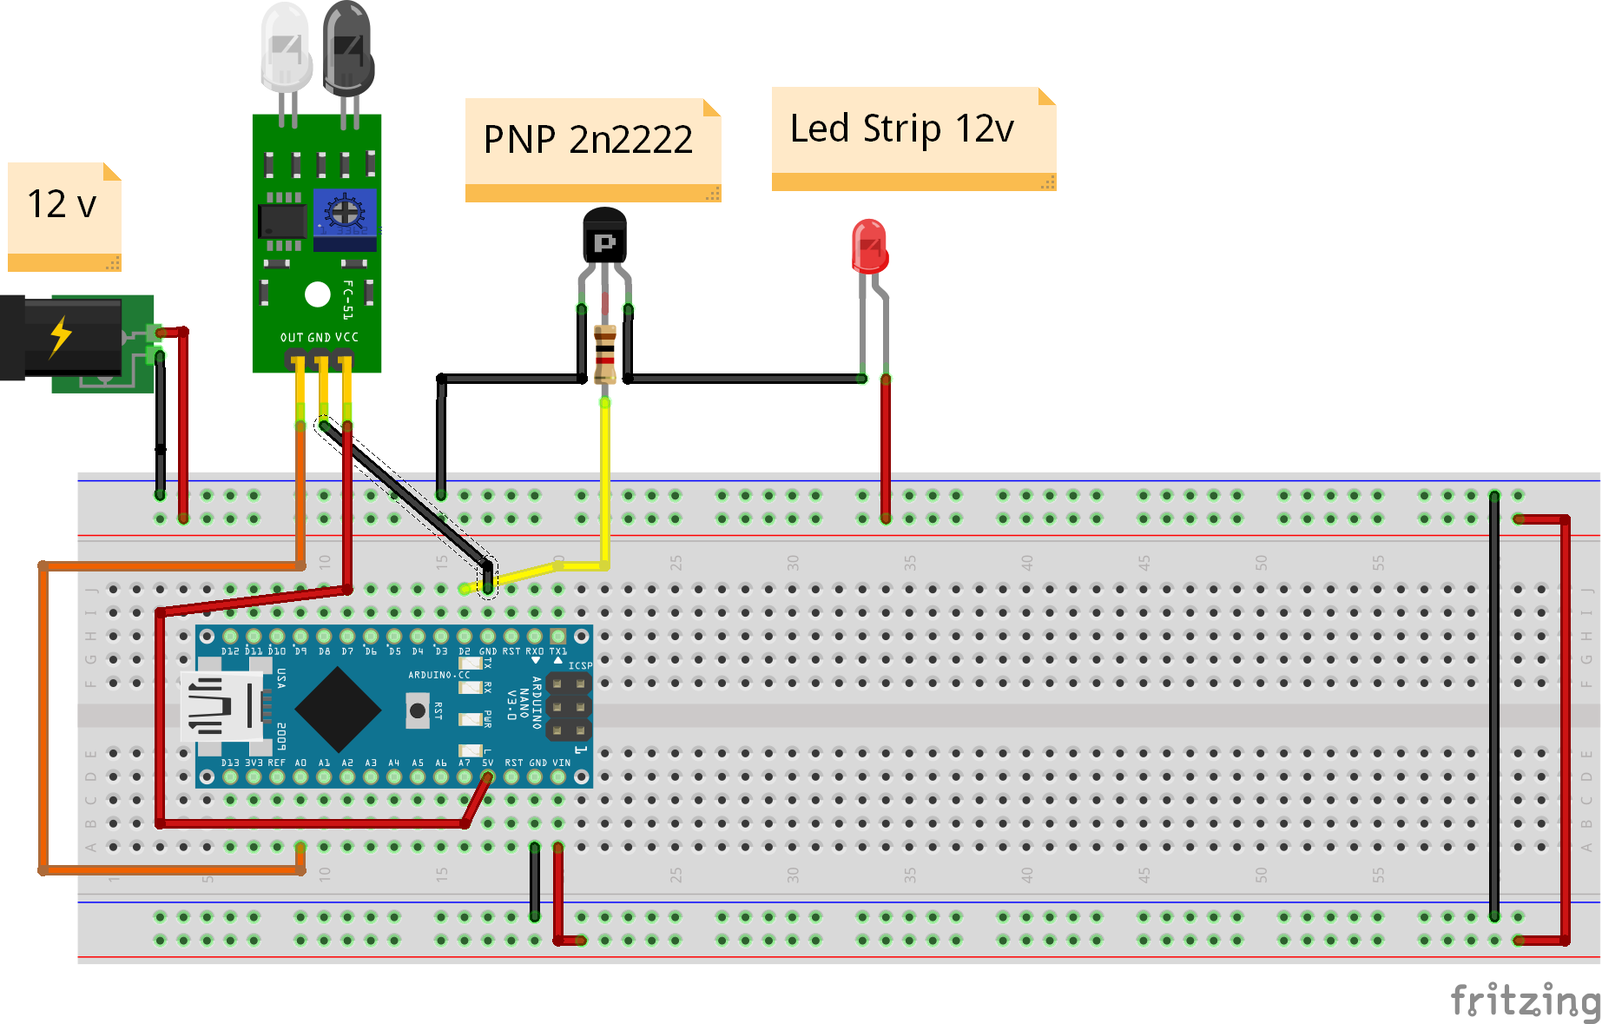
Component :
- Arduino Nano
- LED Strip 12v
- IR Proximity sensor
- Transistor PNP 2n2222
- 1K Resistor
- Power Source ( 12v )
Step 3: Connections

- Connect IR Proximity sensor pin ( OUT ) to Arduino Nano pin ( A0 ) & VCC pin to 5v Arduino Nano pin and GND to Arduino Nano GND,
- Connect Transistor Base to 1K Resistor and Other side of resistor to Arduino Nano pin D2 & Transistor Emitter to 12v GND & Transistor Collector to LED Strip ( GND ) .
Connect LED Strip ( VCC ) to 12v ( VCC ) .
Step 4: Coding

int ir=A0;
int led=2; // Transistor PNP 2n2222
int val=0; int ledon=0; int pushed=0;
void setup() { Serial.begin(9600); pinMode(ir, INPUT_PULLUP); pinMode(led, OUTPUT); }
void loop() { val=digitalRead(ir); if(val==HIGH && ledon==LOW) { pushed=1-pushed; delay(100); }
ledon=val; if(pushed==HIGH) { Serial.println("led on"); digitalWrite(led, LOW); } else { Serial.println("led off"); digitalWrite(led, HIGH); } }
Attachments

Step 5: Print All the Parts


All Parts here :
https://cults3d.com/en/3d-model/home/honeycomb-led...
....
Using Cura i had slice all the parts ,
I hade to use small support for the base model
Layer Height : 0.2 mm
Infill : 10%
Infill Pattern : Gyroid
Support for one model ( Base )
Speed : 50mm/s

![Tim's Mechanical Spider Leg [LU9685-20CU]](https://content.instructables.com/FFB/5R4I/LVKZ6G6R/FFB5R4ILVKZ6G6R.png?auto=webp&crop=1.2%3A1&frame=1&width=306)


