

Introduction: A Beginner's Guide to Stirling Engines


Last year I was an IB student in the MYP program. At the end of the year we had to do a research project on something that interests us. Doing some research on the internet, I came across something called a stirling engine.
"So, what the heck is a stirling engine?" You may ask. Well when I first heard of it I thought of a chrome plated V8 internal combustion engine. However, according to a quick look at Wikipedia, "A Stirling engine is a closed-cycle regenerative heat engine with a permanently gaseous working fluid". Stirling engines happen to be one of the more efficient engines invented and can even act as a heat pump if manually turned. With the world taking a new focus on "green" energy, the stirling engine is making a comeback, being used in generators on small scales in remote areas and in larger scales, contributing to power grids.
The next few steps will get more into the history and applications of stirling engines.
If history and long boring back stories aren't your thing skip over to the build at Step 4.
(https://www.instructables.com/id/A-Beginners-Guide-to-Sterling-Engines/step4/Actually-making-the-Stirling-Engine-Materials/) I don't know how to create one of those fancy links so here an old fashioned link
This is my first instrucable so please feel free to leave some constructive criticism and if you really like it then make sure to vote!
Step 1: The History

The stirling engine was invented by a fellow by the name of Robert Stirling. Stirling was born on October 25 1790. He pursued a career as a clergyman and engineer.
He patented the Stirling engine in 1816 after several previous attempts at creating an air engine. His patent focused on some parts that kept some residual energy within the system allowing it to require less energy and therefore less fuel. He had also created the engine to compete directly with steam engines which, at the time were relatively dangerous having a tendency to explode when improperly used. Although it had great design and much thought had been put into the engine, the engines Stirling and his brother built tended to be unreliable because of some of the material limitations and the steam engines started becoming more reliable and safer. Stirling stopped pursuing the idea without knowing how it would be used today.
Step 2: Stirling Engine Applications


Stirling engines are now starting to gain popularity for it's high fuel efficiency and being relatively quiet while running. They are used in some generators as they can be powered by any heat source like solar or gas/wood flame. There are larger scale solar farms in Arizona that produce power using stirling engines.
In the 90's, NASA was experimenting with putting a stirling engine into a truck. They could burn any fuel that they wanted including diesel and even jet fuel. They eventually scrapped the idea for research into its uses as a stationary generator.
The Swedish navy has built a line of stirling powered submarines, or air independent propulsion submarines. They are the newest diesel electric subs that can stay underwater for several times longer than other diesel electric vessels, something only nuclear subs could do.
Step 3: How It Works
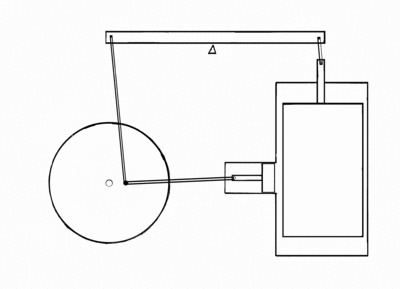
There are a few basic parts to the kind of stirling engine we are going to build. There is the flywheel, power piston and displacer. The power piston is what captures the expansion and contraction of the working fluid. The displacer moves air inside the engine to heat it up or cool it off. The flywheel keeps momentum and turns the engine to the next stage while the power piston isn't pushing or on the pull stroke when it is weaker.
Stirling Engines heat and cool a working fluid (air) to cause it to expand and contract to push and pull on the power piston which turns the fly wheel and causes the displacer to change positions. There are 4 steps in this process:
1. The displacer is lifted and the air is pushed to the heated side, causing the air to heat up
2. The heated air expands and pushes the piston out, turning the wheel
3. The displacer is lowered and moves the air to the cooler side
4. The cooled air contracts pulling the piston in, turning the wheel causing the cycle to repeat.
Step 4: Actually Making the Stirling Engine: Materials


Materials:
-2 Liter plastic bottle
-23 oz Aluminum can
-Galvanized steel wire - about 16 gauge
-1/16 inch balsa wood
-Disposable chopsticks or 1/4 dowel
-3/4 inch ID copper pipe
-JB weld
-2 Part Epoxy (doesn't mater what kind)
-Super Glue
-White glue
-Clear tape
-Cap from a glue stick
-1/16 inch ID brass tube
-1/16inch OD brass tube
-Old CD or DVD
-Some card board
-Oil or a light grease
Tools
-Scissors
-Sharp Knife
-Wire Cutters
-Square
-Ruler
-Pliers
-steel wool or high grit sand paper
-saw or pipe cutter
Optional you don't need this but it really speeds up the process
-Rotary tool w/ steel brush
Step 5: Prepping Parts


I put the material prep in 1 step because otherwise there would be hundreds of steps. If you get confused refer to the pictures and it might make more sense.
1. Cut a 1 1/2 inch tall strip of the 2 liter bottle as shown in the pictures
2. Cut off the top and bottom of the 23 oz can and straighten the cut with a scissors. then cut through the can so that you get a single sheet of aluminum.
3. Using steel wool or sand paper, take off all the paint and clear coat on the aluminum sheet.
4. Trace 2 circles on the aluminum sheet using the rest of the plastic bottle as a stencil and cut the circles out, just outside the lines you marked.
5. Cut out 2, 1x1 inch squares from the balsa wood
6. Super glue 1 of the wood squares to the center of the CD/DVD.
7. Mark the center of the CD/DVD and drill a 1/16 inch hole
8. Glue the second square to the other side of the CD/DVD, mark the center again and drill a 1/16 inch hole (This is the fly wheel)
9. Measure a 2 inch section of pipe and cut it with a hack saw, rotary tool or pipe cutter.
10. Using steel wool, sand paper or a rotary tool, polish the pipe, especially on the inside.
11. Mark 2 circles on the cardboard using the plastic bottle as a stencil and cut these out about 1/16 of an inch inside the line then glue them together with white glue, and mark the center of the circle.
12. Take the cap of an old glue stick and wrap it nicely with the clear tape until it has a mostly air tight fit in the copper pipe. Make sure that it has very little friction, with some oil, gravity should be able to move it all 2 inches of the pipe.
13. Cut a 3 inch piece of steel wire and make a small loop in the middle of the wire big enough to let another piece of wire pass through. make sure the wire legs are both pointing in the same direction. Bend the end of the wires inward, this will help the wire anchor into the epoxy later.
14. mix a small batch of 2 part epoxy and fill the glue stick cap. take the wire loop and suspend it with the legs inside the epoxy and the loop about 1/4 inch above the top. use a toothpick and spacers to hold it inlace till the epoxy cures. (This is the power piston)
15. (Sorry no pictures for this part) Use a knife to cut a 1/4 inch piece of the 1/16 inch ID brass pipe and a 4 inch piece of the 1/16 inch OD brass pipe.
Step 6: The Main Chamber


Now that we have all our pieces, we can put it together.
Mix up some of that JB Weld and glue one of the aluminum plates to the bottom of the strip of plastic bottle.
While that is curing, take the other aluminum sheet and find the center and drill a hole for the 1/16 ID beats pipe. Use more of the JB Weld to glue it in the hole. Make sure that it is mostly flush with the bottom surface of the aluminum.
Take the cardboard circle and drill a 1/16 inch hole (only through 1 layer of cardboard) in the center and use more JB weld to glue the 1/16 inch OD brass pipe in to the hole. make sure to get some of the glue inside the pipe to seal it up and make sure that as the glue cures, the pipe says perpendicular to the cardboard. Hence forth this part will be called the displacer.
The next day after everything has cured, take the aluminum sheet with the pipe glued to it and mark a spot between the center and the edge of the circle and cut out a 3/4 inch hole. Put the pipe glued to the displacer from the bottom of the aluminum sheet, through the 1/16 inch ID pipe and out the top. once it is through, bend the top 1/4 inch 90˚
Mix up more of the gray stuff and glue the bottom of the aluminum sheet to the other side of the plastic bottle.
Take the 2 inch section of 3/4 inch copper pipe and glue it over the 3/4 inch hole in the aluminum sheet.
After this all cures, touch up the seal with a little more JB Weld, we want this to be air tight.
Take your chopsticks or dowel and cut 4 pieces, 2 the diameter of the aluminum and 2 the radius of the aluminum. You can use super glue, JB Weld or hot glue, for this part. Glue the diameter lengths across the aluminum so that the 1/16 inch ID pipe is in-between the 2 pieces and they are perpendicular to the copper pipe. Then glue the radius lengths perpendicular to the first pieces of wood so that they sandwich the copper pipe, on to the aluminum. These pieces of wood are there to support the aluminum because it is a little too thin to support all the weight and handle the stresses the engine will put on it.
Take the 2 popsicle sticks and cut 1 end flat and on the other end, drill a 1/16 inch hole a 1/4 inch from the top.
then take more JB Weld and glue it to the sides of the chamber so that they are on opposite sides and line up with the 3/4 inch pipe and the 1/16 inch pipes. You may have to trim off some of the aluminum to allow the popsicle stick to sit flush to the plastic bottle.
Let this cure before moving on
Step 7: The Finicky Bits


Here comes the tricky part
Cut a 8 inch piece of wire and straighten it out as much as you can then put it through the holes in the popsicle sticks.
Then stick the glue cap piston into the 3/4 inch copper pipe half way down. Measure the distance between the loop on the piston to the suspended wire. Cut a wire about an inch longer and create one loop on one side and loop the other side around the loop on the piston.
Cut another piece of wire about 4 inches in length and put a loop in both ends and bend a "Z" shape into the wire to allow for some adjustments. Hook one loop onto the 90˚ bend on the displacer rod and lift the displacer about halfway up. Reform the Z bend so that the top loop is at the same height as the suspended wire.
On the wire, mark out the point where the center of the the piston is, then mark 1/8 inch on both sides. take out the wire from the popsicle sticks and bend the wire 90˚ on the 2 1/8 inch lines to form a kind of J shape. then measure 1/4 inch up from the bend and bend it again 90˚ so you get a basic cam.
Put the wire back into the popsicle sticks and line up the cam to the copper pipe. Then mark the point just over the displacer rod on the wire and again 1/8 inch on either side. Take the wire out again and bend the 1/8 inch marks 90˚, this time make the bend perpendicular to the first cam.Then measure 1/2 inch and bend it into a second cam (This is really confusing so look at the pictures and it will make more sense).
Before you put the cam shaft back into the holder, slide the connectors on to their respective cams and tighten up the loops so that they can't come out, then put the shaft back into the holes on the popsicle sticks.
Finally you can attach the flywheel to the end of the shaft by sliding the shaft through the holes in the balsa wood, bending the wire 90˚ and use super glue to glue it to the flywheel.
You can add something to the other side of the wire that is sticking out of the popsicle stick or just bend it so it doesn't slide out.
Thats it. That is a stirling engine!
To power these things, you can apply hot boiling water to the bottom side, let it heat up for a moment and give the flywheel a spin. These engines are directional depending on how you bend the cam, so if you find it hard to turn or it is fighting you then try spinning it the other way. You can also use a small flame like a candle on the bottom. also since it works because of the temperature gradient, you could cool the top side to get even better performance out of it.
Step 8: Troubleshooting
Stirling engines on small scales that hobbyists build them, tend to be fairly delicate in a balance between the the amount of power it produces, the weight and balance of the fly wheel and the friction throughout the entire system so there will undoubtedly be problems with your new engine, especially if this is the first one you built.
Since the engine runs on the rapid heating and cooling of a working fluid, it is important that there is a high temperature gradient. People who live in colder areas may see better performance out of one of these engines where as people in warmer regions like me may struggle to keep the engine running.
Another problem may be the friction. Check to make sure that the piston is relatively air tight but can still mover freely. a general rule of thumb is that gravity should be able to pull it down with relative ease. Make sure to oil/grease all the joints and that it runs smoothly when you turn the flywheel.
Make sure that no air can escape the engine. It is impossible to completely seal off the piston or the displacer shaft (otherwise there would be too much friction) but make sure that if you were to submerge it under water, there are no leaks. If there are mix up some jb weld and seal it up.
Those are the most common problems I have encountered. If you continue to have problems, then there is a great community of experienced stirling engine builders on the internet that you can ask.
Enjoy your new Stirling Engine!

Runner Up in the
Rainy Day Challenge

Participated in the
Full Spectrum Laser Contest 2016


