

Introduction: A Dragon Dog (like a Chinese Dragon, But a Dog!)


By Zoe Martinez
Hello and welcome to our Dragon Dog Body Instructables. These instructions do not include how the head shall be built, but a link to a seperate instructables will be mentioned.
The purpose of our float is to advertise and get the word out about The Rescued Dog, a non profit, along with no-kill shelters, due to the many healthy and adoptables dogs being euthanized everyday in regular shelters for something as small as space issues.
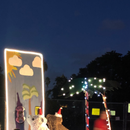
The float was built to be carried down the seaside streets in the OB parade, which the theme for this year was “It’s a wonderful life in OB.”
Before we begin, here’s an introduction for the group that worked on this design. Evan, Melanhi, Maya, and Zoe each played their part to construct this build, and are students of a project based school called High Tech Media Arts.
First, the materials needed will be a canvas sheet and foam, both 2 ft in height and 15 ft in length. Brown and white paint or spray paint will be needed. 5 wooden pipes will be needed, as well as a lightweight wooden brick than is long enough to cut out 5 2in. by 4in. wooden rectangles. The tools you will need is a drill, a saw, a paint roller, a detail brush, and a hot glue gun with at least 20 hot glue sticks to be safe.
A way to make the process quicker, easier, and help you save money as well as time, use a thick brown sheet instead of paint, which can take awhile depending on your resources.
Step 1: Step 1: the Canvas

To begin, lay out the canvas sheet, and use a small brush to paint in white The Rescued Dog on both sides. As you can see, we chose to write in different fonts. Start painting, but avoid the lettering, with brown paint while using a paint roller, rather than a large brush to make the process easier. Once the words have dried, use the detail brush to outline and fill in empty spaces. Something you may want to look out for is getting the right shade of paint. We had used brushes in the beginning, which not only wasted time, but wasted paint. It took a while to get the right shade, using up one bottle after another, making one big hodgepodge. Using a paint roller will help cover more ground with smaller amounts of the right shade. Next, cut foam to the shape of the canvas sheet and attach them together with hot glue.
Step 2: Step 2: the Poles

To move onto the next step, you will need to ready the poles and wooden rectangles. Cut them into the right shape if you haven’t already, and return them to the canvas. Find the center of the foam, begin at the bottom, using the rectangle and an exacto knife to trace a hole that the rectangle can fit in. Move the rectangle up three feet, and trace once again. Repeat until you have five holes in the canvas. Do try to make sure that the holes cut are in the center or it may look uneven, which can be avoided if you have a long flat object to press against, similarly to drawing a line with a ruler.
Then, drill a single hole in the center of each wooden rectangle on the short side, one that the poles can fit in perfectly. To make sure they stay, drill a nail through the rectangle on the tall side so that it is stuck to the pole. Hot glue the short side that the poles are not attached to onto the holes in the canvas. Another thing you may want to know is that the wood may snap in half while drilling in the screws. Try not to put too much pressure into it. These poles will be held onto so that five people may hold up the float.
That’s it! To move onto the head, there are separate instructions here.


