

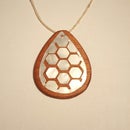
Introduction: Acid Blackened Custom Hunting Knife


In this Instructable I will show how to make a hidden tang acid blackened knife out of an old machete. I want to preface this all by saying that this is the first knife I had ever made, and love the outcome. I had always been very interested in knife making and have learned a plethora of information over the past few years which I was finally able to use in building this. I use the stock removal method which is taking metal stock and removing material through sanding, grinding, and filing until you reach the shape, thickness, and bevel you want. I designed this myself in hopes of creating an elegant, polished looking workhorse of a knife capable of still completing precise tasks, and after the completion of the knife, there isn't a thing I would change to improve it.
Step 1: Cutting the Blade and Sourcing Steel


I cut the blade out of an old, rusted machete, because it was free for me, and it is a high quality steel for knife making. I used my Dremel with reinforced cutting disk to cut out the knife blank, and that worked much better than I thought. I made sure to keep the blade cool as I cut because it the blade heated it to much it would loose it's temper which would cause it to not hold a sharpened edge very long. This isn't a huge deal if you aren't using it to go camping every weekend or things like that, but it still hinders the performance of your knife. I was able to get 3 knives out of the machete which I was very happy about.
If you are looking for other cheap alternatives to buying proper tool steel, you can also use old circular saw blades, you can cut material out of old handsaws, you can restore and modify knives from flea markets and garage sales, or use any high carbon steel which can be heat treated. If you are looking for a more professional approach, I would suggest using O1 tool steel, which is what many professional knife kakers use. Surprisingly, you can order O1 tool steel through Amazon, and a 1/8x2x18 inch pieces of barstock would run you around $30. You should absolutely be able to make about 3 knifes with this size piece of steel, especially if you are just beggining knife making and starting with smaller knives.
Step 2: Refining and Cleaning the Blade


After I had cut out my hunting knife blade I took it over to a bench grinder and cleaned up the rough edges the Dremel had made and finalized the profile of the knife. I then used a wire wheel to remove most of the surface rust, but there was still some pitting in the blade from rust eating away at the steel for years while it sat outside. I hand sanded most of the pitting out, however I left a little because I wanted to experiment with acid blackening and how pitting would effect the overall outcome of that.
Step 3: Beveling


I hand filed the bevels on both sides of the knife, and used and jig which is able to maintain a constant beveling angle, and allowed me to make crisp, precise angles and plunge lines. I was able to purchase all of the materials needed to make the jig for less than $10 at Home Depot. Instead of trying to explain how I made it, I will include a link to a YouTube video which shows how to make the jig in great detail (a picture really is worth 1000 words in this case).
It took me around half an hour to bevel each side, and I was incredibly happy with the result. This type of jig, which there are literally hundreds of variations, is the most effective way to hand bevel a knife with phenomenal results.
Step 4: Vinegar Blackening Solution


I hadn't done any research on how to blacken knifes using this technique, so it was very interesting experimenting with the different knife blades I had and seeing how quickly the results could change on an hourly basis. I heard about this technique from Mike Craughwell, the guy who had the TV show big giant swords, but other than that I did no research and was clueless as to how it would come out. My tips to all of you would be to experiment with it until you find the effect you like, not to keep in it to long otherwise all of the vinegar reacts with the knife until it all dries out and crystallizes (this was very unexpected), and lastly not to keep any other metal items around it because it causes them to rust incredibly fast (again, I did no research so that was an interesting discovery). I also found it is necessary to oil the knife shortly after with a professional grade oil like ballistol or simply with WD40.
Step 5: Making the Handle Scales + Shaping and Sanding


I wanted the knife to be a hidden tang knife, meaning that the metal handle part of the blade is entirely encased in the handle material, so the only metal shown on the knife is the blade. To achieve the look of a hidden tang I had to carve out a perfectly shaped area for the tang to sit inside of the handle.
Since this knife was only my first knife, and I was still learning and experimenting, I used wood from a pine 2 by 4, and cut that to size with a jigsaw. I really wanted a nice finish on the handle, so I spent hours and hours shaping the knife and sanding it all the way to a 240 grit until I couldn't see any noticeable sanding marks, and I additionally stained it with a medium color Varathane Early American. While shaping the knife I wanted a flare out palm swell for comfort but I also wanted the contours of the blade to match with the contours of the handle, which I think I achieved flawlessly. The handle feels so incredibly great in the hand and the palm swell makes it feel incredibly ergonomic. I also found it feels great in the hand regardless of whether I hold it normally, or the "opposite" way, with the palm swell by my index finger instead of my pinky. This sounds irrelevant, but I think it is quite important because it means I could use it comfortably to carve a stick into a point, or alternatively, to switch my grip and stab into something, and be able to support the knife by placing my thumb on the end of the palm swell. The ability to use any grip comfortably is crucial to the design because I can use the knife for delicate, controlled work such as simple carving or cutting leather and things of that nature as well as be able to use the knife for more crude work with an opposite grip to stab into and open sacks of animal feed and grain, or skin an animal. I purposefully designed the knife to be as practical as possible, with as many different uses as I could manage. Again, it seems arbitrary but the design of this knife provides it with the capability if being a bit of a workhorse as well as a controlled and more elegant and precise knife.
Step 6: Final Thoughts


Overall I couldn't be happier with the outcome of my very first knife. Both the aesthetics and the functionality of the knife is unparalleled by any off the shelf knives. This is mainly due to the custom utilitarian yet visually pleasing design. It is created with all reclaimed and scrap materials so it is very cost efficient and is a great start for anyone looking to get into knife making.
Thank you!
Brandon (16)

Participated in the
Metal Contest 2016

Participated in the
Wood Contest 2016


