

Introduction: Amaranth Bud and Lavender Pens


I started these pens about a 2 years ago as a gift for my wife. I had made her this sea shell pen but it weighs a ton and is unwieldy. So, I bought these dried flowers thinking that they would be neat and then life got in the way (really what happened is I tried to make a 16" bowl out of a 65 lb chunk of hickory, it broke, I got mad, and sold my Shopsmith to buy this little lathe).
Anyway, this is a pretty easy build. Let's get started!
Supplies
- lavender (I used the ones with stems)
- amaranth
- resin for casting
- coloring (optional)
- toilet paper tubes (or paper towel)
- wax paper
- aluminum foil
- sand paper (220, 400, 800, 2000)
- CA glue (super glue)
- pressure pot
- pen kits
- blue ink (wife needed it for work, the other kits come with black)
- barrel trimmer - 7mm
- 7mm drill bit
- pen mandrel (comes with slimline bushings)
- turning tools
- drill press
- lathe
Step 1: Create Your Blanks


There are much better ways to create blanks, especially for the lavender blanks. You can even buy silicone molds designed specifically for this. That said, these work fine. If you need a smaller blank, cut the tube lengthwise, wrap it around a 1" dowel rod, and then tape it together. Your blank should be 5.25" long.
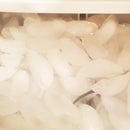
For the lavender blank, pull the lavender through the tube. Cut off the excess. The wrap one end of the tube in foil making sure that it extends all the way to the top of the tube. Be careful not to puncture the foil or else you will have a mess of resin. For the aramanth pen, just wrap one end of the tube. Then, add your buds to the tube.
Mix your epoxy by combining equal parts of each compound in a disposable cup. I ended up using about 2.5 ounces of each part to make two pen blanks. If you wish to add color, do it by adding a very small amount of dye to the mixture. A little dye goes a long way and if you add too much, your resin won't cure well.
Slowly pour your resin into your molds. Let the bubbles come to the surface and keep adding resin until the molds are full.
I used a vacuum chamber to remove the air. Negative 8psi seems to be the maximum that you want to go with because after that, the epoxy forms thousands of little bubbles. If you use the vacuum, bring it to -5 to -8 psi, let it sit for a few seconds (10-15) then release the pressure. This will help lessen the amount of tiny bubbles that form in the resin. Let the resin cure in ambient pressure.
For this project, I would not recommend a vacuum. I would instead use a pressure pot. I think that crushing the little bubbles in the flowers is probably the better way to go. If you do this, let the resin cure under pressure.
Step 2: Turn Your Blanks


Most of this step is just preparing to turn the blank. Start by cutting off any large bits of resin that may have formed in the previous process. Then, cut your blanks in half.
The next few parts use a drill press. You'll want to drill a 7mm hole down the center of your blanks. Then, sand your tubes to rough them up a bit. Apply glue liberally and insert the tubes into your blanks. Once they have dried, use your barrel trimmer to trim away any excess material and true up the ends of your blanks. Trim down to the point where you just barely touch the metal barrel.
Slide your blanks onto your mandrel. Put bushings on both sides of the blanks. Bushings come in many different sizes so be sure that you are using the proper ones for your pen. Turn your pen down so that the ends are the same size as the bushings.
At this point, you should be getting close to the finishing steps. Before finishing, use a thick CA glue to fill in any voids that may be visible. If possible, let the glue dry without removing the blanks from the mandrel. That will lessen the chance that you drop it in a pile of dust (like I did). Once dry, carefully turn the pens to remove any of the bumps from the glue.
To finish, use sand paper, starting with 220-grit, to sand out any tool marks. Proceed to 400, 800, and finally end with 2000-grit. Then, apply CA glue to a piece of paper towel and wipe it over the blanks while they spin. Once it has dried, return to the 2000-grit sand paper to smooth out any imperfections. Finish the process by wet sanding with the 2000-grit paper.
Step 3: Assemble the Pen Mechanism


Important note: in the exploded photo, the turning mechanism is backwards. The brass end goes the other way as shown in all the other photos.
I learned an important lesson this time around. Always check your pen mechanisms to ensure that work before you insert them into your barrels. I found one that didn't work after I had assembled the pen and now I get to learn how to remove it.
They make a pen press tool for this process but I've always just used my wood vice without any problems. Ilike to work my way from the tip to the cap but I don't know that it matters.
- press the tip into the end of the pen that you want to be the section that you write with.
- press the mechanism in the other end of that barrel. Only the brass section should be in the barrel, everything else should stick out of the back. If you've pressed it so far in that you can't see the little indented ring, you've gone way too far. You can always go deeper if you need to but you can't make it more shallow.
- screw in your ink.
- Choose the side of the other barrel that you want to be the cap. Press the cap and clip together into the pen. I use the clip to hide any unsightly bubbles that formed that I couldn't get rid of.
- Assemble the two sides putting the little metal ring between them. You can do this by hand so don't use a vice.
Congratulations, you're done!

Participated in the
Finish It Already Speed Challenge


