

Introduction: Balancing Man Kinetic Sculpture


I've liked metal sculpture from an early age and this could be the reason. Some time around 1980, give or take a few years, my Dad made one of these for me. I still have it on my desk at work (see pic below.) I'd often thought of making one for my son, but hadn't got around to it. Thanks to Instructables Kinetic Sculpture Contest, I've finally been motivated enough to do it.
This sculpture is made from stainless steel TIG rod with brass bar for the weights. You could use any materials for this and it can be scaled up or down and still work. It requires no motors, batteries, electronics, or magnets. Also, this could be a woman, boy, girl, polar bear, or whatever form you prefer.
This Instructable is entered in the Kinetic Sculpture Contest, Dremel Contest and Epilog Contest, so please rate it and vote if you like it. If you make one of your own, please post pictures in the comments.
Step 1: Materials and Equipment


Here's what I used:
3/32" stainless steel TIG rod (2 18" pieces should do)
3/4" brass round bar (I used 2 pieces, app. 1 1/8" long)
Bandsaw
TIG welder
Lathe
Wire cutters
Dremel
The body of the man and the bar is formed from the TIG rod. Any stiff rod or wire could be used for this, even a wire coat hanger.
The bandsaw was used for cutting the brass bar. A hacksaw would suffice.
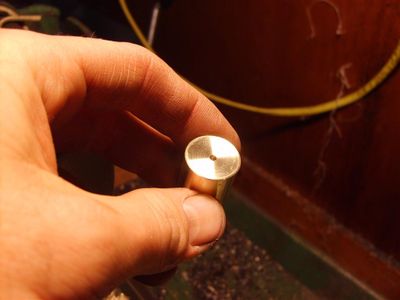
The lathe was used to face the ends of the brass bar and drill them. Depending on what materials you're using and how you're attaching them, this step could be skipped.
The Dremel was used for everything else - deburring the ends of the rods, polishing the welds, cleaning up the brass, etc.
The TIG welder was used to weld all the parts together. This could be MIG welded, brazed, soldered, or epoxied.
With the exception of the welding, all of these tools could be replaced with one Dremel. However, since I have all of the above tools, I used them instead. Also, I've been wanting to take some cool lathe pictures and this was a good excuse.
Step 2: Weights


For the barbell weights I used 3/4" diameter brass bar. I would have preferred stainless, but I didn't have any. I wanted something that wouldn't rust, so carbon steel was out. Since I can't weld stainless to brass, I drilled the brass bar and pressed the rod into it. I peened the end of the rod and bar to keep it from sliding off. You'll want the pieces to be fairly close in weight to make it easier to balance.
I made the mistake of pressing the weights on, then trying to weld them onto the man. Problem with that was once the rod heated up, the weights made it sag. On the second attempt, I welded the rod (18" length of 3/32" rod) onto the man, then added the weights. The bar should be centered as much as possible. If it's not perfectly centered, you can make up for it when it's bent in the final step.
Step 3: Body Building


The body is made from 3 pieces of rod. 3/32" stainless is pretty stiff stuff, so you'll need a good pair of pliers. If you try to cut it to length first, it's much harder to bend it exactly in half. I found it was easier to start with a full piece of rod, bend it to shape, then time the ends to the desired size.
For the torso and head, I started with making the round bend for the head. I wasn't able to make a nice perfectly round circle, so I ended up with the quasi-triangular shape you see here. 1/16" rod is much easier to bend, but is more difficult to weld. In my initial notes, I figured the head and torso would use about 1-3/4" of material.
The arms are each about 1". I made the bend using the jaws of the pliers to form the bend radius. After making the first bend, I cut the other side to match.
The legs are tricky. It's probably easier to look at the pictures and make your own shape. The feet are about 1/4" long. Each leg is about 1-1/2" long. One leg will bend back at the "knee." The other leg has a slight bend to look natural. The final shape will be tweaked after it's welded. You could make this with one straight leg, but what's the fun in that?
Step 4: Fusion

Here's the man after welding. Notice that the head looks different than in the last step's pictures. That's because the high amperage of the welder induced a magnetic field that reshaped the head...naw I'm just kiddin'. Actually, while welding the first one, I used a little too much amperage when trying to weld the arms on and burned through it. I had to make another one, but didn't take before pictures. For the final welds, I had my welder set for about 10 amps with a 1/16" electrode. Your mileage may vary. If you're brazing or soldering or using epoxy, this shouldn't be a problem.
As with most work, the setup is the most important part. Practice on some scrap pieces to get your technique down before ruining your carefully bent pieces.
Step 5: Balancing Act


After everything is welded on, the barbell needs a bend. Without a bend, it won't balance. You may need to change the amount of bend on the legs and feet as well. If you made the long bend on the knee, the man can balance on that leg as well. That makes it look like it's really defying gravity.
The point of contact of the foot is very small, so there is very little friction between it and whatever it's standing on. A slight bump or breeze will set it in motion and will stay in motion for some time.
Some people strive to achieve balance through meditation, religion, exercise or philosophy. This man uses physics. When the man leans forward, the barbell is rotated backwards. The weights push forward to rotate the man back up. When these two forces equal out, the man is perfectly balanced. When viewed from the side, the weights are just about under the supporting foot.
Note that the weights must hang below the man's foot for this to work. Therefore, he has to be perched on something, not on a flat surface like a table or desk.
Finalist in the
Kinetic Sculpture Design Contest
Participated in the
What Can You Do with a Dremel Tool?
Participated in the
Epilog Challenge


