

Introduction: Better Book Safe


I wanted a book safe and didn't like the versions that I saw that looked like they were hacked out with a rusty hatchet. So I came up with my own way of making one.
Materials needed
Thick book - find a book that will look like it belongs in the bookshelf. Don't put "The Works of Shakespear" in a shelf with electronics books just because it was the right size. It looks out of place. Better to use that book "10,000 Electronic Diagrams" that you never use anymore. You can get really nice thick well built books for free or very cheaply at garage sales, library sales, old book shops or just around the house. Just ask for permission if it's not your book.
A sharp utility knife or single edge razor blade or exactco knife
Band saw (recommended) or coping saw (useable)
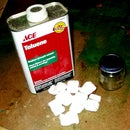
6 min. epoxy or thin super glue - I like 6 min. epoxy because it is thick and will stay where you put it and I'm sensitive to the fumes of super glue.
Strong cloth or paper to reinforce the binding if necessary.
Step 1: Removing the Cover

Lets get started!
The better book will have a binding that looks like this. The cover of the spine is separate from the actual spine of the book and you can just cut down the hinge line and separate the cover from the pages.
If the cover is not separate from the spine carefully peel it away after you have cut at the hinge line.
Step 2: Half Way There

This is what you are trying to achieve. The book cover is separated on one side from the book pages. But the spine of the pages is still intact and the pages are still held together.
Step 3: Cover Removed

Turn the book over and cut down the back hinge so that you can separate the book completely from the cover. You should end up with something like this.
Step 4: Starting to Cut the Well

Use a band saw to cut out your "safe" area in the book starting from the spine and cutting in a straight line. I suggest you draw a guide line to show where you want to cut. I wanted a square safe but you could round the corners to make it easier to cut.
If you want square corners you have to cut the straight lines in the top and bottom first then cut a diagonal line so that you can get to the vertical line at the front.
When you are cutting make sure that you put pressure on the top of the stack and push from the bottom of the stack. If you push from the top of the stack the pages will buckle and the cut won't be aligned. And you stand a good chance of cutting off a finger when the stack buckles.
You could do the cuts using a coping saw but it's going to take much longer. To cut with a coping saw you should clamp the pages between two sheets of plywood already cut to the shape you want so that the book holds its shape while you cut. I did not find this necessary using a band saw.
Step 5: Cut Finished

This is what you will end up with after you are finished cutting.
Of course you can and should recycle the cut out portion of the book.
Step 6: Putting It Back Together

Lay the book back in its cover front side up. Mix us a small amount of epoxy and paint the inside of the safe with the epoxy. Make sure to get some under the bottom sheet to glue the book to the back cover. You can use thin super glue just dribble it all over the cut surface of the book. This glueing will hold the pages together and help the book to keep its shape.
Step 7: Cover Back On

After the glue has hardened, apply more glue to the remaining back of the spine so that you can glue the cover back on. I was going to use the white material to reinforce the hinges but didn't feel it was necessary on this book. You can choose depending on what kind of book you use.
If you want a more finished appearance you can paint the interior or glue felt to the inside to cover up the glued edges.
Step 8: Finished
It's finished. You now have a book safe you can be proud to hide your "stash" in. No more embarrassing looks when your mom finds your stuff in a crappy looking book safe.


