

Introduction: Cardboard RC Airplane Full Guide


In this Instructable you will be able to learn how to build and fly an RC airplane made from cardboard. If you are new into model aircraft you're at the right place ! Enjoy this full guide for beginners and appreciate my video on my youtube channel (french language) !
Step 1: Video
Here is my video about this Instructables. It is in french but you can enjoy the tuto as well as my flights and crashes ^^
You can also subscribe to my channel, it deals with awesome making projects ;)
https://www.youtube.com/channel/UCWxRYbVCfHykwDQ3z...
I really hope you will enjoy this guide and that you will get into aircraft model making !
Step 2: Supplies


First you will need basic supplies such as :
Cutter
Hot glue
Pensil
Ruler
Wire
Straws
Tape
And obviously a large piece of CARDBOARD !!!
Then you will need to buy major elements that you will be able to use again for differents airplanes :
30€ : 3cell 11.1v Lipo Battery : https://amzn.to/34nOB3L
20€ : Charger :https://amzn.to/2yNUETz
60€ : Radio transmitter and receiver : https://amzn.to/3e4e47
And parts needed for every plane :
11€ : Motor+ESC+Propeller : https://amzn.to/2yEjGEz
6€ : Servo motors : https://amzn.to/2yN4R2J
Connectors relative to your country : https://amzn.to/34mDiZK and https://amzn.to/3e730pr
To sum up, you will need about 110€ to start in model aircraft and about 20€ for each new aircraft.
Regarding basic models sold in shops it is not expansive at all and I highly recommand you to watch FliteTest tutorials in order to build an easy to fly plane thanks to their blueprints.
Step 3: Wings


First of all, we will build the wings.
Find a large piece of cardboard and cut it in 2 rectangles for the two wings. They must be about 40cm long.
Then make 6 grooves with your cutter along the wing at a third of it and spaced of 1 cm. They will help us to fold the wings. I recommand you to watch my video in order to well understand what I mean.
Then try to fold the wings thanks to the grooves. Cut 4 strips of cardboard for each wing and glue them so as to build a internal structure for the wings. Finally glue them in the wings, fold and glue them so they stay rigide. They must be rounded at the front to allow the plane lift off.
Next we need to fix the two wings together. To do that, cut the top of the wings (where they will be glued) of 1mm so when we will fix them they will form a V. First glue the bottom of the wings, wait it dries, then glue the top of them while holding them to form a little V. Finally put tape around the junction to hold them firmly.
Step 4: Power Unit


Then we will build the power unit including the motor, the battery and the Electronic Speed Controler.
First cut a rectangle in a piece of carboard so that you can build a rectangular parallelepiped. The battery must be placed inside so cut your pattern regarding your battery size.
Then cut the front part of your power unit in PVC or wood (plastic will melt because of the motor heat) so that the motor can be screwed on it. You can use a drill or a hot welder to make the holes. Glue this front part on the power unit, put a tape on it and drill the holes again. Screw the motor on the X cross delivered with it. Then screw it on the power unit thanks to screws you will find in your home (like in Mecano toys).
Solder the connectors to the battery, the motor, and the ESC then place everything in the unit.
The ESC must be connected to the battery, and the motor. At the end we will also connect it to the receiver.
WARNING: disconnect everything from the battery until you are not flying
Notes about the battery bellow
Step 5: Fuselage


To build the fuselage, you need the dimensions of your power unit and your wing. The fuselage need to be about twice as long as the width of the wings and the power unit must slide nicely into it. Use a long piece of cardboard to make it as shown in the pictures/video.
Glue it under the wings, it must be strong !! The power unit must not be glued in it. It will hold in place thanks to skewers crossing the fuselage and the unit. DO NOT forget the skewers while flying or the power unit could be dislodged from the fuselage during flight.
Step 6: Rudder, Lifter and Ailerons


In this step we will build the rudder, lifter and ailerons.
First cut pieces of carboard to the size you like (but not so big or your plane will be too heavy) to make the lifter. Place it on the back of the fuselage. Then make a groove and cut the cardboard in order to create the back aileron as shown in the picture. It must be easy to move. Do the same thing for the rudder and glue everything.
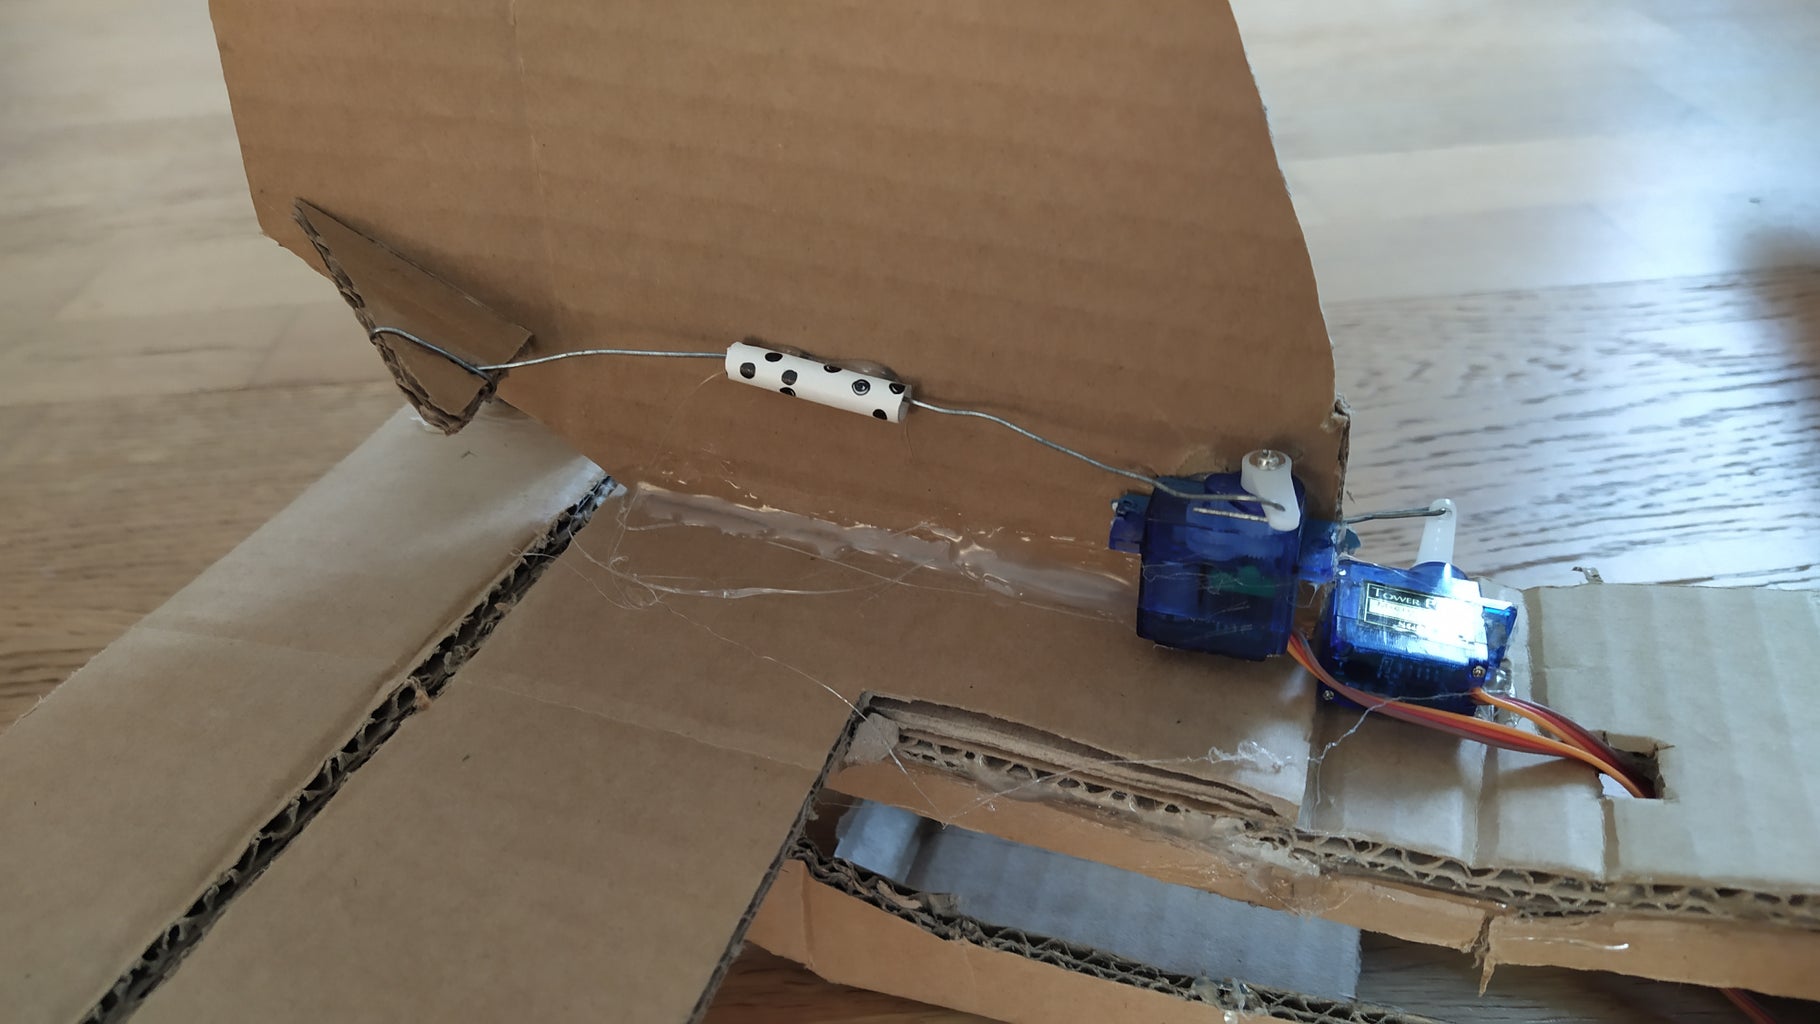
We can now glue the servomotors on the plane. They will move the ailerons. You must cut little triangle pieces and use wire to link the servo and the ailerons. You can use straws to guide the wire so that it will not bend. Be sure that the ailerons can move up and down / right and left.
I let you do the same thing to create ailerons on the wings. One servo motor is enough to move the two wing' ailerons.
Step 7: WARNING ON ELECTRONICS
NEVER discharge your battery under 11.1v. If it reaches 9v it would never be reload. Try short fly then measure the voltage with your charger.
DO NOT invert positive and negative wire to change the motor's sense of rotation. Only invert two wire (phase) from the three-phase motor.
PROTECT your battery from crash with foam or cardboard.
Step 8: Time to FLY !!!


BEFORE you fly I highly recommand you to train on a simulator like PICASIM. You can buy a cable (few euros) to link your radio to a computer so that you can train on a simulator. There are also few apps on smartphones.
When everything is done, you can pair your receiver with your radio and connect everything together. Each radio is different so I let you discover your own.
WARNING check every servomotor direction. Check that when you go up, your plane will go up and conversely. Same for the rudder and the ailerons.
When you feel ready, find the wind direction. You will launch your plane AGAINST the wind and land it the same direction. Put half power and launch it with a medium speed (you can ask someone else to help you). You should first try if your plane flies straight ahead. If it seems to dive, move your battery back. If it climbs quickly, remove weight on the back and move your battery forward.
You should also wear glasses to protect you from sunlight and you should ALWAYS back the sun.
It's time to ENJOYYYYY !!!!
Do not be worry if your plane crash often first. You will need to adjust plane and improve your pilot skills :p

Participated in the
Cardboard Speed Challenge


