

Introduction: Cardboard Shark Costume


In our world today there are tons of new technologies and inventions emerging each day. From high tech computers to nuclear powered battleships it is evident that our world is evolving. Many of these new technologies, although amazing and convenient, are hurting our environment this very second. Every day tons of toxic and non-bio-degradable wastes are being pumped into our oceans or landfills in the earth. Although the human race understands this, they insist on creating more and more "junk" that in the end will do us more harm than good. Our race has to find alternative economically friendly devices and technologies soon or planet earth will eventually cease to exist.
Based on the"Going Green" theme, my high school technology class has been assigned to create a line of cardboard costumes using slotted construction technology. The costumes are each designed to be economically friendly by using only recycled cardboard. This also makes them cheap, and easy to construct. The targeted age range for this costume line is anywhere from 11 to 13 years old.
Design brief:
To design and construct a cardboard costume using slotted construction. This costume must be simple enough to be made and worn by a middle school child.
Specifications:
costume must...
-Resemble a shark
-Be somewhat durable
-Be easy to store
-Wearer must be able to move in it
-Support itself on the wearer
-Somewhat easy to make
Limits:
Costume has to...
-Be made entirely made out of cardboard
-Utilize slotted construction.
-Fit a middle school child
-Simple enough for 11-13 years olds to construct
Materials you will need:
(S1) 20 square feet of single ply cardboard
Tools
(T1) Utility knife- Used to cut parts out of cardboard.
(T2) Ruler- Used to measure parts.
(T3) Pencil- Used to mark where cuts will be made (optional/Not used in instructions)
Parts
(P1) Main body (2)
(P2) Front end (1)
(P3) Back end (1)
(P4) Head (1)
(P5) Tail (1)
(P6) Fin (2)
(P7) Top support piece (back) (1)
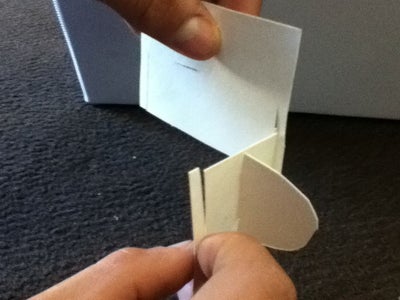
*( NOTE- In the pictures I am using a model that is not to perfect scale)
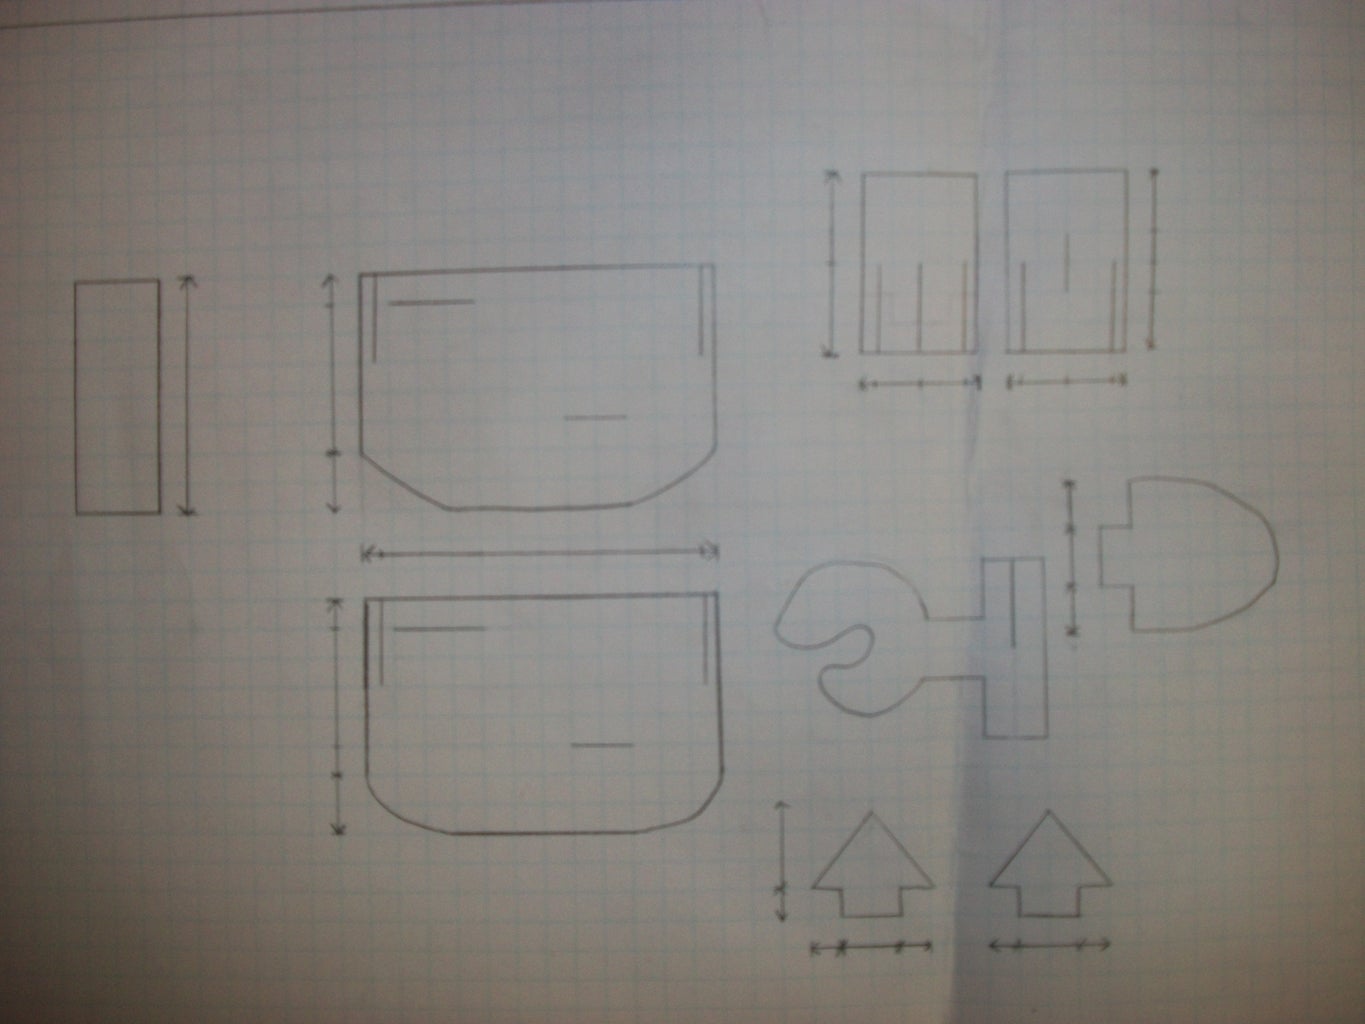
Step 1: Cutting Out the Parts
Main Body
1.) Take cardboard sheet (S1) and cut out 2, 2 by 3 foot pieces with utility knife (T1) .
2.) On each piece make 2, 12 inch cuts vertically 2 inches in from the 2 foot side with the utility knife (T1).
3.) Now on each piece cut a horizontal 6 inch slit nine inches from the bottom and 9 inches from the side with the utility knife (T1).
4.) (optional) To make you shark look more realistic you may want to round off the bottom piece of the main body.
Front Endpoint
1.) Cut out a 12 by 18 inch piece of cardboard with utility knife (T1).
2.) Measure 1 inch in from the bottom and make a 9 inch cut going up the 18 inch side vertically with the utility knife (T1) and ruler (T2). (On both sides)
3.) Make 6 inch slit vertically, 6 inches from the top of the 18 inch end and 6 inches from the bottom with utility knife (T1).
Back Endpoint
1.) Cut out a 12 by 18 inch piece of cardboard with utility knife (T1).
2.) Measure 1 inch in from the bottom and make a 9 inch cut going up the 18 inch side vertically with the utility knife (T1) and ruler (T2). (On both sides
3.) Measure in 6 inches from each side of the piece and make a 9 inch slit with utility knife (T1)
Head
1.) Cut out a 1ft by 1 ft head shaped figure with a 3 inch by 6 inch tab with utility knife (T1).
Tail
1.) Cut out 18 inch tall and 18 inch wide piece of cardboard with utility knife (T1).
2.) Measure 6 inches away from edge with ruler (T2).
3.) Make vertical cuts up and down from point made in step 2 with utility knife (T1) each 6 inches long.
4.) This leaves a 6 inch space in between your two cuts to make that actual fin shape
5.) Cut out your own fin shape with utility knife (T1)
Fin
1.) Cut out 2 triangles using the utility knife (T1) with base lengths of 6 inches and the height of 9 inches. Leave room for attached tab underneath
2.) Underneath triangle cut out tab 3 inches tall and 6 inches wide with utility knife (T1).
Top Support Piece
1.) Cut out 1, 2 foot by nine inch piece of cardboard with utility knife (T1).
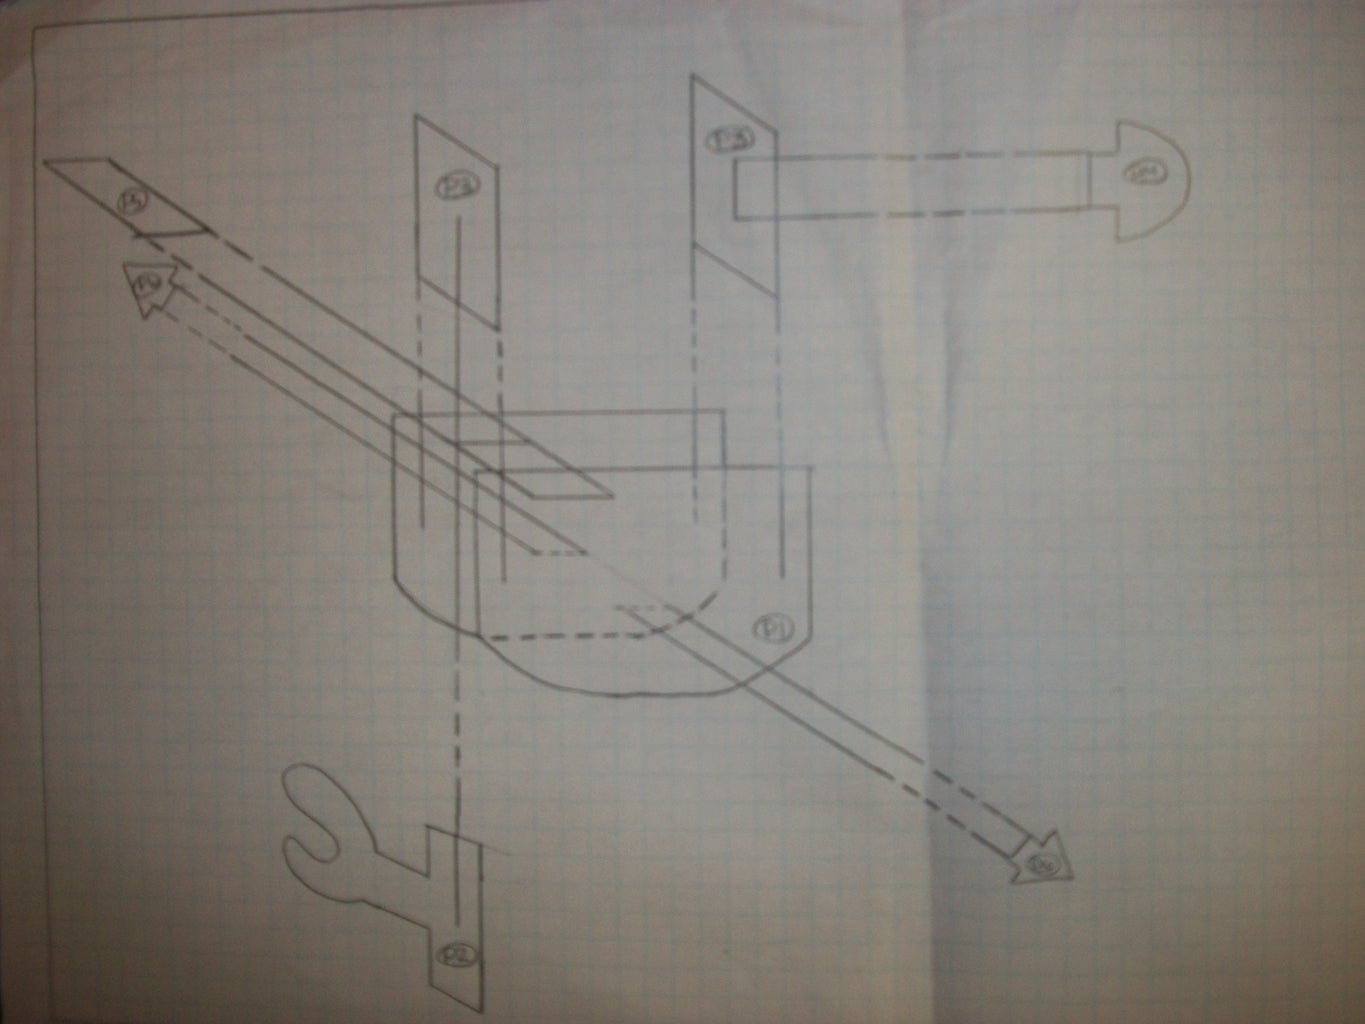
Step 2: Assembly


Step 1
1.) Slide Slot A of Tail (P5) into Back end (P3).
Step 2
1.) Insert Tab A of Head piece (P4) into Slot A of the Front end (P2).
Step 3
1.) Slide Slot C of Back end (P3) into Slot C of Main Body (P1).
Step 4
1.) Slide Slot C of Main piece (P1) into Slot B of Back end (P3).
Step 5
Slide Top support piece (P7) through Slot D of both Main body pieces (P1).
Step 6
1.) Slide Slot C of Back end (P3) into Slot B of 1 Main Body piece (P1).
2.) Slide Slot B of Back end (P3) into Slot C of the other Main body Piece (P1).
Step 7
1.) Insert Tab A of 1 Fin (P6) into Slot A of 1 Main Body Piece (P1).
2.) Insert Tab A of the other Fin (P6) into Slot A of the other Main Body Piece (P1).
* I chose not to paint my model, but if you choose to make sure you paint before assembly, and you must paint both sides of each piece or else it will warp, and bend out of its original shape.


