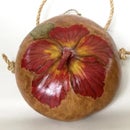
Introduction: Clay Flowers 101 to ............
Flowers brings good feelings just by looking at them.
This Instructable shows how to make simple flowers which have endless possibilities for other projects.
They could be made into different flowers, arranged, made into earrings, necklaces, hair fashions and etc.
Any pliable clay would work, I like using air-dry clay.
Step 1: Keeping It White or Color It
White clay makes clean, classy-looking flowers and a little color for parts of them adds details.
A little drop of acrylic paint works well.
Step 2: Making the Middle Part
Make a teardrop shape out of green or yellow clay.
Cut using small, sharp, pointy scissors.
Step 3: Making a Bell-Shaped Flower
Make a teardrop shape.
Insert a dull pencil into the middle of the bigger end. You can cut 5 petals to make an open flower.
Attach a middle part using any glue that dries clear.
Step 4: Making a Star Flower
Cut a bell-shaped one to make 5 petals.
Pinch the ends.
Add a Middle.
Step 5: Making a Thinner Inward Star Flower
From the cut bell-shaped one, thin each petal by rolling a pencil on it.
Leave as is or pinch the tips and curve the petals outward.
Add a middle.
Step 6: Making a Thinner Outward Star Flower
From the cut bell-shaped one, thin each petal by rolling a pencil on it.
Pinch each petal outward.
Add a middle.
Step 7: Making a Cup Flower
From a bell-shaped flower, use a pencil to thin out the petal and once it is wide enough, you can use your fingers to thin it out some more.
For the middle part, make round shape, flatten the bottom the score the top.
Step 8: Making a Flower With Overlapping Petals
Make a thin cup.
Cut into five petals.
Attach middle and overlap the petals.
Step 9: Arranging
Arrange with leaves to make a dinner centerpiece or make jewelry and other decoration.
Have fun!

Participated in the
Clay Contest 2016


