

Introduction: DIY Arduino Ammemeter


Hello everybody. Today, we will see how we can make our own Ammeter using an Arduino. It is an easy project and anyone can make it. So, lets start building!!!
Step 1: Materials Required -
1) Arduino UNO
2) A laptop with Arduino IDE pre-installed
3) ACS-712 Current Measuring Sensor
4) 16 X 2 character LCD Display
5) Some wires
6) USB-B Type cable
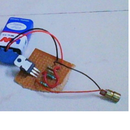
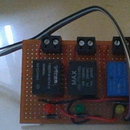
Step 2: The Circuit -

Step 3: The Code -
Attachments

Step 4: Finding a Proper Box -
You may take any box you want. The only requirements are that the box should hold the circuit as well as the LCD. You may also use an OLED display instead of a character LCD display to reduce the reduce.
Step 5: Finding a Proper Power Supply -
The voltage limit for the Arduino is from 7 - 20 volts dc. However, the recommended power supply limit is from 9 - 12 volts dc. So, you will need a 12 volt dc power supply.

![Tim's Mechanical Spider Leg [LU9685-20CU]](https://content.instructables.com/FFB/5R4I/LVKZ6G6R/FFB5R4ILVKZ6G6R.png?auto=webp&crop=1.2%3A1&frame=1&width=306)


