

Introduction: ESP8266 Connected WS2812 RGB LED Controlled Through WiFi


Hey Guys.
This is my second instructable.
In this instructable we will control WS2812 RGB LED strip connected to ESP8266 via web server.
Credit for the original idea and the code goes to Aircoookie.
Link to Original Project: WLED
Step 1: Materials Required


1. ESP8266
- I used NodeMCU LOLIN Board, but practically any ESP8266 board will work
3. 5V Power Supply
- Salvaged from old charger. The wattage depends on the number of LEDs in the strip. Each LED draws around max 50mA. For this project there are 30 LEDs, so 50mA X 30 LED = 1500 mA (1.5A). I used a 2A supply to be on safe side.
4. Enclosure
- I repurposed an old LED ceiling lamp
7. Hot Glue Gun
Step 2: Construction
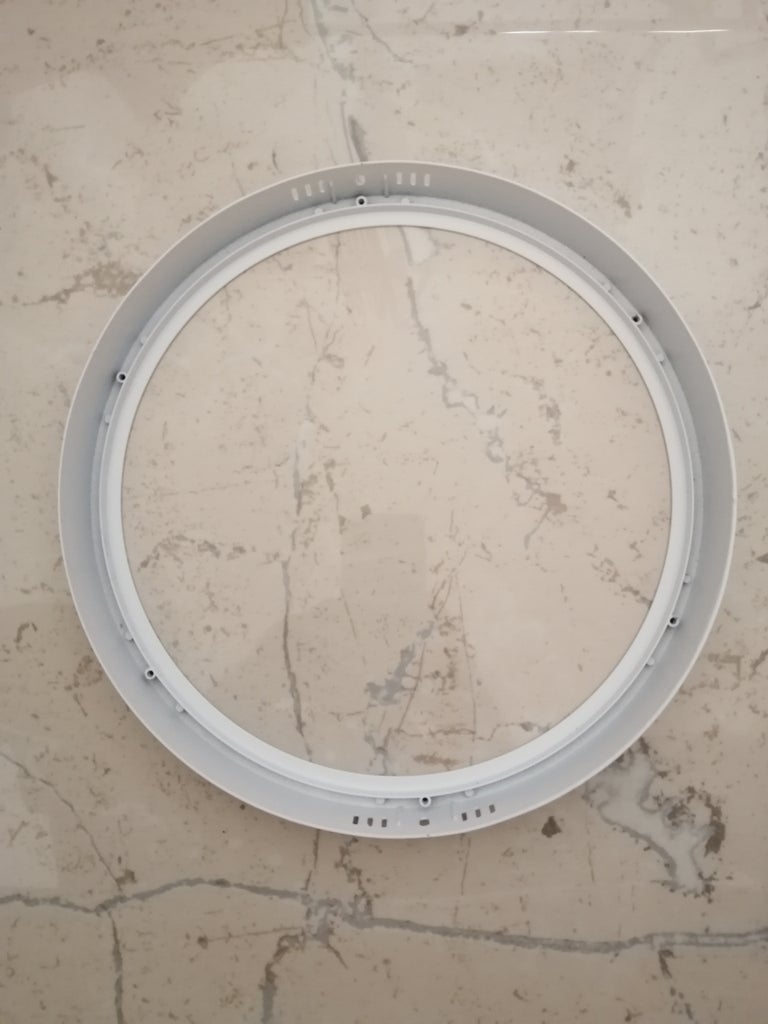

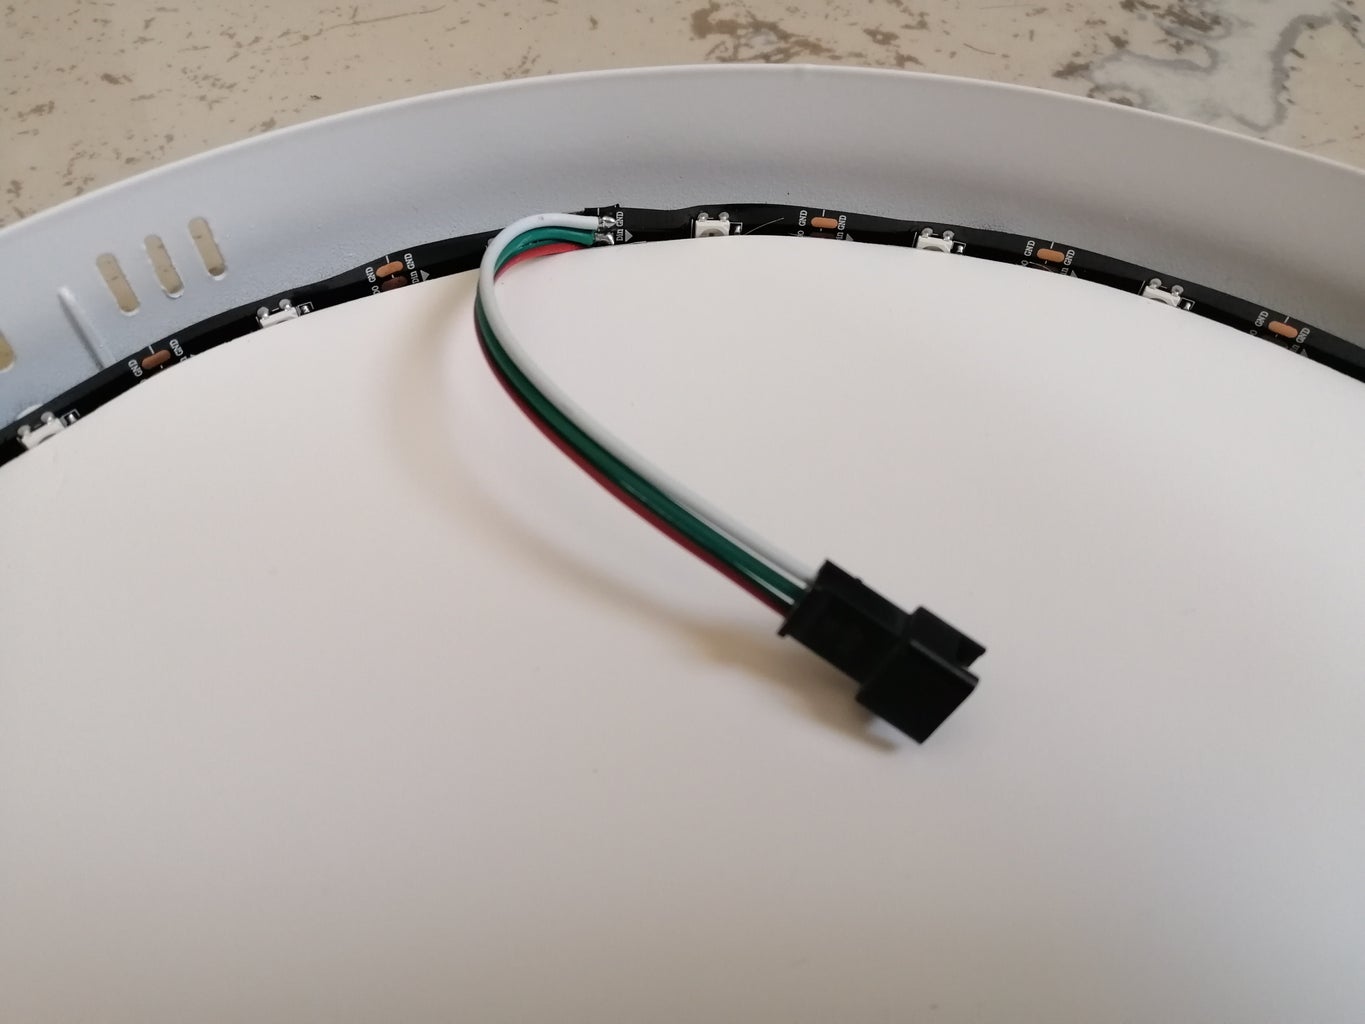
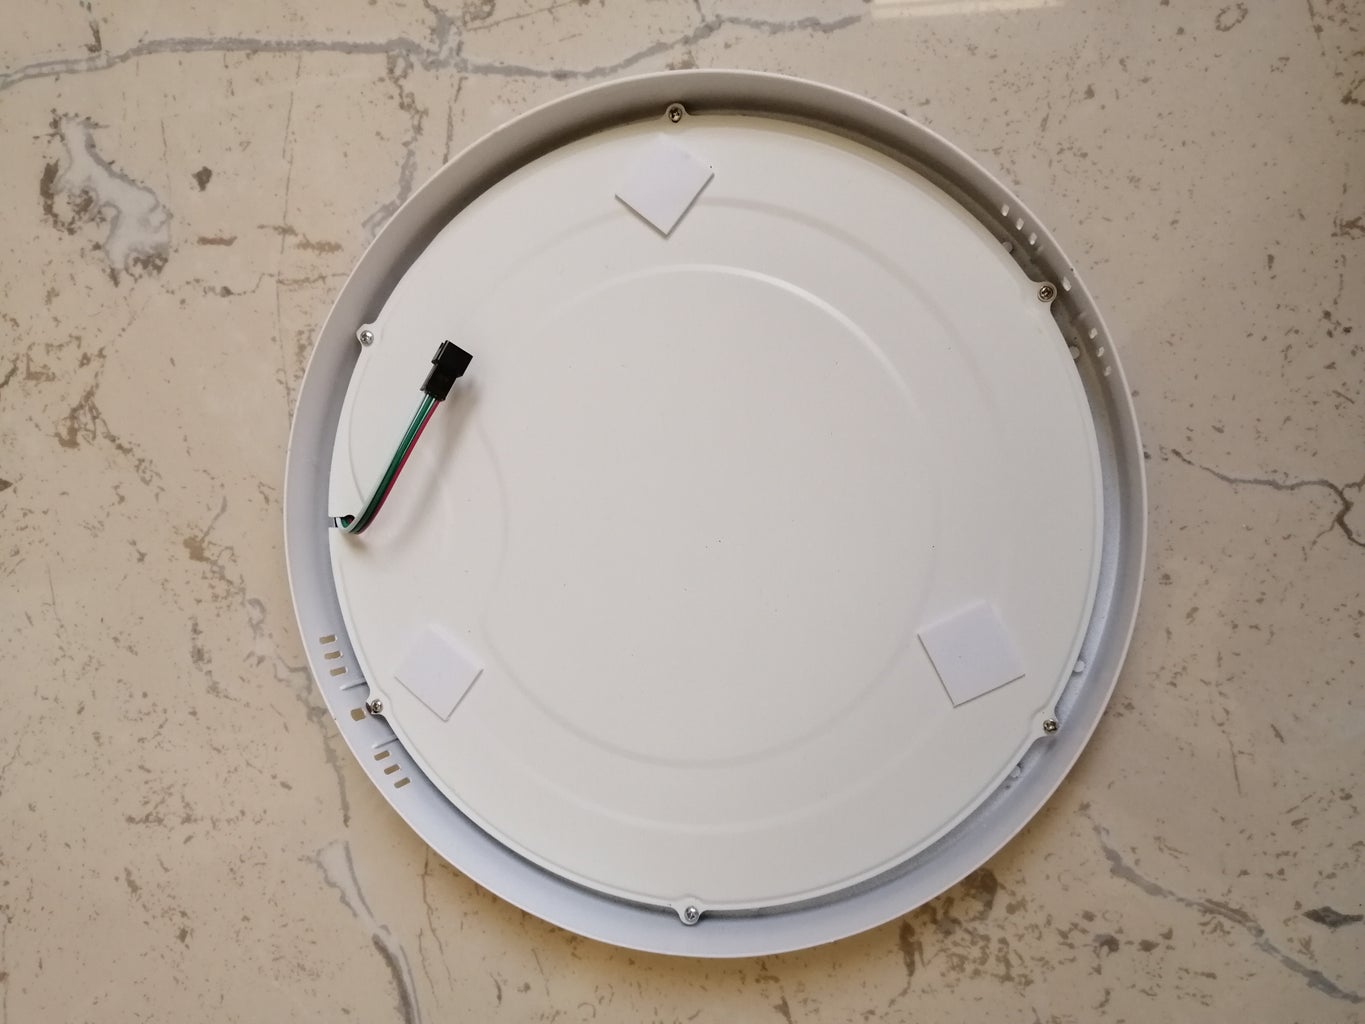
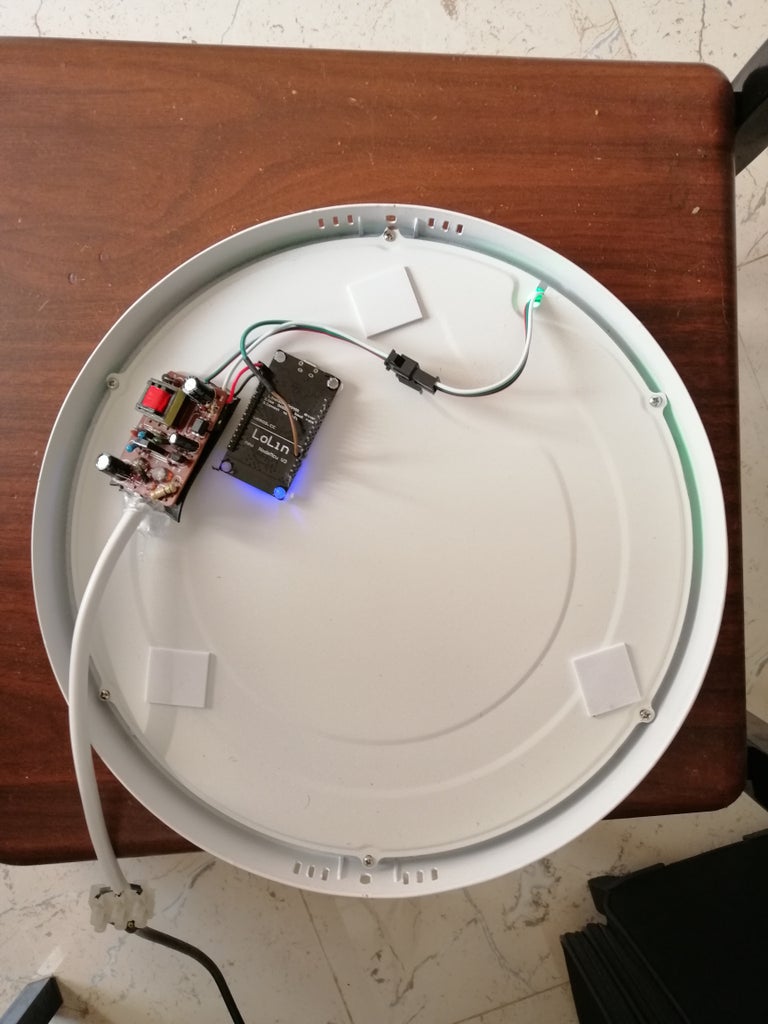
For the enclosure i repurposed an old Ceiling LED lamp. Removed the back cover and took out the LED driver board and the LEDs. Then fixed the WS2812 RGB strip to the inside of the lamp. This was little bit difficult as the WS2812 was bigger and thicker than the old LEDs. I used generous amount of hot glue to keep the strip in place.
Once the WS2812 strip is fixed the further steps are pretty straight forward.
Step 3: Circuit

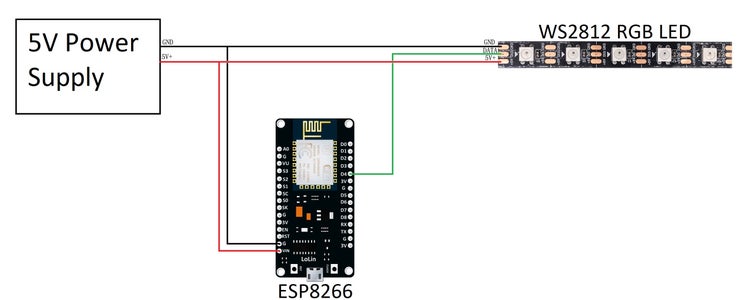
The connections are pretty simple
1. Connect the +5V from the Power Supply to the "VIN" of the ESP8266 and the "+5V" of the WS2812.
2. Connect the GND from the Power Supply to the "GND" of the ESP8266 and the "GND" of the WS2812
3. Connect the D4 pin of the ESP8266 to the "DATA" of the WS2812
Once the connections were done all wires were secured to the back of the lamp using glue.
Step 4: Code
I am not an expert on the coding part, all I did was copy the code from the original project by Aircoookie.
Please refer this link for details.
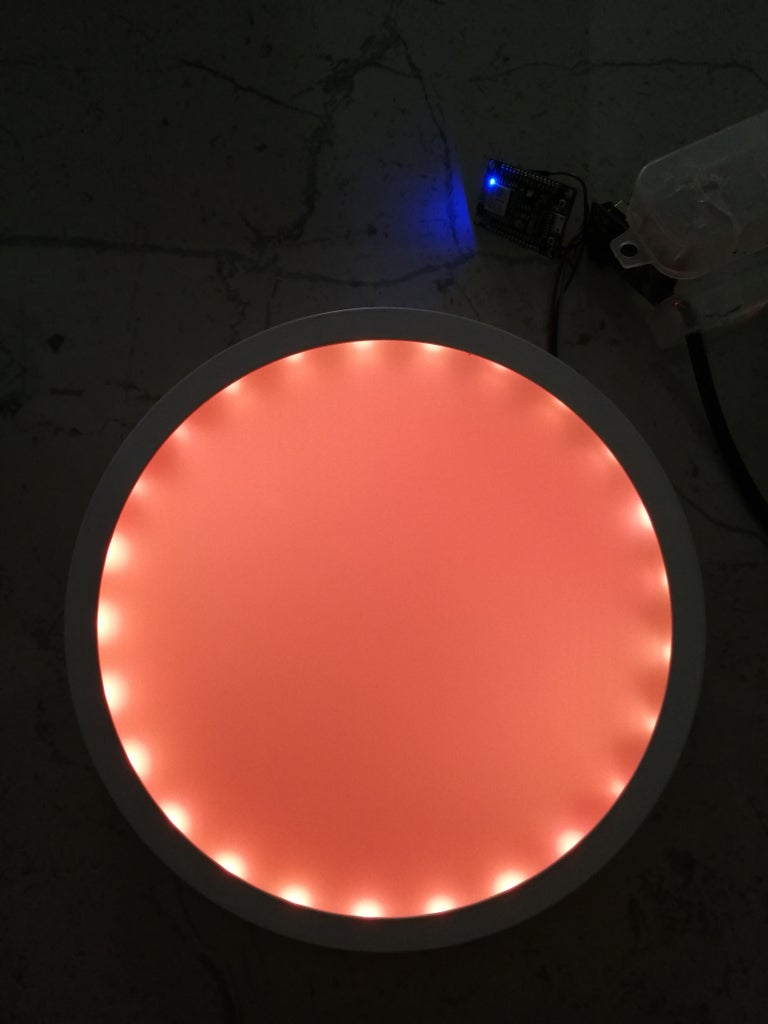
Step 5: User Interface
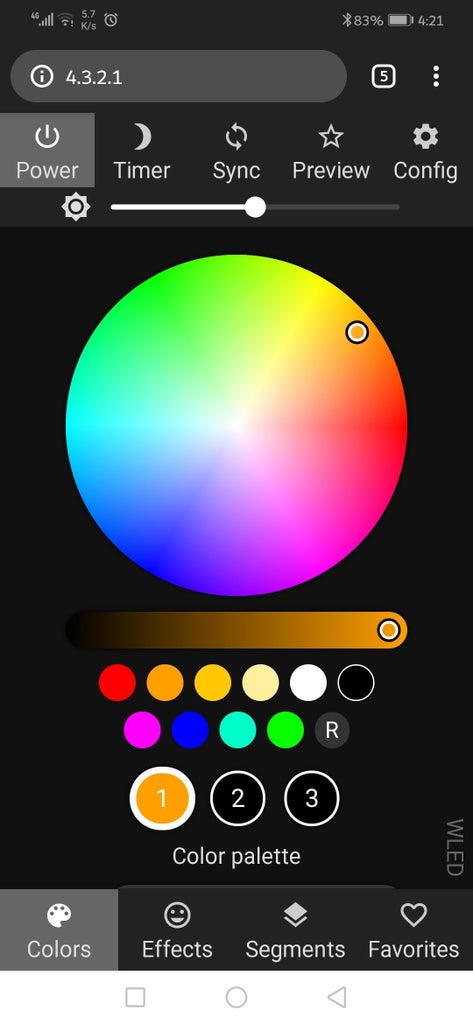

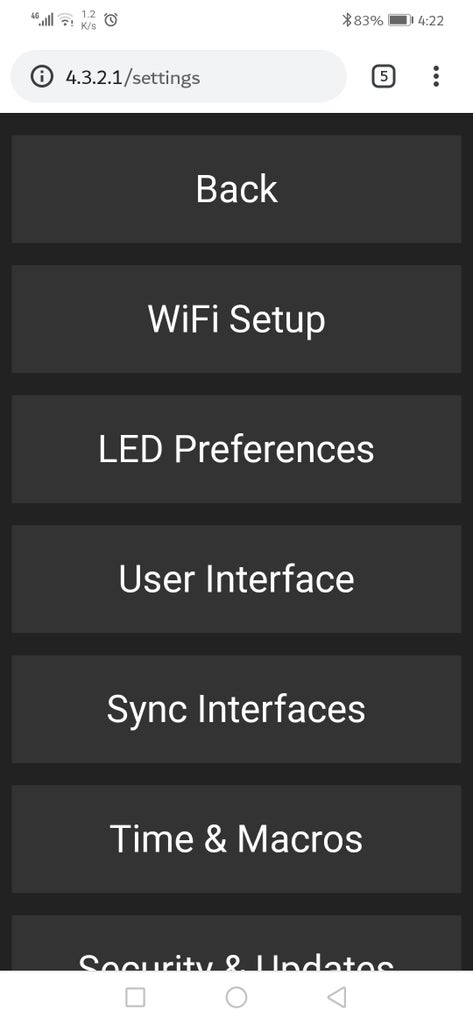
Once powered up, the ESP8266 will look for configured WiFi networks. If not found it will go to Access Point Mode (AP) and create a WiFi connection with name "WLED-AP" and password "wled1234". Once connected to this AP, go to IP Adress 4.3.2.1 on your browser. This will connect you to the webserver. You have a lot of options to configure, but the most important is the number of LEDs. You can also configure your home WiFi credentials if you like. Thats it!!!
I did also try to interface it with Blynk, but the connection was sluggish and it will use up all your Blynk energy.
Read through the github for full information.
Once again all the credit goes to Aircoookie
Thanks for reading through my instructable. Have fun.
Step 6: Watch the Video
Watch the patterns and styles video


![Tim's Mechanical Spider Leg [LU9685-20CU]](https://content.instructables.com/FFB/5R4I/LVKZ6G6R/FFB5R4ILVKZ6G6R.png?auto=webp&crop=1.2%3A1&frame=1&width=306)


