Introduction: Fix a Hole in Drywall
Whether from a door knob, rambunctious kids playing, or a moving accident; a hole in drywall is an ugly eyesore. You might think that repairing this unexpected opening would require all kinds of specialized knowledge, but repairing a hole in drywall is actually very easy. Chances are, you probably have most of the stuff needed to make the repair at home already!
Step 1: Tools + Supplies
To fix a hole in drywall we'll be cutting a plug from around the damaged drywall and replacing it with a plug of undamaged drywall. To do this, we'll use a standard hole saw of the right size. Hole saws are a useful tool and it's worth getting a set that includes multiple sizes, rather than just one.
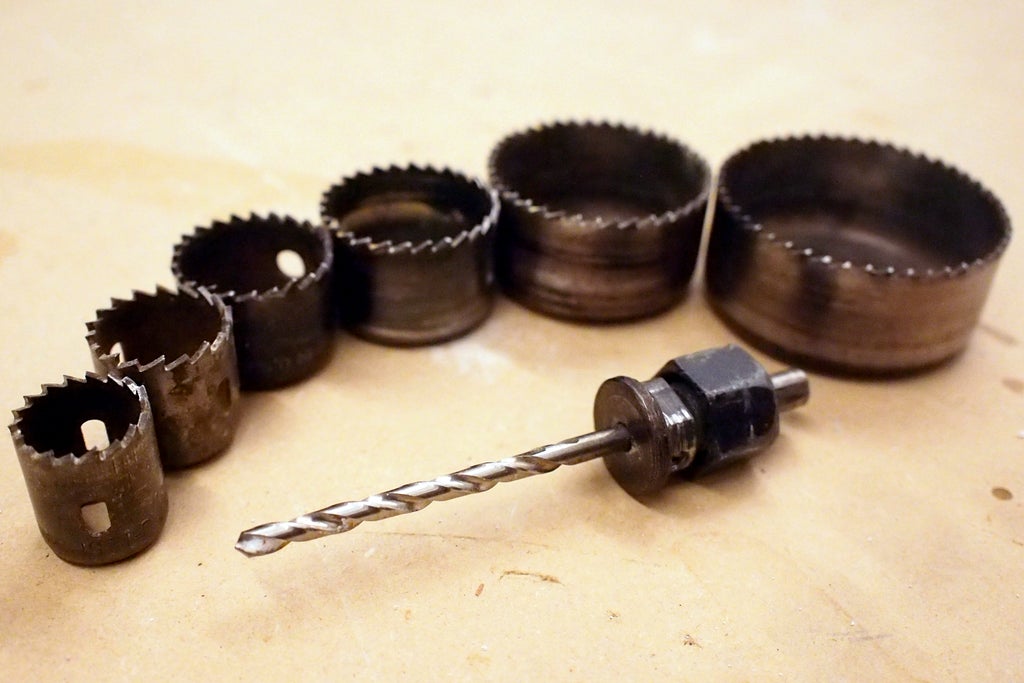
Here's what else you'll need:
- Hole saws (buy a kit with multiple sizes)
- Electric drill
- Fresh drywall scrap (any thickness)
- Scrap plywood (any thickness)
- Broad putty knife
- Hobby knife
- Joint compound (also called "mud")
- Sandpaper
The rest of the items on this list are what most homeowners should have lying around. If you don't, then this is a good opportunity to get a few materials that will make home repair much easier the next time something like this happens.
Step 2: Size Hole Saw
We'll start by matching a hole saw to the size of the damage in the drywall. Chose a hole saw that is as close a match in size as possible.
Step 3: Assemble Hole Saw
Once you have the size of the hole saw you need you'll need to assemble the saw onto the threaded mandrel.
Every hole saw is a little different, but most will have a nut that needs to be removed before the hole saw is slipped onto the mandrel. In my hole saw, the opening in hole saws align with the asymmetrical mandrel and are seated fully before placing the nut back on and tightening, securing the hole saw in place.
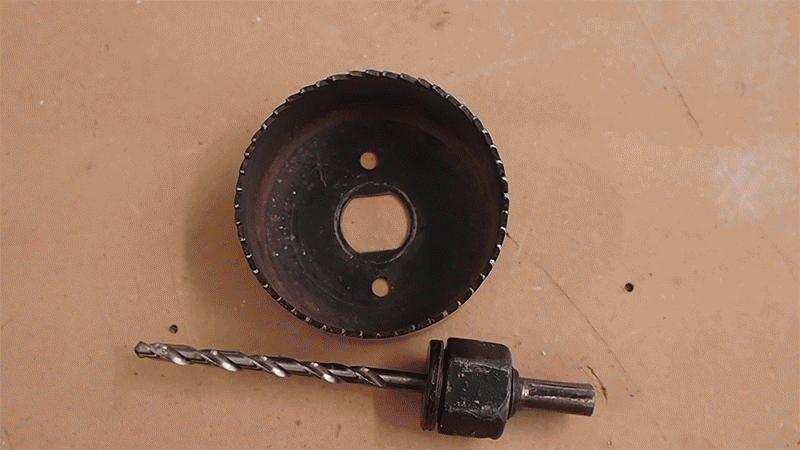
Because hole saws are threaded in the same direction that the saw cuts, there's no reason to over-tighten the nut since friction will self-tighten it. Therefore, hole saw nuts can be firmly hand tightened.
Step 4: Cut Plywood Template
To prevent the hole saw skipping around the drywall when cutting, there needs to be a template that will support the circumference of the saw blade. I used scrap plywood.
The scrap plywood can be of any thickness, since it's only guiding the blade and keep it in place when cutting drywall.
Step 5: Drill Out Damage
Place the template against the wall, with the opening in the template directly over the damaged drywall.

Holding the template firmly against the wall with one hand, line up the hole saw inside the template and slowly drill and push into the drywall, the template will keep the hole saw centered around the damage.

Continue drilling until you cut completely through the drywall. A clean hole will be left, with a plug of the damaged drywall in the hole saw.
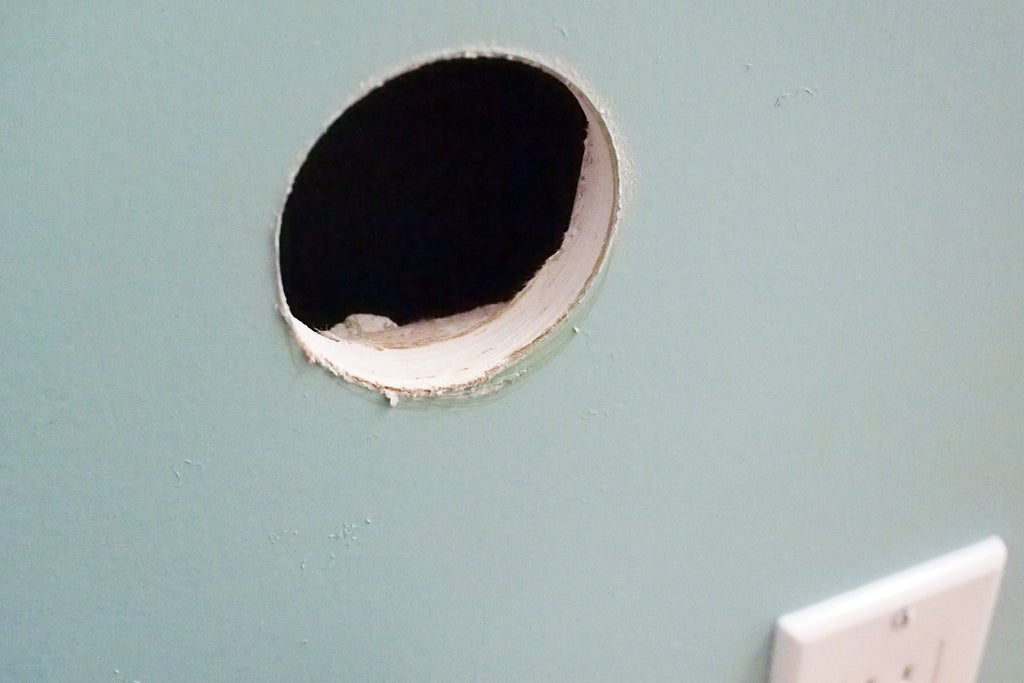
Remove the template, hole saw, and any debris in and around the opening.
Step 6: Make New Plug
To cover the opening in the wall we'll make a plug of drywall using the same hole saw. A great benefit of using this method is that almost any thickness drywall will work to make a new plug, it doesn't have to match the thickness of the existing drywall. If you have ½" thick drywall and a ⅜" thick sheet of scrap plywood then this method will work fine!
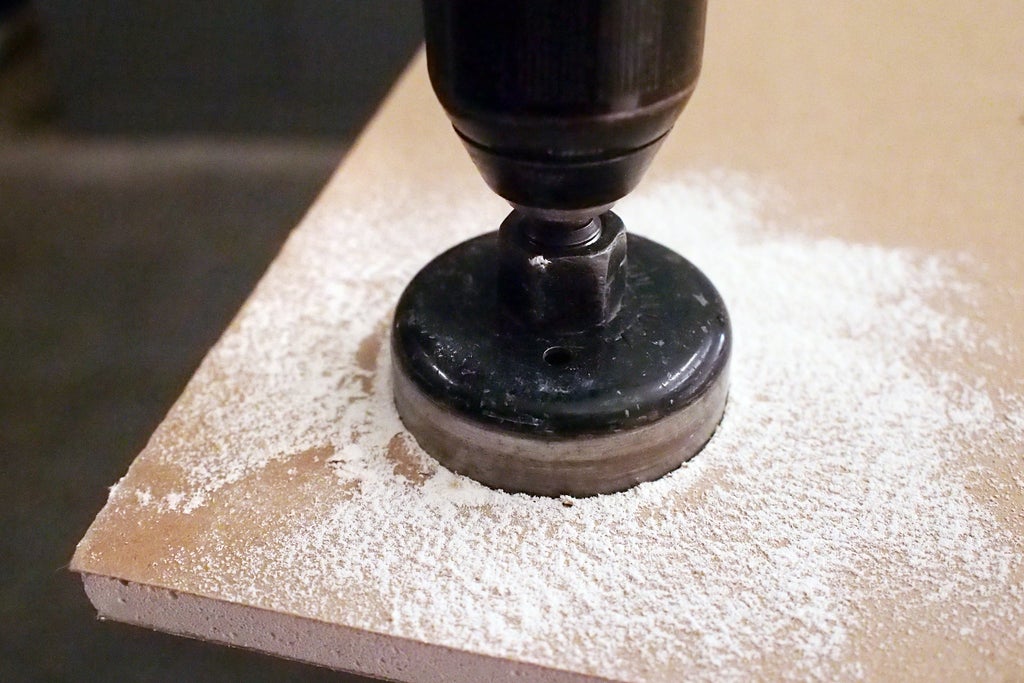
Keeping the drill perpendicular to the scrap piece of plywood, start drilling into the scrap but stop before going all the way through.
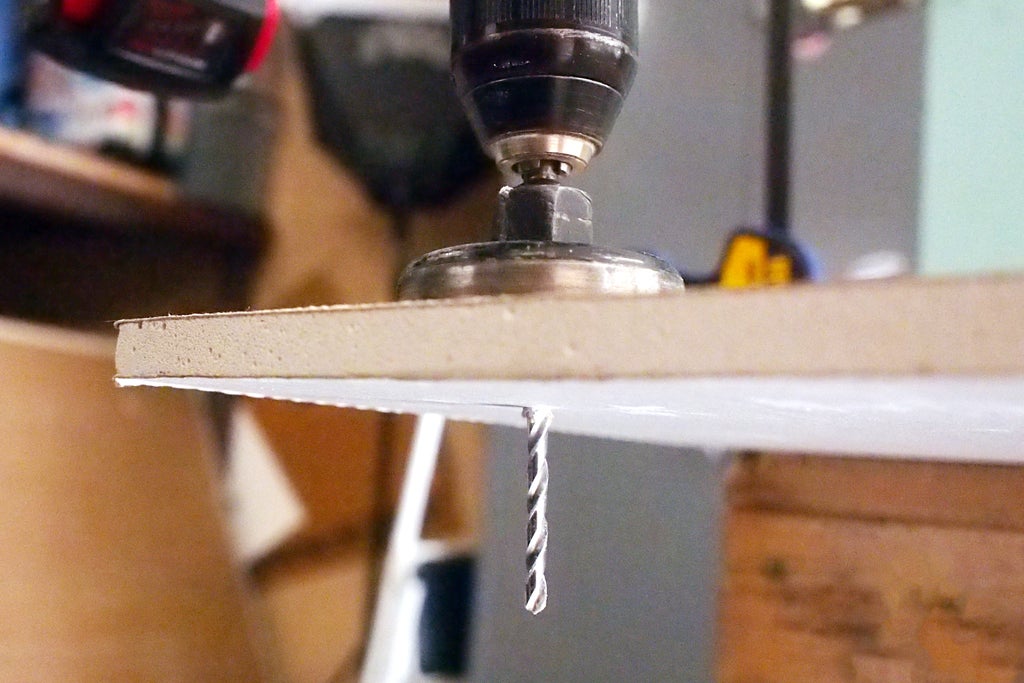
Your hole saw should have made it through the gypsum middle layer but not through the back paper layer. This is critical to patching the hole. If you accidentally drilled all the way through the scrap drywall find another area and drill a new plug - you'll need the backing paper to make an effective patch.
Step 7: Cut and Score Patch
With a sharp hobby knife cut around the partially drilled drywall scrap. Take your time and make multiple shallow cuts to cut completely through the scrap drywall.
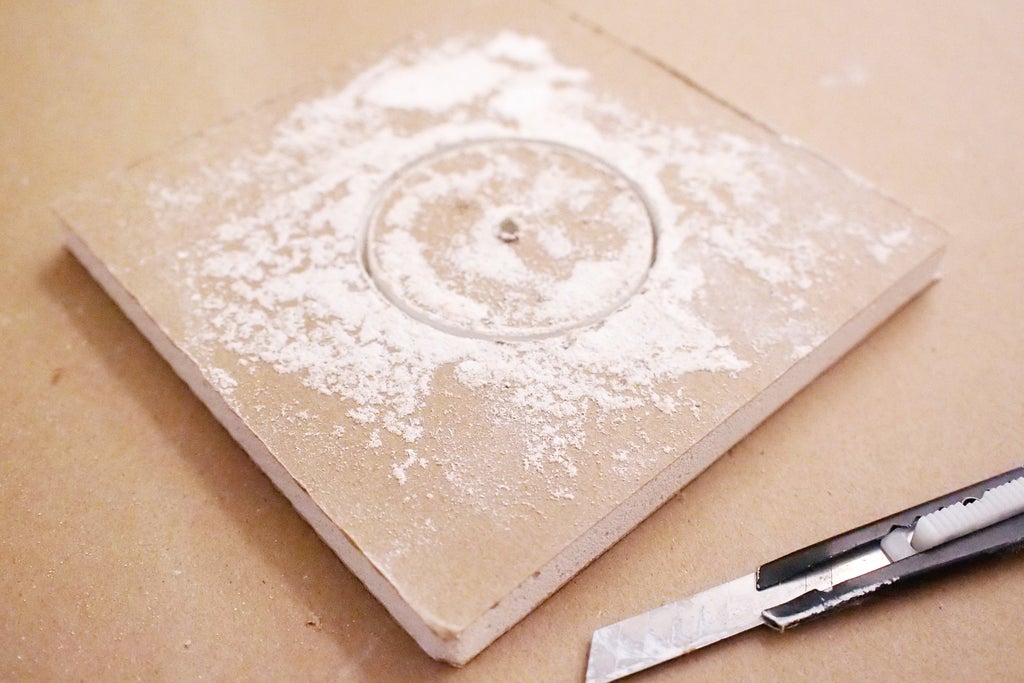
You'll need a few inches around the partially drilled plug to make a patch.
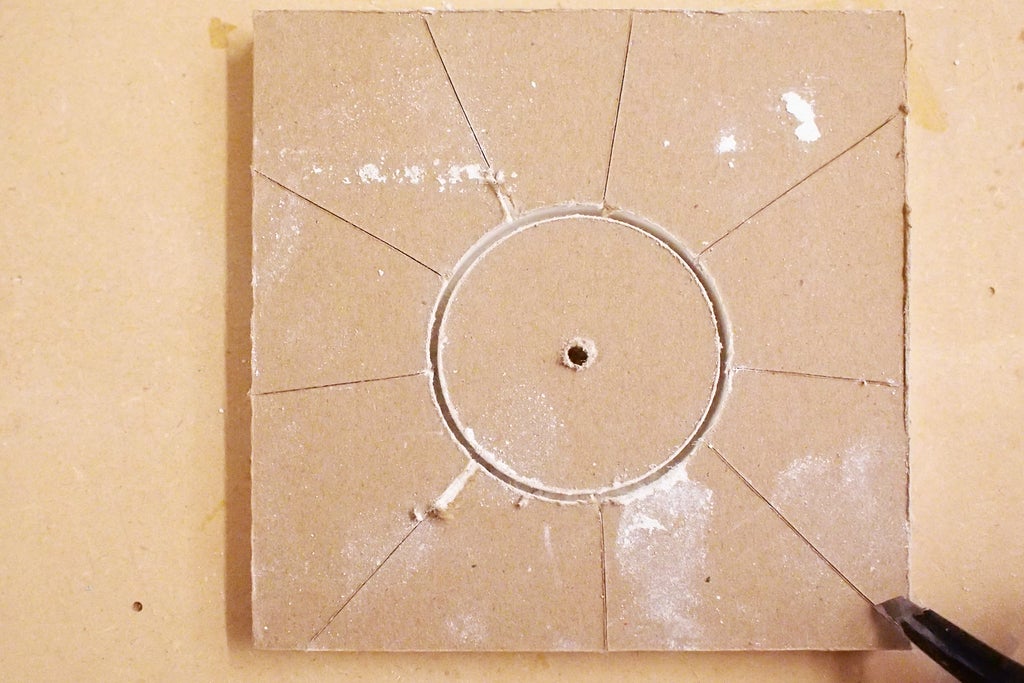
Score radial markings from the partially drilled plug to the outside of the cut patch. The scoring doesn't have to be very deep, just enough to allow the drywall to break apart with our hands.
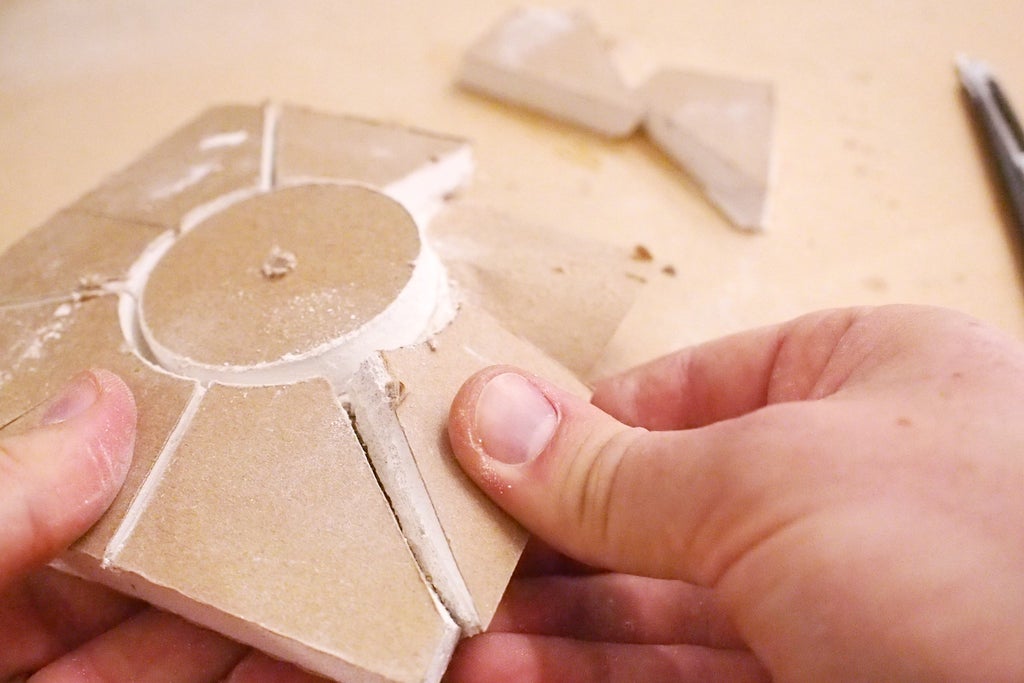
With a firm grip break along the scoring and remove the drywall from around the partially drilled plug, being careful to leave the paper backing in tact.
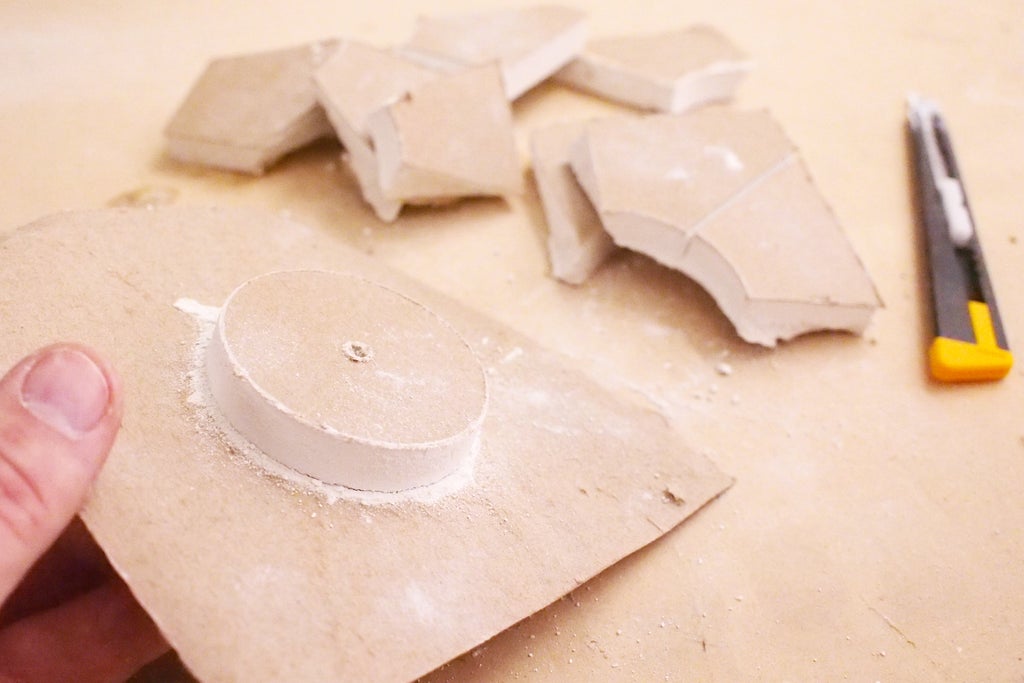
When done correctly you'll have a drywall plug with a skirt of paper attached.
Step 8: Trim and Wet Patch
Trimming the corners off the patch is optional, but I think makes the patch easier to conceal without any sharp edges. I used regular scissors to make a small radius on each corner.
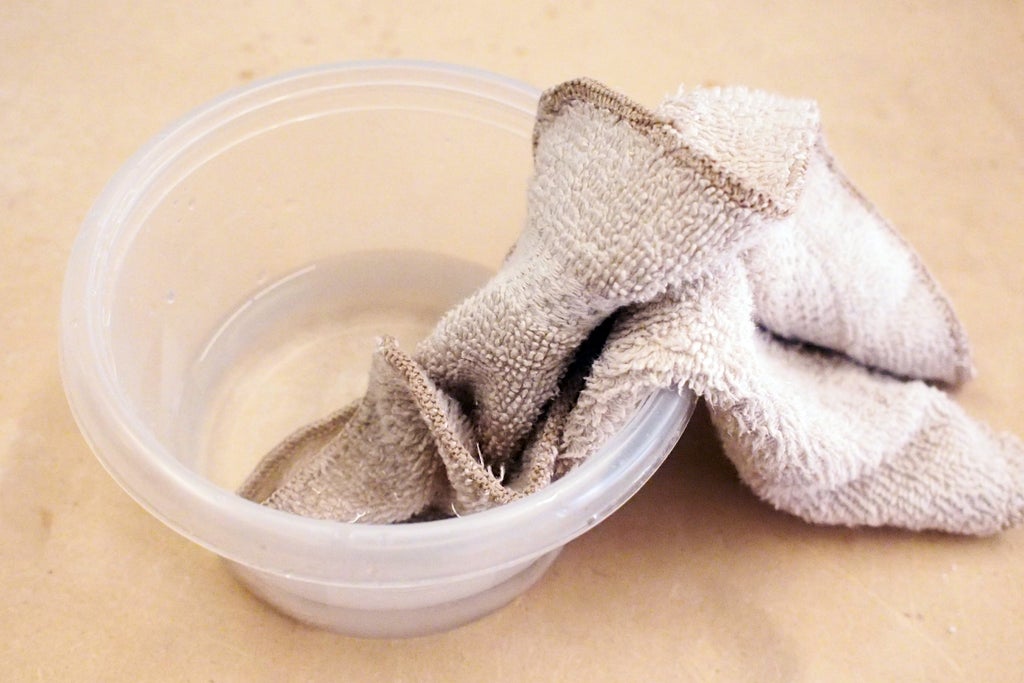
Using a damp rag I moistened the paper of the patch. Don't make the paper soaking wet, the idea is to have a moist paper patch which will accept the drywall compound mud.
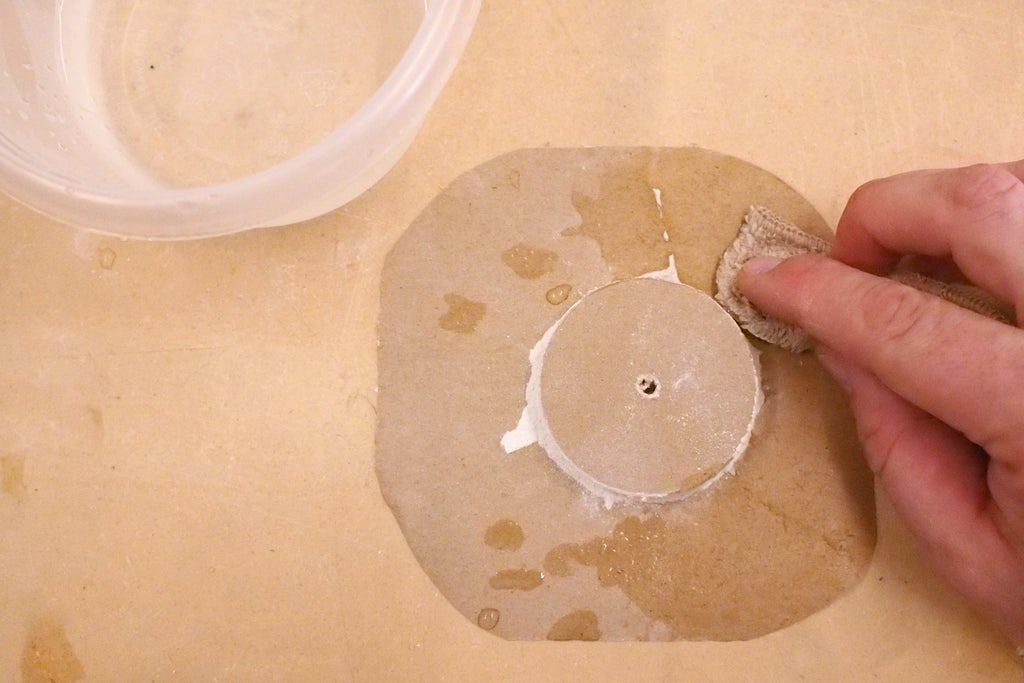
Dab the paper with the damp rag, being careful to keep the moisture on the paper and not the drywall. Once wetted, set patch aside.
Step 9: Apply Compound to Opening
Open the drywall joint compound and mix thoroughly. Using the putty knife apply a generous amount of joint compound in the opening and on the surface around the opening.
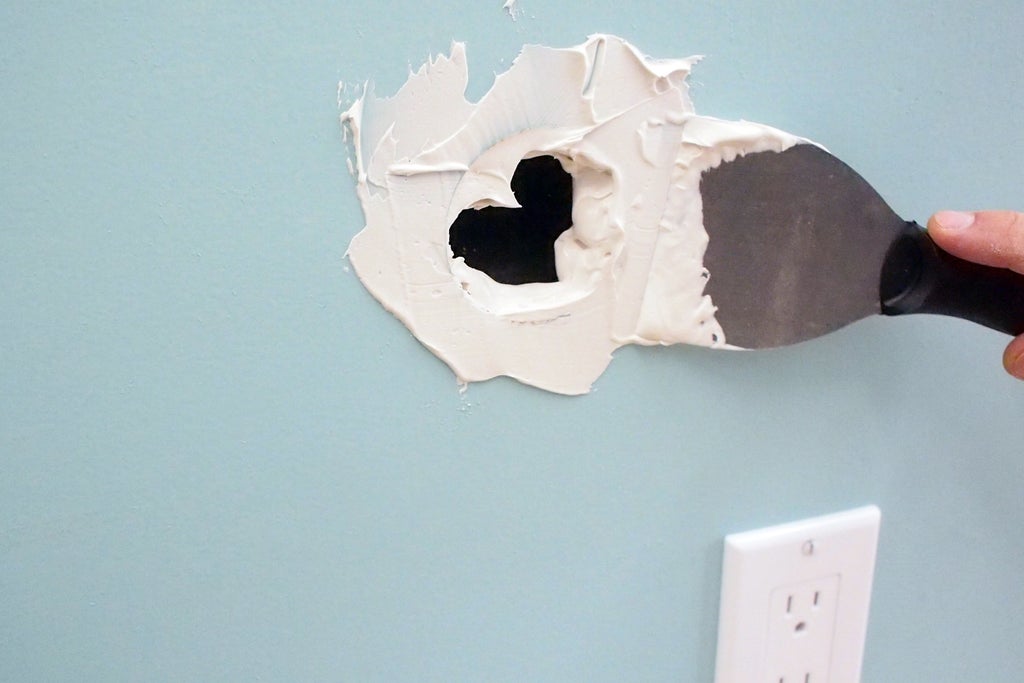
Ensure there's plenty of compound on the inside of the opening, this will be filling the gap made by the hole saw blade kerf. When the new plug is inserted it will squeeze any excess compound in behind the wall where it won't be seen, so don't worry about overdoing it here.
Step 10: Insert Patch
Line up the wetted paper patch and insert with the plug inwards, leaving the paper back facing you.

Gently press the plug into the opening until fully seated and the paper backing is flush with the wall.
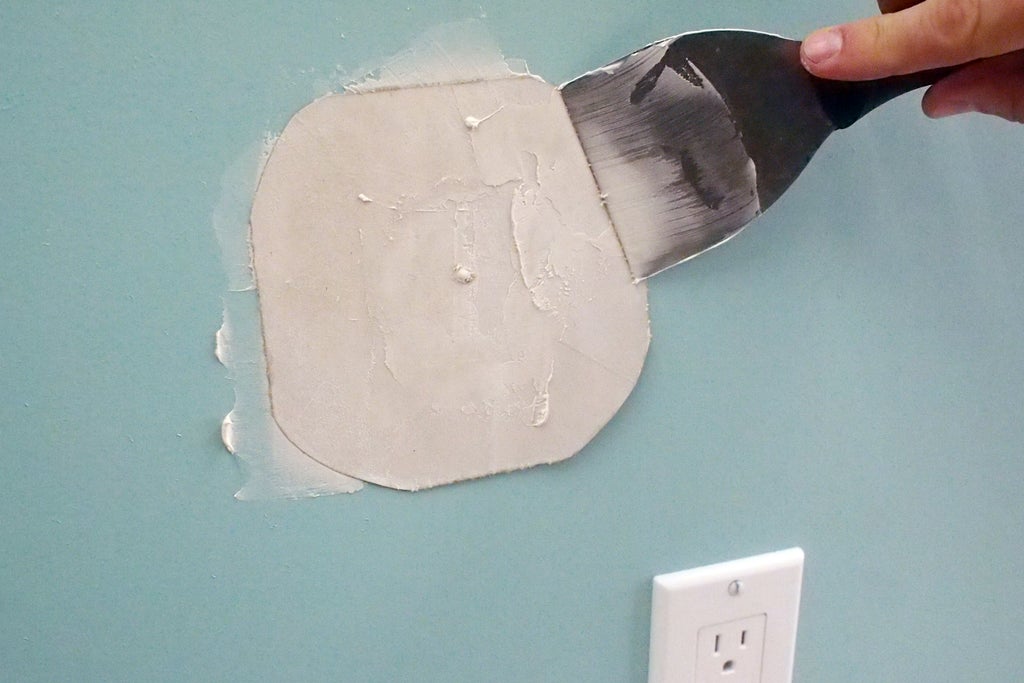
Use the putty knife to press from the middle of the patch outwards to squeeze out any air bubbles and make good contact between the paper skirt and the wall. Any joint compound that is pushed out from the putty knife just place back on top of the patch and continue smoothing out.
Step 11: Add Joint Compound
Apply more joint compound with the putty knife over the patch, using the knife to smooth out the compound into even and smooth coats.
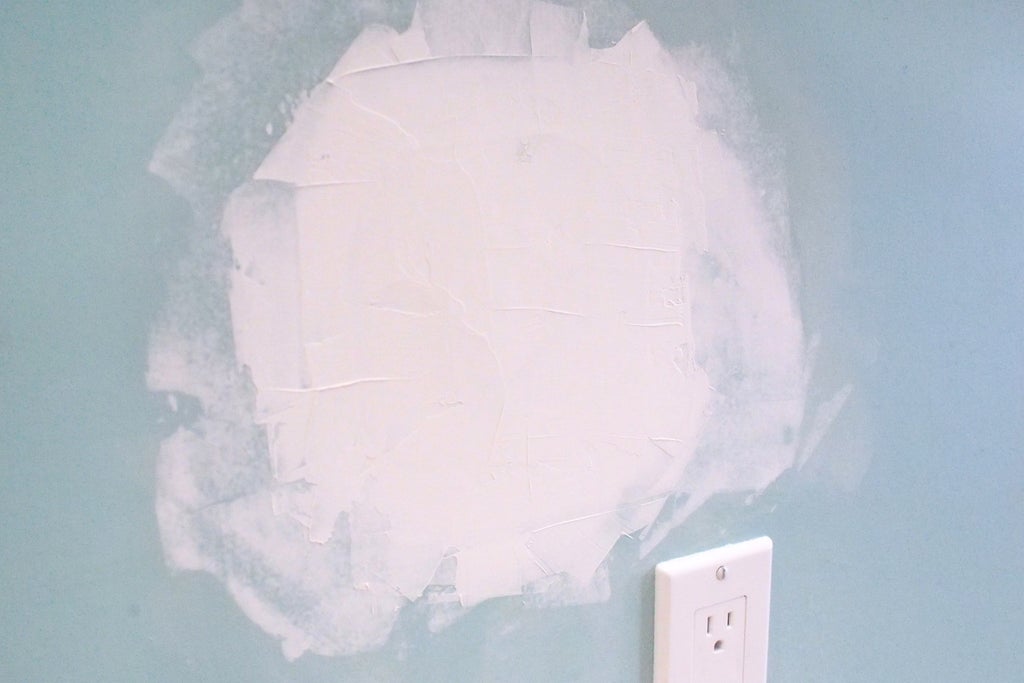
The aim here is to make a smooth transition from the existing surface of the wall to the edge of the patch. I find it's effective to alternate and make passes from the center outwards, then go back from outside the patch and make passes in towards the center.
When the patch, and more importantly the patch edges, are covered allow the joint compound to dry completely. I left the compound to dry overnight before moving on to the next step.
Step 12: Sanding
When the joint compound is completely dry it can be sanded smooth. Attempting to sand partially dry joint compound will not work, and will make a huge clumpy mess.
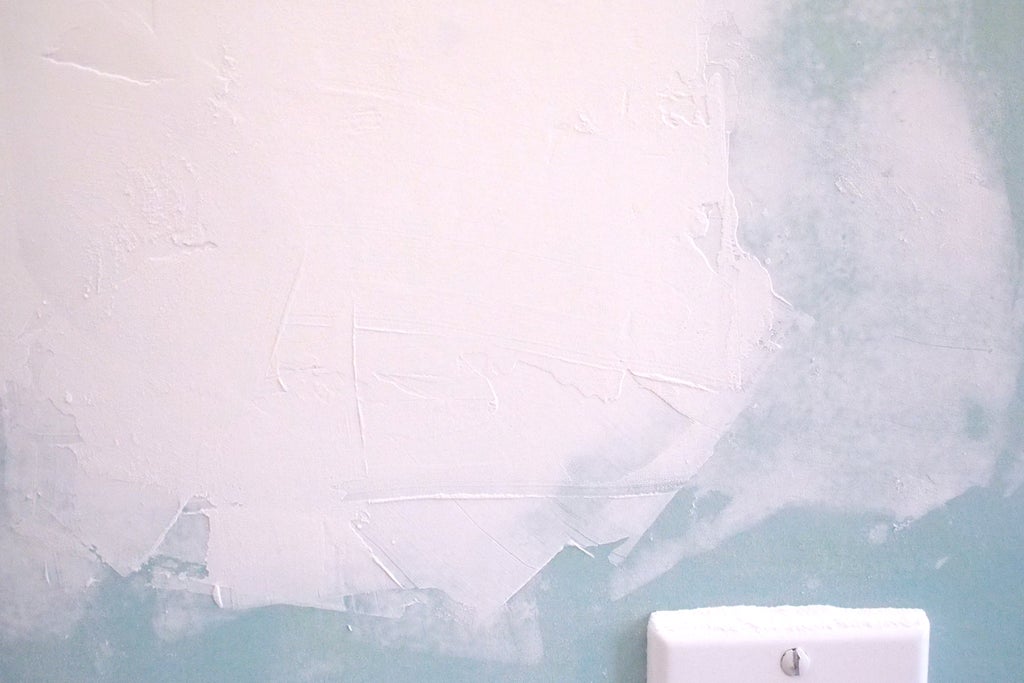
Start with 120 grit sandpaper and work up to 200 grit sandpaper, removing the putty knife marks, high spots, and smoothing the joint compound to make a seamless transition from the existing wall to the patch.
After sanding clean up all dust and debris before painting.
Step 13: Paint
To cover the patch, matching paint was applied with a paint roller. Rollers are a better choice for painting large flat areas, not just because it's faster, but the finish a roller leaves is much smoother than with a brush.
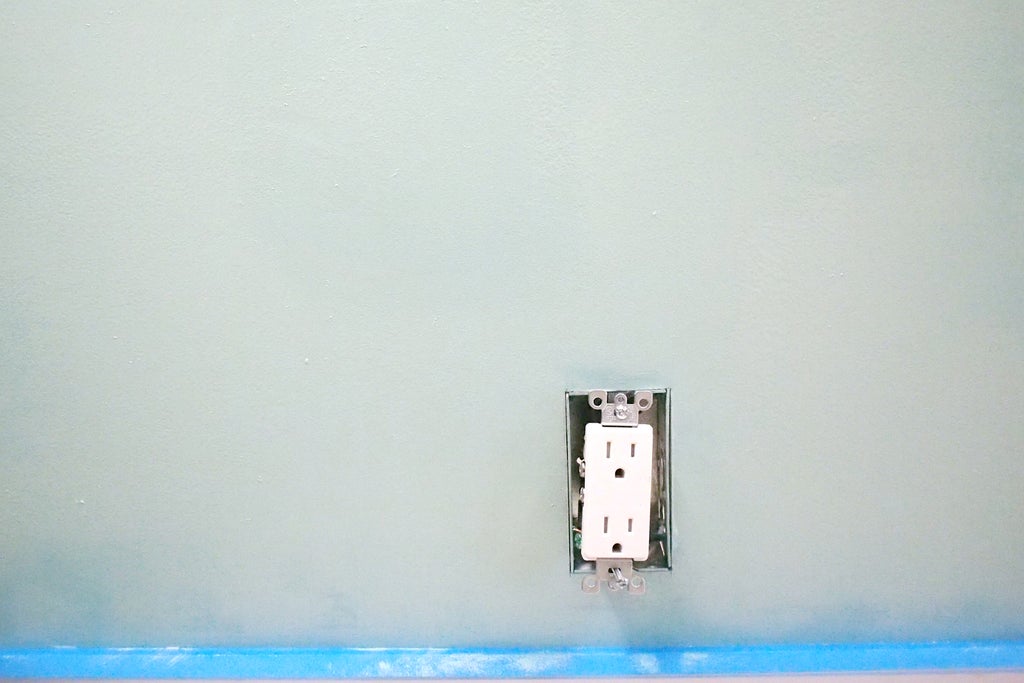
If your patch was near an outlet or switch, it's best to remove the faceplate or mask with tape to prevent painting it accidentally. The more time spent on sanding the patch and joint compound to make a smooth transition will pay off after painting. Can you even tell where the patch is in the above picture?
Happy patching!
Have you repaired a hole in drywall based on this Instructable? I want to see it!
Happy making :)

Participated in the
Woodworking Contest 2017


