

Introduction: Gcode Laser Engraving Software


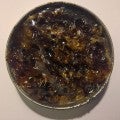


I made this instructable because I couldn't find software for engraving images with G-code controlled laser. I tried inkscape with extenstions, but this isn't what I expected. I want to engrave photos like attached one, make PCBs etc.
@edit: I wont support nor provide old version any longer New one was written in python, can be used on any platform and is opensource! There is precompiled Windows executable in my github repo (link's below).
@not longer true: So I wrote app in Matlab, which I use commonly on my university. I call it imGcode I want you to give it a try. It is standalone executable, with all libraries attached, so you will only need to install one file and it should work.
You will need laser with grbl or other Gcode controller. It have to have laser PWM controlled by S code.
App is here:
Step 1: Imgcode


App is very simple. You'll have write parameters in command line after app name:
python imgcode.py image_path output_file_path x_offset_mm y_offset_mm output_image_horizontal_size_mm pixel_size_mm feedrate max_power number_of_colours
e.g. python .\imgcode.py lena.png test.nc 0 0 10 0.2 100 255 5
e.g. python .\imgcode.py "C:\Documents\laser files\lena.png" "C:\laser files\out files\output_gcode.nc" 0 0 10 0.2 220 1000 5
image_path - path to image file relative or absolute (most file formats should work, if something fails convert it with MS Paint to bmp or png). Image can be bw or rgb.
output_file_path - path to gcode file (any extension can be provided .nc is quite standard on)
x_offset_mm y_offset_mm - origin offset it is point where lower left corner of image will be according to machines' coordinate system.
output_image_horizontal_size_mm - size of eatchet image - pretty obvious, I hope
pixel_size_mm - size of one pixel of image You can set it as you like, but I think that the best value is 0.1mm or 0.2mm.
feedrate - speed of laser head in mm/min
max_power - maximal laser power 255 or 1000 in most machines
number_of_colours - number of colours / power steps in output image 1 means B/W etc.
For better results use some graphic program that will allow you to change image to B/W, make higher contrast and set brightens to appropriate level.
Step 2: Additional Info
imgcode is quite slow when working as standalone executable compared to python script, so please be patient or use script instead.
If you have inverted Y axis in opposite direction to my drawing in previous step, it will work, but image will be upside down and origin offset will show upper left corner.
Let me know if any bug appears or you need any changes.


