

Introduction: Grill Anywhere There Is Fire!!!


So, I was hanging out with my girlfriend when I came up with this fun grill. I love fire, more than most people, and I really wanted a steak, but all we had was a gas grill. I loathe gas grills. I’m charcoal all the way. So I went online searching for a grill that can be used with wood fires, you know, campfire style, but not for survival. Problem was, I couldn’t find anything lightweight, adjustable, and adorable. So, this is my design and prototype for a Tuscan grill that can be moved with tongs, change height, and cost next to nothing.
You will need:
2 wire hangers- like those otherwise useless dry cleaning hangers
4 wire core twistee ties, like for fruit at the grocery store or bread bag
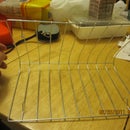
1 cooling rack from dollar store, which I got for 50 cents
6 pack of pliers (you won’t need all of them)
Strong hands
Step 1: Bending!


Take the hangers and straighten them out.
Line up the ends and bend them in half
Take that bent end and bend it in half so the legs are now a w (the middle part should be ½ the width-or shorter side)
Now, bend a good length of the one side of the W, about 1/3 of the way down, in a sharp angle. Use the pliers throughout the ible as
you deem necessary.
Do so with the other side of the W as well.
Now, with that bent over piece, bend half of the ‘bent’ part inwards. This will provide support to your grill.
Now, line it up with the ‘leg’ of the cooling rack, and weave the bent wire into the wires of the cooling rack.
Curl the end of the hanger around the closest wire of the cooling rack.
Repeat these steps for all the other legs. Note- there should only be 3 left, since 1 hanger makes up the legs for 1 whole side.
Step 2: Finish It!


Now, take the wire cores out of the twistee ties and wrap the hanger where the 1st L bend was made for the legs to the cooling rack frame. This will hold it steady. I went in an X pattern, you can use other patterns as you see fit.
Now, your legs are all different lengths, so bend feet (in ward) into the pointy parts of the W as long as you need them to level it out.
You’re done!
I tested mine out on a bbq, it made a great shelf for resting meat, since it’s warm, but cool enough to be a resting area for my porkchops.

Participated in the
BBQ Contest


