

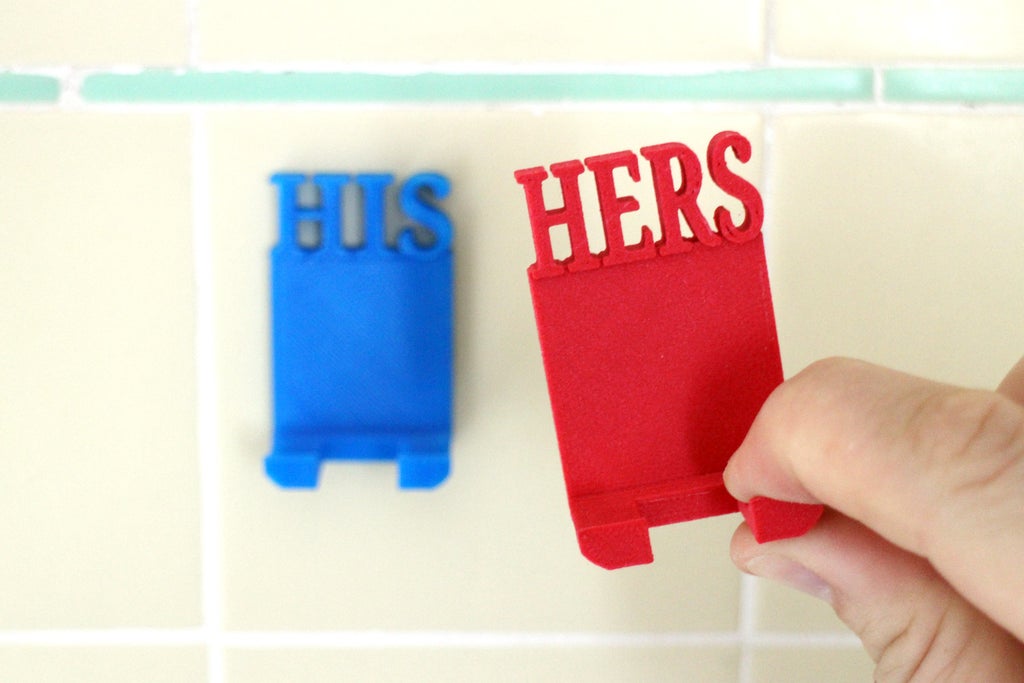
Introduction: His & Hers Razor Holders


Shaving in the shower is the best. But in a shared shower, few things are more gross than putting your razor down in a questionable wet spot. Even when I have a dedicated shelf to put my razor, I've noticed it can get bumped off (falling on the floor - gross) or is inexplicably moved (why are you touching my stuff? Please don't touch that).
A home for your rakish razor is easily solved by making a razor holder that keeps your razor easily accessible. And, with the razor stored upright, water drops off the blades and keeps them from sitting in a pool of water.
I made this model in about an hour in Tinkercad, you can see my model below.
My Tinkercad file is free to remix and use however you like. I'd love to see your variations and creations, so please share in the comments below if you've made your own!
Ready to keep your shower more organized? Let's make!

Step 1: Measure

All good design starts with understanding the parameters of what you're working with. I took measurements of my razor, rounding up to the nearest whole millimeter. Since I wanted to make a few razor holders capable of holding a few different razor designs, I made allowances around the measurement of the neck of the razor to accommodate the few razors we use in the shower.
With the measurements written down I could start designing.
Open up Tinkercadand start a new design.
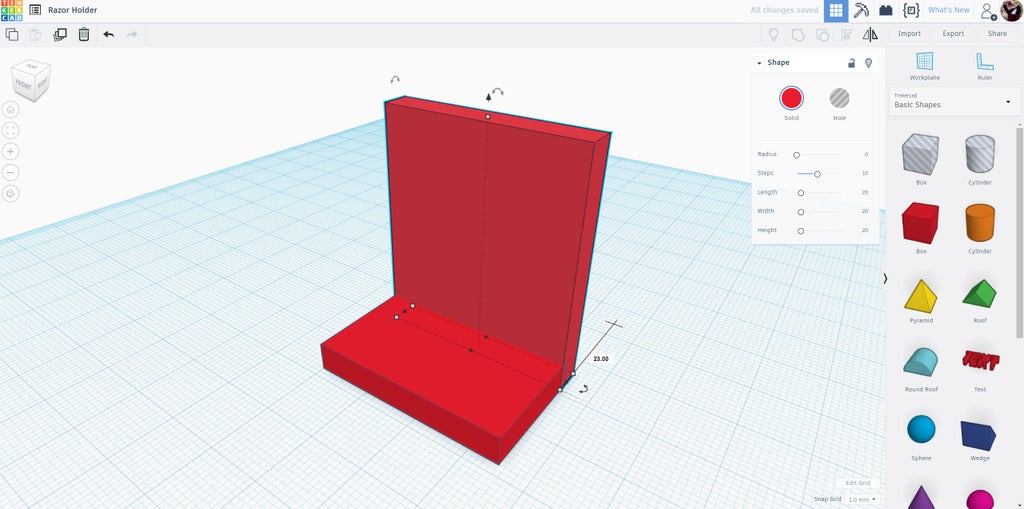
Step 2: 2 Boxes
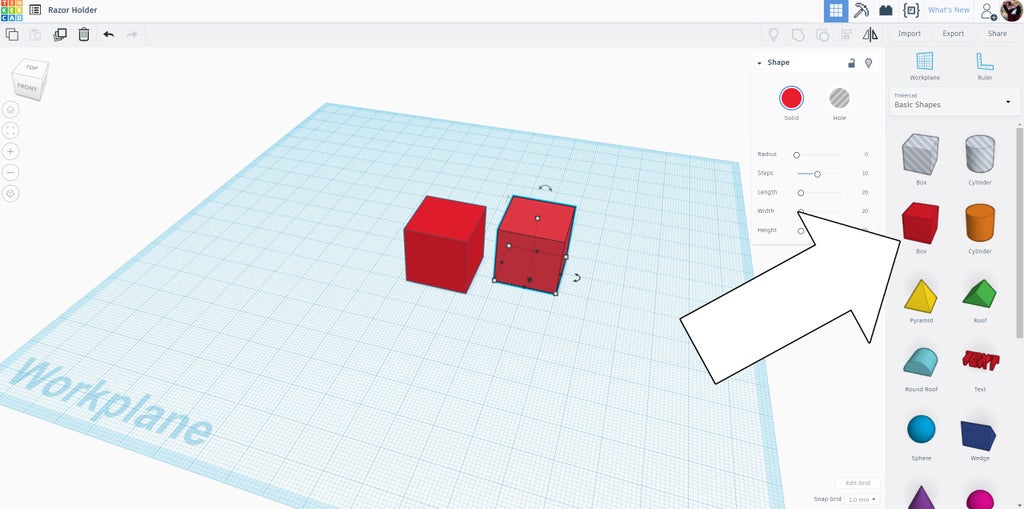
I started by dragging 2 boxes from the shapes toolbar onto the workplane.
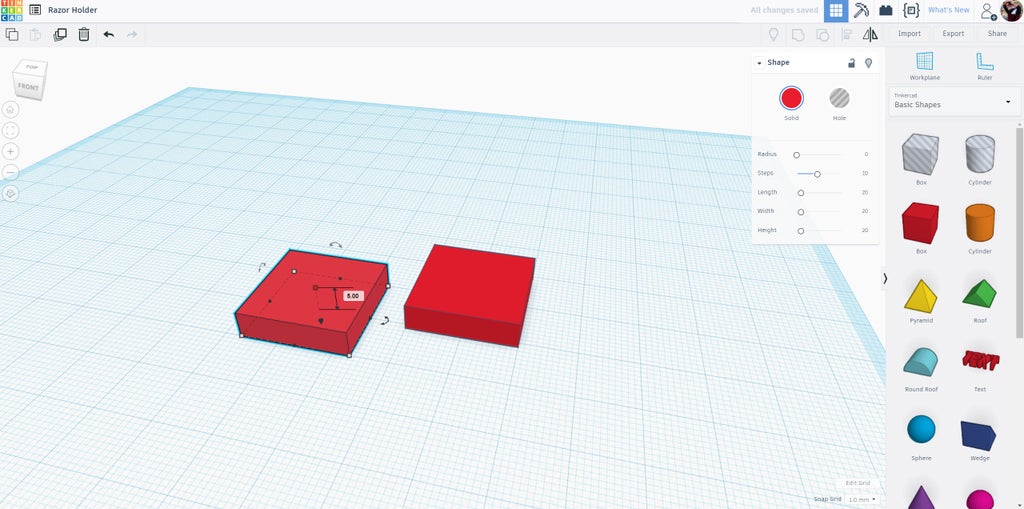
Clicking on one of the boxes I grabbed the white handle on the top of the shape and pulled it downwards to squish the box flat, making it 5mm thick. Then I did the same to the other box.
These two flat boxes will be the base for the razor holder.
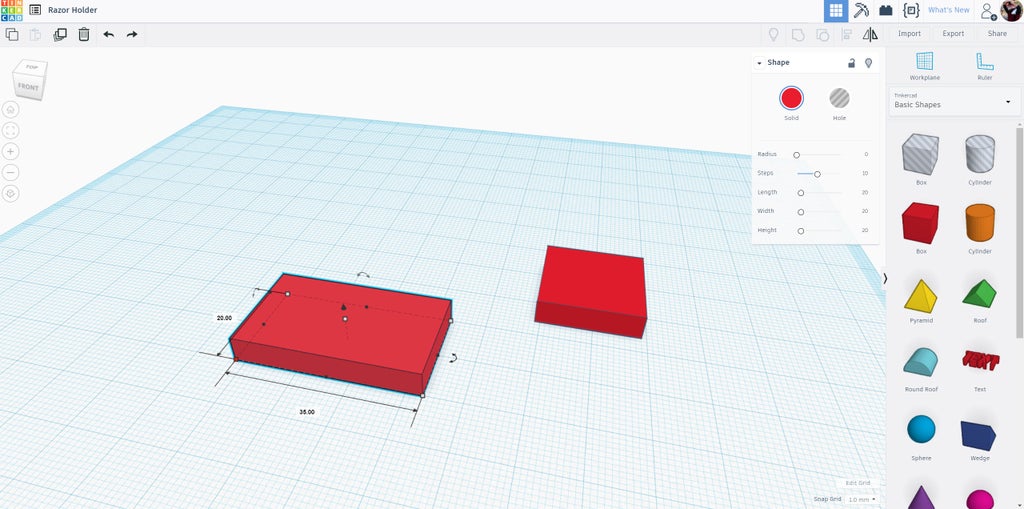
Using the measurements as a guide, I made one of the boxes 35mmx40mm and the other 35mmx20mm.
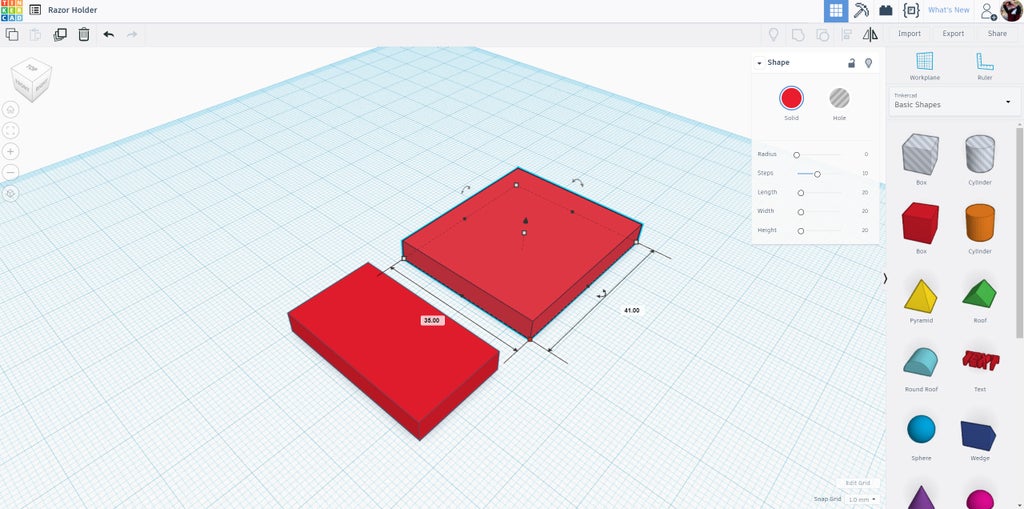
The two sides that were 35mm were aligned next to each other, lining them up so they will mate when the top piece is rotated into place.
Step 3: Rotate and Place

Click on the larger box and navigate to the rotational arrows on the perimeter of the shape on the workplane.
The rotation command is active once the mouse is clicked on the arrow axis you want to rotate around. Holding the mouse button you'll notice a compass appears showing you the angle in degrees the shape has rotated. Rotate the shape until it's 90° to the workplane and forms an L-shape with the bottom shape.
Step 4: Make Opening

Drag a new negative box shape from the shape panel on the right side of the screen.
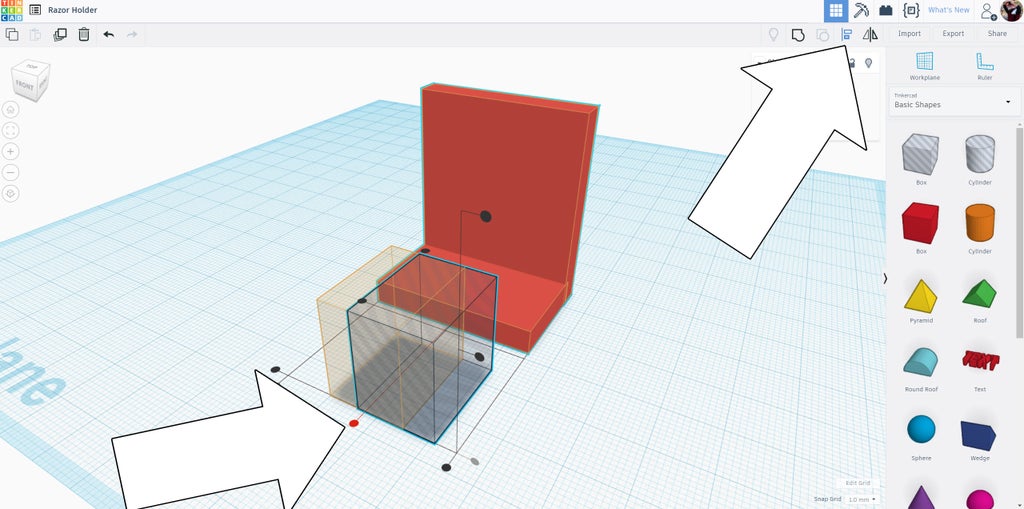
Click on the handles of the negative box shape to input the dimensions. Using the measurements as a reference I made this shape 15mm wide and 20mm deep. Select all the shapes by dragging a window around them, then click the align tool from the top toolbar to alight the shapes.
Move the negative shape into the base, holding shift as you move it will constrain the shape to only move along one axis and not all over the place.
I placed the block so it almost touches the vertical box. This negative space will be where the razor is placed.
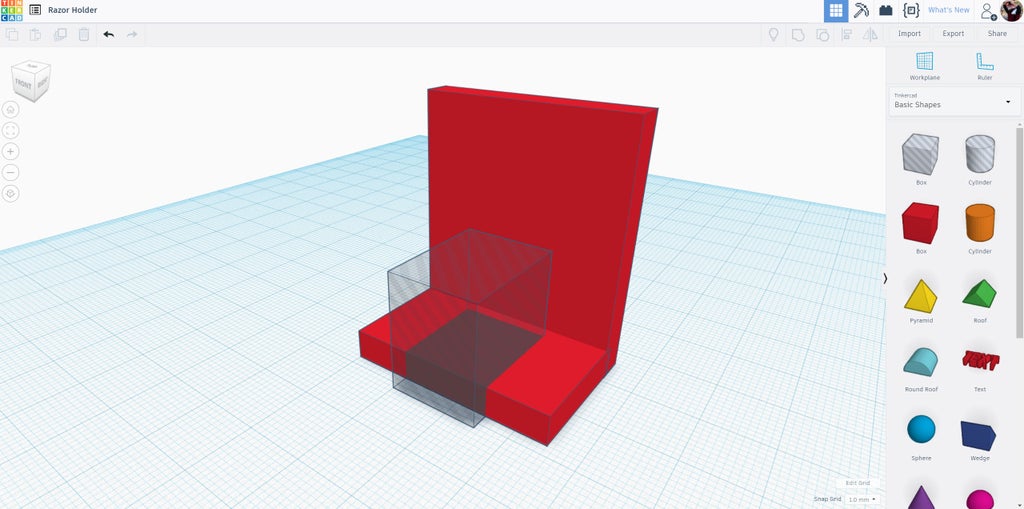
Step 5: Add Lip

To prevent the razor from slipping off the holder I added a lip to the end of the shelf that holds the razor. I grabbed the wedge shape from the shape toolbar and dropped it onto the workplane.
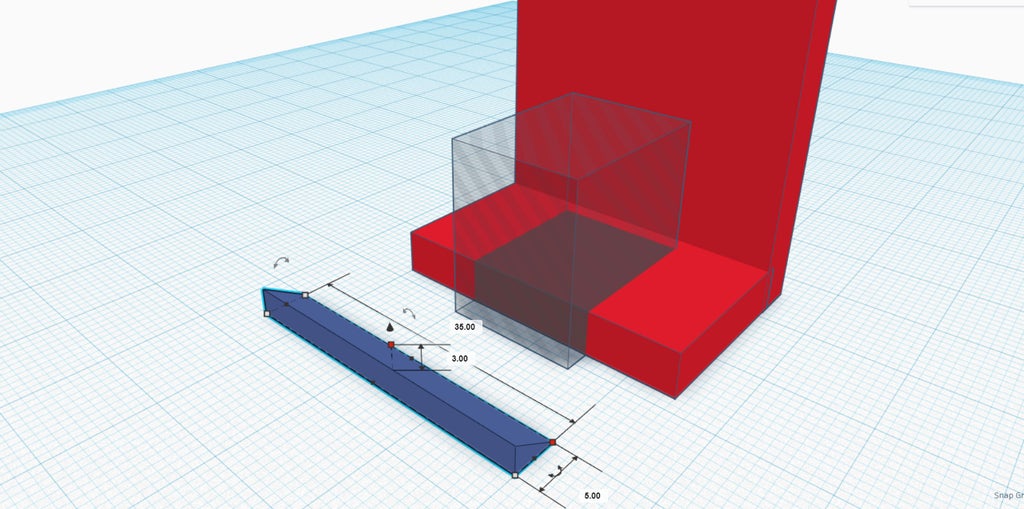
The wedge shape was stretched to the same width as the shelf, 35mm. I then tweaked the height and depth until it looked right, that ended up being 3mm tall and 5mm deep.
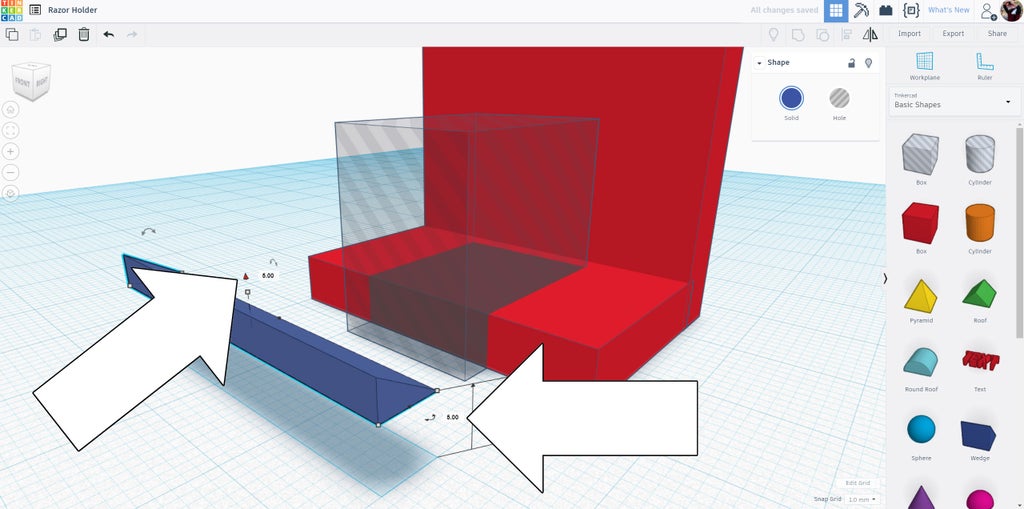
The lip needs to be raised to sit on top of the shelf. Select the long wedge lip and find the arrow above the shape to drag the shape upwards off the workplane. The shelf is 5mm thick, so the lip was raised that amount.
To keep everything neat I selected all the shapes and used the align tool to keep them in the same axis. The lip was then dragged with the shift key to sit on the front edge of the shelf.
With the wedge shape still selected I made a duplicate (ctrl+D), then used the mirror command from the top toolbar to flip the shape and locate it where the shelf meets the upright shape. This will act as a truss that helps hold the shelf to the vertical back.
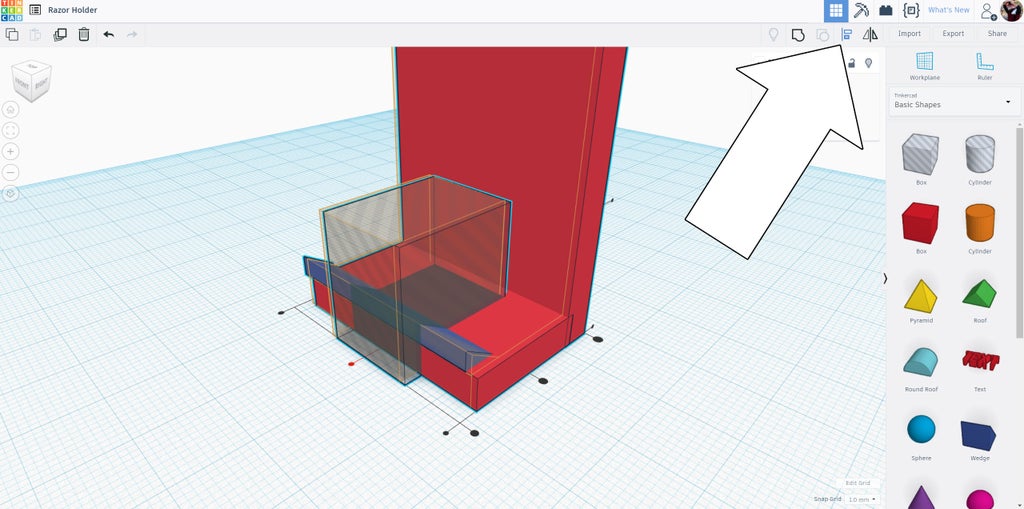
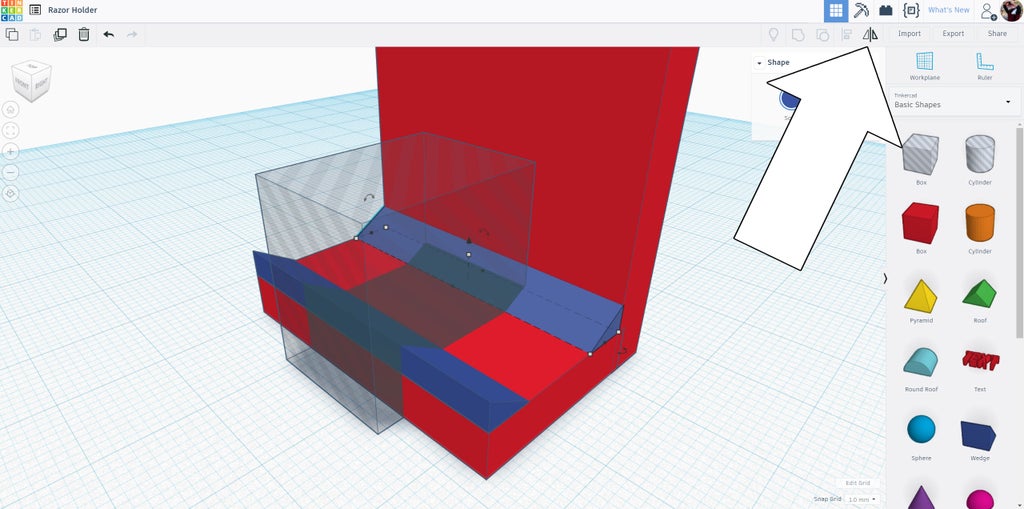
Step 6: Group Together
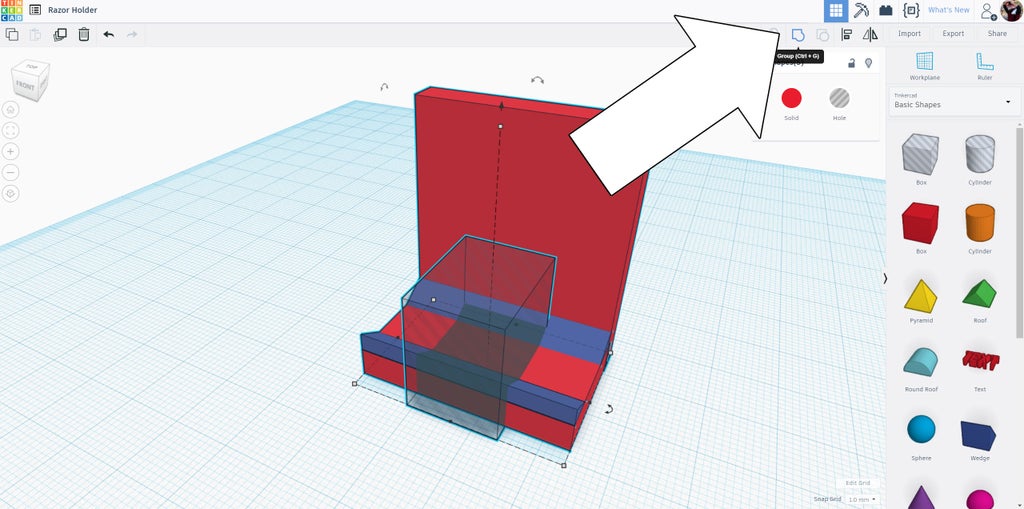
Once all the shapes are lined up and in the right place it's time to group them together and make one shape. Select all the shapes then hit the group tool from the top toolbar.
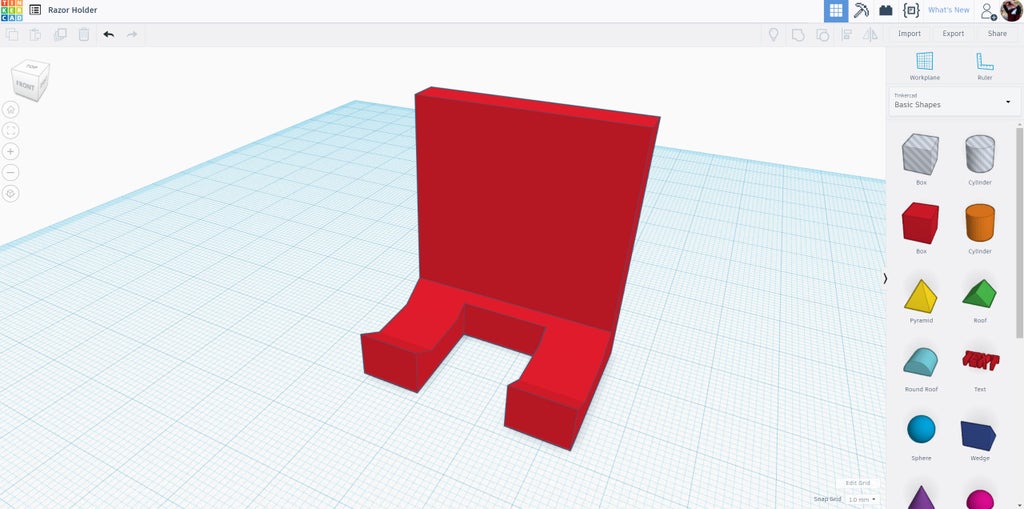
This is what my shape looked like, with the negative space in the middle where the razor will sit.
You could stop here, but why not add a little flair?
Step 7: Text Topper

Select the holder shape and rotate so it lies with the long backing on the workplane. This will not only make it easy to place the text, but it will need to be in this orientation for printing.
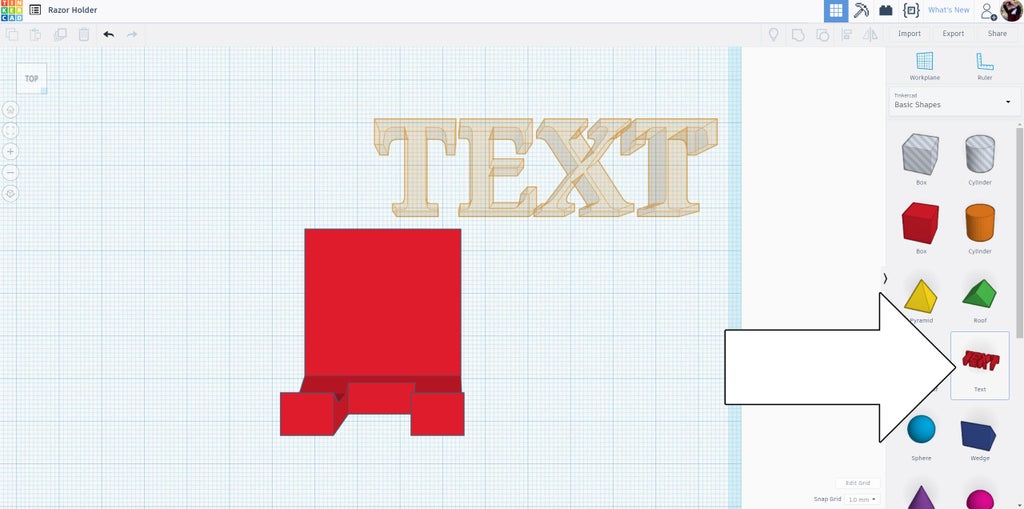
Find the text icon in the shapes toolbar and drag it onto the workplane.
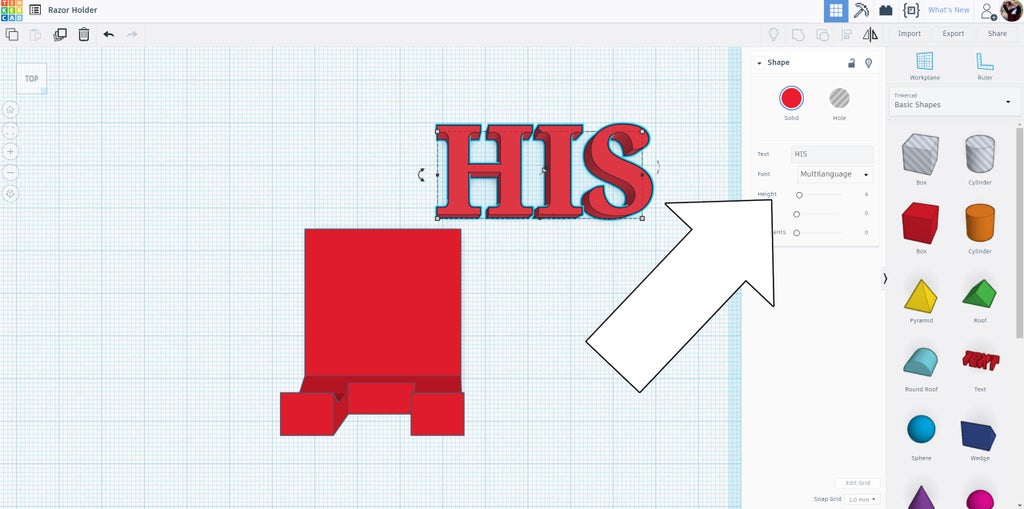
With the text shape clicked a new window pops up which will allow us to define the text and size. To let the letters pop a little more I made them 1mm thicker than the backing, 6mm.
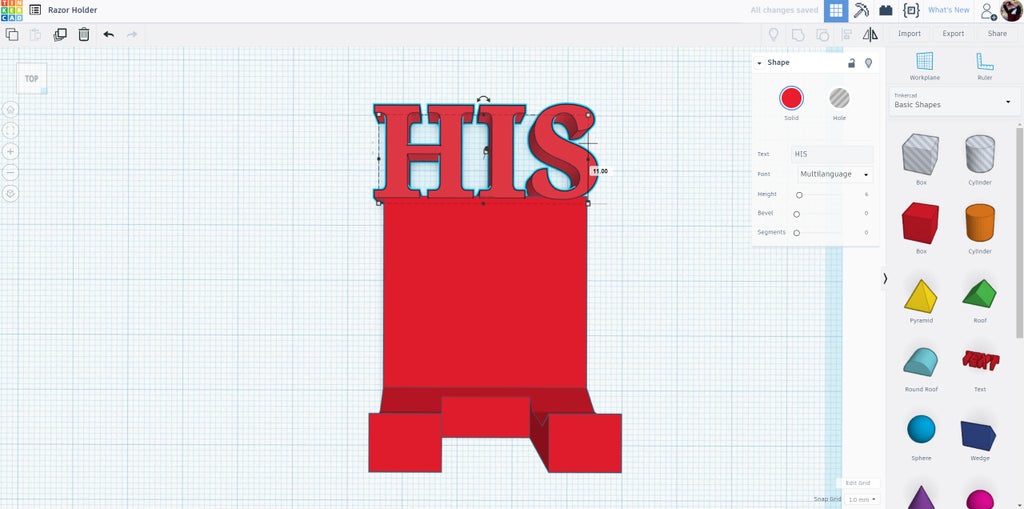
The letters were placed on the top of the holder, using the align tool to keep things tidy.
Select all the shapes and group them together.
Step 8: Round Corners
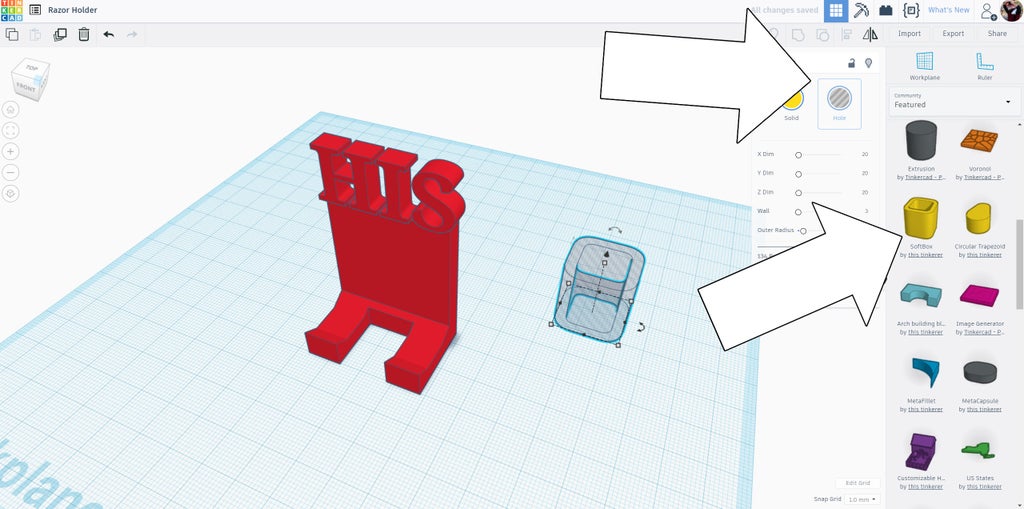
Tinkercad doesn't have the ability to round over sharp edges, but there's a workaround for that.
Above the shape menu is a dropdown that you can select featured shapes. Scroll down on this specialized shape list and find softbox. Drag a softbox onto the workplane and make it a negative shape.
 Align the softbox with the razor holder. We'll use the rounded inside of the softbox to trim up the sharp edges on the bottom of the razor holder.
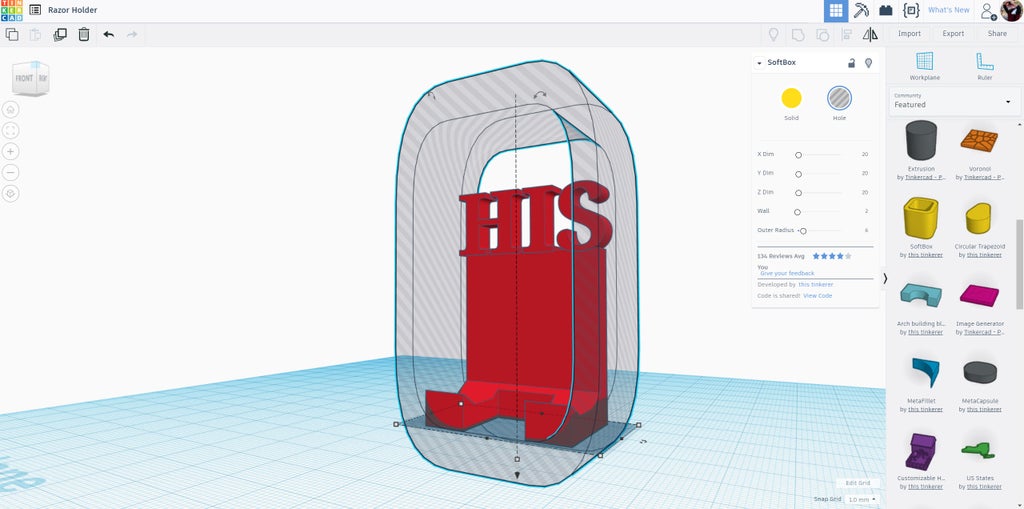
Use the handles on the softbox to stretch the shape until the inside of the negative shape is overlapping with the sharp bottom of the razor holder. I made sure the softbox was wide enough to not trim up the sides or top, only the bottom.
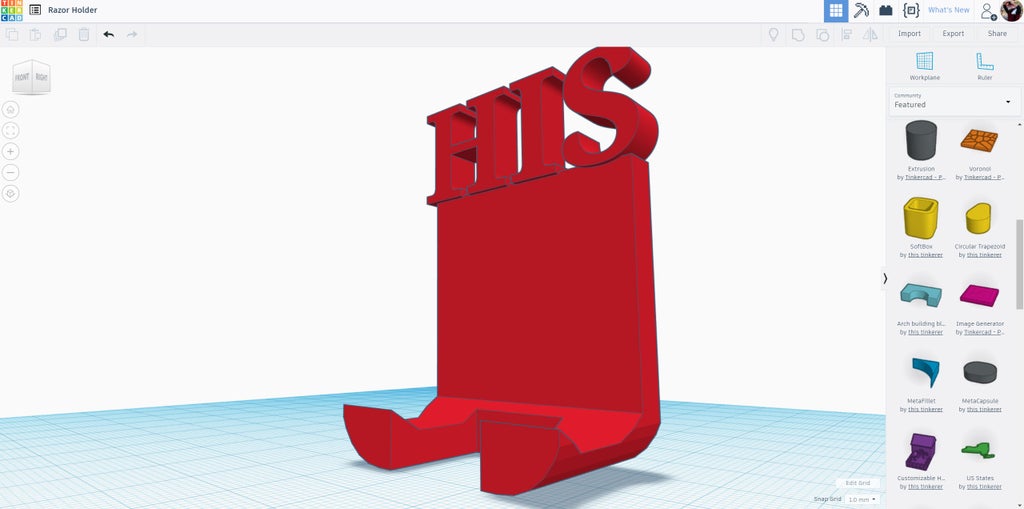
Select both shapes and combine to use the negative shape to trim the razor holder.
Step 9: Print
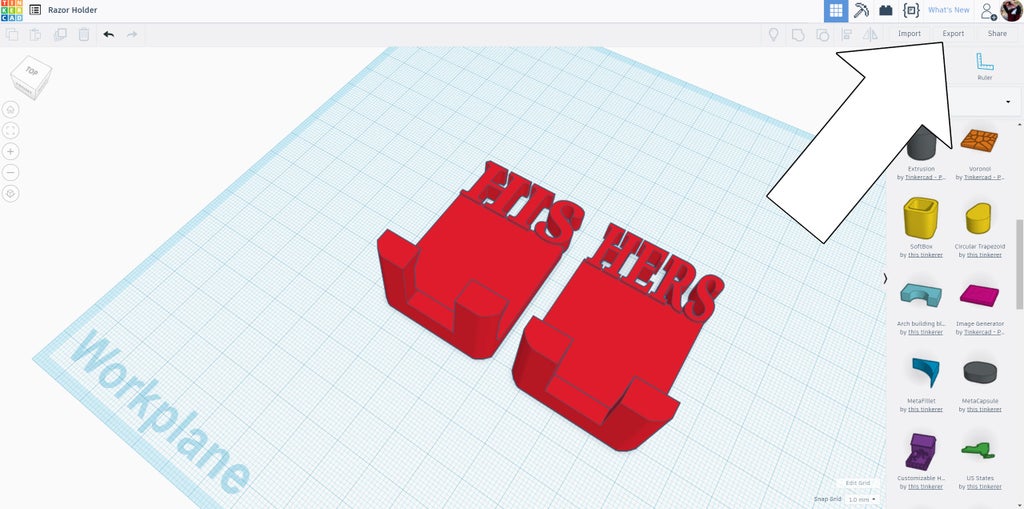
Select the shapes to print and use the export button in the top toolbar.
I printed these lying flat and required no support material. It took about 40 minutes.
Step 10: Stick

I used super strong double-sided adhesive tape to stick the razor holders to the tile in my washroom.
make sure the area you're adhering to is dry and clear of any debris before sticking.
Step 11: Stay Organized

These razor holders are not only functional, but are super fun to see in the shower every morning. The design is large enough to capture both men's and women's razors, and are wide enough to still be used even if we change brands.
Have you made your own razor holder?I want to see it! Share your version as an "I Made It" below.
Happy making :)


