

Introduction: How to Draw, Then Watercolour


I am combining my two previous Instructables to create this one. What I do here is my favorite thing to do with my art. This form of art isn’t very hard, but it does take a while. This took me three total hours to complete.
Supplies
~
~Ruler (optional)
~Paper
~Pencil
~Eraser
~Pen
~Watercolour Paint (paint in a tube is better than a palette)
~Brush
~Water
~Time
Step 1: Pencil


I started with a ruler and drew in pencil then ink the dividing line. Then I erased the line and started drawing the characters. I had a few references to help me decide what to draw for the details. The horse I needed to redraw the head of because it didn’t look correct at all. Then I drew the other character and the background. For the trees I just drew a line for the trunk and pretty much scribbled the rest.

Step 2: Ink and Erase


This step is pretty straight forward. You just need to trace what you want to keep in the final product and erase the rest. For the background, I use a grey pen to show a difference. You need to put your hand firmly on the page to avoid bending the page.
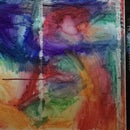
Step 3: Watercolour


If you have read my watercolour Instructable, this will be easy. Just. Find the colours you need and start. If not you should go read that because it will really help here. I added shading to the characters as I went and highlights at the end. Be as creative as you want with this step, its your project. I used a variety of browns and greens, along with other colours.
Step 4: Finish

Good job, you achieved a great accomplishment and should be proud. Frame it, hang it, create a story around it, whatever you want. Good job!


