

Introduction: How to Make a Minecraft Server With Plugins

A minecraft server is something that most gamers want to have. Creating a minecraft server is a lot easier than you may think as long as you have some idea of what you are doing. There are many programs or services that you can use to that will host a minecraft server for you but I will be showing you how to host one on any windows computer you want.
You will need a computer with the following MINIMUM specifications:
1. 1 GB of free space on your hard drive
2. 2 GB of Memory (RAM)
As with almost everything the more of each you have the better.
Step 1: Install Java


For Minecraft to work you need to have Java installed. It is always a good thing to have the most up to date version on Java.
You can download Java here. If you plan to use more than 1 Gig of Memory(RAM) use this link Java 64 Bit and click the 64 bit option.
1. Click the download button
2. Click agree to start the download
3. Click on the file after it has downloaded and allow it to make changes to your computer
4. Click on the Install button
5. A window may pop up asking if you want to verify the version this is optional but is is best if you agree to it
If you already have Java installed you should check to make sure that you have the most up to date version.
Step 2: Downloading the Server


This step is the hardest and most confusing step. By this step you should have the most up to date version of Java installed.
To install the actual server you need to:
1. Create a folder on your desktop called "Minecraft Server"
2. Go to this website and download the latest build. (https://papermc.io/downloads)
3. Copy the paper-xxx.jar file into the folder you made in #1
4. rename the file to "paper"
5. Open a text editor like notepad or notepad++ and add the following to it:
java -Xmx1024M -Xms1024M -jar paper.jar
6. Save the file to your "Minecraft Server" folder as "run.bat" (make sure you select all types!)
7. Double click on the run.bat file you just made
It will download the some files and close the CMD window when its done.
~~~Common Problems~~~
1. If you get an error about the command not being recognized you either made a typo, or java was not installed correctly and needs to be reinstalled.
Step 3: Preparing the Server

After you have downloaded the server the server can't be run yet. It is fairly easy to prepare the server. All preparing the server means is setting how much ram you want the server to use and all the other things like how many people can join and so on.
To prepare the server you need to:
1. Open a file created in the last step called "eula.txt" and change "false" to "true"
2. You can also edit the server.properties file to change things like the maximum number of players allowed on your server. DO NOT CHANGE SOMETHING IF YOU DON'T KNOW WHAT IT MEANS!!!
3. Double click on the "run.bat" file again. The CMD prompt should stay on the screen and some new files should be created.
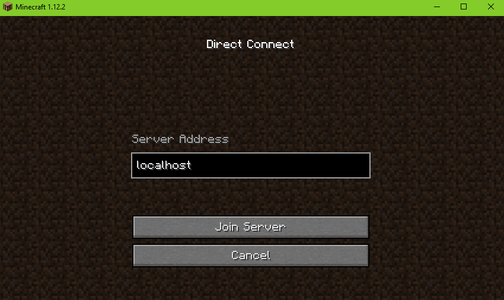
4. You can open the server by double clicking on the "run" file. At this point only you can connect to the server by typing "localhost" into the direct connect box in the game.
Step 4: Letting People Join Your Server


***NOTE***
This step will be different depending on which router you use; however, every router should have the functionality described in this step
So far you have set up the server so only you can use it. The whole point you decided to make a Minecraft server was so that you and other people could play Minecraft on the same world and interact with each other. It would be boring to play all by yourself so in this step I will show you how to let other people join your server.
1. The first thing you need to do is open CMD by pressing the windows key + R and typing "cmd"
2. Now that CMD is open you should type "ipconfig" and hit enter. A screen with a lot of numbers and letters should pop up, this is all of the information about your internet connection.
3. Go down to Default Gateway and copy the the number. It should be something like 192.168.0.1
4. Open the web browser of your choice and paste the number you copied down into the URL address bar.
5. Log into your internet router.
6. Click on the advanced settings and go to the port forwarding section. Click on add new and enter "25565" for the port number
7. you need to open CMD again by pressing the windows key + R and typing "cmd". Find your IPv4 address and use that as your IP address.
8. next you need to find out your public IP address by going here
9. To have people join your server give them the public IP address followed by ":25565". It should look like this "PublicIP:25565"
You and your friends can now play and interact in the same Minecraft world. The IP address is probably not what you were hoping to give people but to have a IP address like "us.mineplex.com" but to do that it costs money and is much more complicated.
Step 5: Installing Mods
You're finally at the point where you and your friends can play and interact in the same Minecraft world, but you're missing one fun thing. MODS! Mods can make any Minecraft game fun or easier and with all the work that you've just put into installing and getting the server working this step is one of the easiest.
1. Make sure your server isn't running, if it is type "stop and press enter.
2. Download your server plugin from a website like this.
3. Drag your downloaded plugin into your plugins folder.
4. Double click on your "run.bat" file and you should have your plugin on your server.
5. If a plugin needs you to do anything else it will have a "read me" file that will tell you what else to do.
Step 6: Update the Server
Updating the server is very easy and should be done whenever a new server jar is released.
~~~Stop the server by typing stop into the server console before continuing!!!~~~
1. Go to https://papermc.io/downloads and download the most recent jar.
2. Drag the file you just downloaded and put it into your "Minecraft Server" folder
3. Rename the file to paper.jar and replace the old one.

Participated in the
First Time Author Contest 2018

Participated in the
Minecraft Challenge 2018


