

Introduction: Improvise ‘a’ Tool


This instructable is about pure improvisation - there always comes a time, when a situation calls for a specific tool and we cannot locate what we are looking for..... This brings in that A-team / McGiver improvisó - A task needs completing and time is of the essence!......Spend an hour looking for it? Or spend a few minutes making it? The option is yours.........???
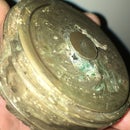
Step 1: Where Is That Cork Screw?


You went out and bought a bottle of nice wine, I mean it has a cork not a screw top! and I’m not being a snob , there are a great deal of decent wines that come with a screw top! Also to note, I am not a connoisseur of wines? Or a quaffer....;-) I digress, getting back to the point of this excise - It is easy to break a cork, if you do not have the right equipment for the job - unless it’s a bastardised plastic cork......?
How to extract a cork without a Corkscrew? (1) Using a Medium Cross Head Decking Screw 3” (75mm), A ScrewDriver (Cross Head) a Large Pair of Scissors or Pliers and a Towel or Glove. First pare back outer plastic cover to expose cork. Next take screw, aim centre and screw to no more than an inch in depth. Now take bottle in one hand as you would normally and with other hand gloved or with towel, take pliers or scissors, grip and pull vertically..... the cork should pull out- do not use a fine threaded screw - my green decking screw works like a charm - yes I could just buy a proper one but this is an emergency......;-)
Step 2: Essay & Sharpening a Conventional Drill Bit


Now suppose we have just broken a Screw/ Bolt - maybe because of over tightening it or it was seized and the head broke off?
You know there is a good chance it will unscrew but cannot get a purchase on it - It is of conventional thread and only have conventional drill bits what should we do?
Using an easy out is risky and requires a pre drilled hole - and we do not have an easy out or a left handed drill to hand either......??
A drill is sharpened at an angle of roughly -1o less than 60o’s or 59o’s to be exact - the total of each side is 118o’s with a slight raised angle on the top to give a cutting edge a degree above 90 o’s - to achieve this - you first place the left side of drill at this angle, with the flute also to the left, then when done, you spin the opposite flute 180o’s from right to left, which becomes the mirror or opposite angle.-
******
To make a reverse drill we reverse all the angles. Starting with the the right half of the drill at a 59o angle towards the right - with flute to the left as before.
Then turning through a 180o angle we do the other half equally with a slight incline to achieve the top cutting angle, a degree greater than 90o -
Now using the drill bit anti-clockwise in a drill it becomes a reverse out drill.....
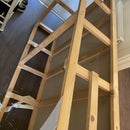
*********Step 3: Honing Tool for Deep Bore


I spend my day to day as an mobile engineer, I am presented with different kinds of problems with varying degrees of difficulty-
The thing that makes it worse is not having a fixed base or workshop to make tools that I need - so an easy task can sometimes end up harder than it should be but this is the nature of things.
I was asked if would take on a job, this particular task was simple but, never under-estimate simple as it can bite you on the ass.....!
I had to basically improvise 95% but I did successfully achieve my goal.
This is how - after intial assessment and wasteful toying with the task, soon realised I needed a proper tool......
I am very determined and like recycling - so I needed a ‘flapper wheel’ of 30mm I only had 40mm so I had to make it smaller - I achieved this by cutting some 30 segments 5mm smaller, after successful completion I needed a shaft to mount the spindle onto.
Taking a Drop-Link, I cut off each ball joint now I have a very long, straight shaft of around 10mm. Taking an M10 nut, I then tack welded it to the shaft, at each stage, checking for concentricity by placing it into a drill.
Once I was happy it was without wobble, I completely welded around the circumference, then put a chamfer on it to make it neat, using a bench grinder -
I then took an M6 flanged nut with the thread drilled out, to suit the shaft of the flapper wheel.
I welded this in the same fashion, also checking for wobble and surprisingly enough I could not have got it straighter in a lathe.......
Step 4: Make a Drill Bit From a Piece of HT Steel


Some times you may need a drill bit for wood, plastic or plaster, but need one that is a little longer then what you have to hand - even if it is just for pilot hole for dowels or marking a hole on wall that your pencil can’t reach and so on
- All you need is a bench grinder and a piece of high tensile steel- first off we need to know which angles can cut and which part of the wheel will help us get them...
First of all make a flat on each side parallel to each other.
Then taking the top-end flat portion tilt as to make a cutting face and angle to roughly 59,60o - until half of this flat is angled then rotate 180o and repeat ( Ref: Images)
Next tilt this angle inward towards the edge of the grinder - to profile (curve) the inside of the cutting and to reduce overall width.
Now try for cutting - these angles can be played with to alter cutting face centre and pitch - but it is not impossible to make a drill from blank rod of high tensile steel.....


