

Introduction: My Diy Peltier Cooler! - DECOMMISSIONED


I always wanted a means to keep groceries cool enough in my car without having to rush home to my refrigerator. I decided to use an old Peltier heat exchanger I made a few years ago.
I sandwiched the Peltier between two aluminum heat sinks. The bigger one being the hot side. I used plain off the shelf steel epoxy to stick the heatsinks onto the Peltier and it has held firm for a few years plus the heat transfer capability is great!
Step 1: Modding a Cooler.

Using a cheap 24 quart cooler, I went about modifying it to fit the heatsinks.
Step 2: Making an Opening.


I used the cold heatsink to mark the lid of the cooler. Next I cut a rectangular opening to be able to slot the heatsink in.
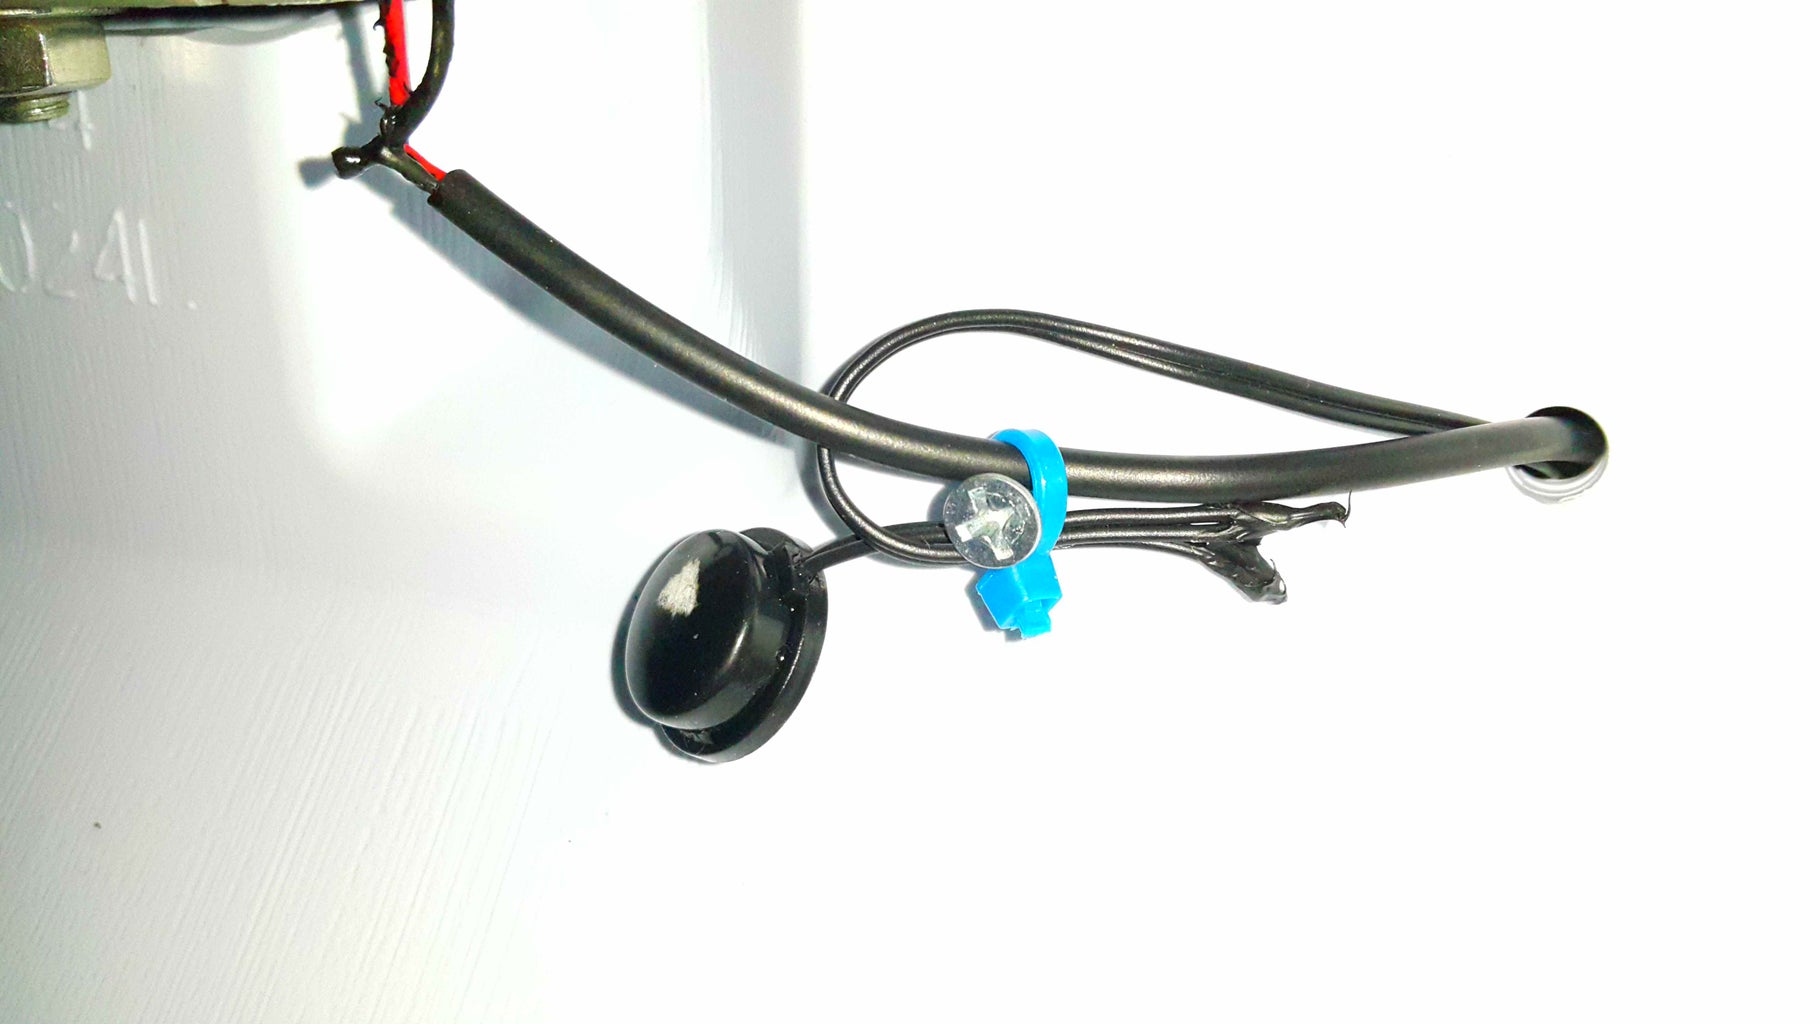
Step 3: Securing the Peltier Assembly Onto the Lid.


I used a long bolt and nuts to clamp the cold heatsink and thereby hold the entire assembly onto the lid.
Step 4: Installing a Recirculation Fan.

Using a spare blower fan, I secured it to the underside of the cold heatsink fins. This will keep the cold air in circulation over the groceries.
Step 5: Temperature Measurement.
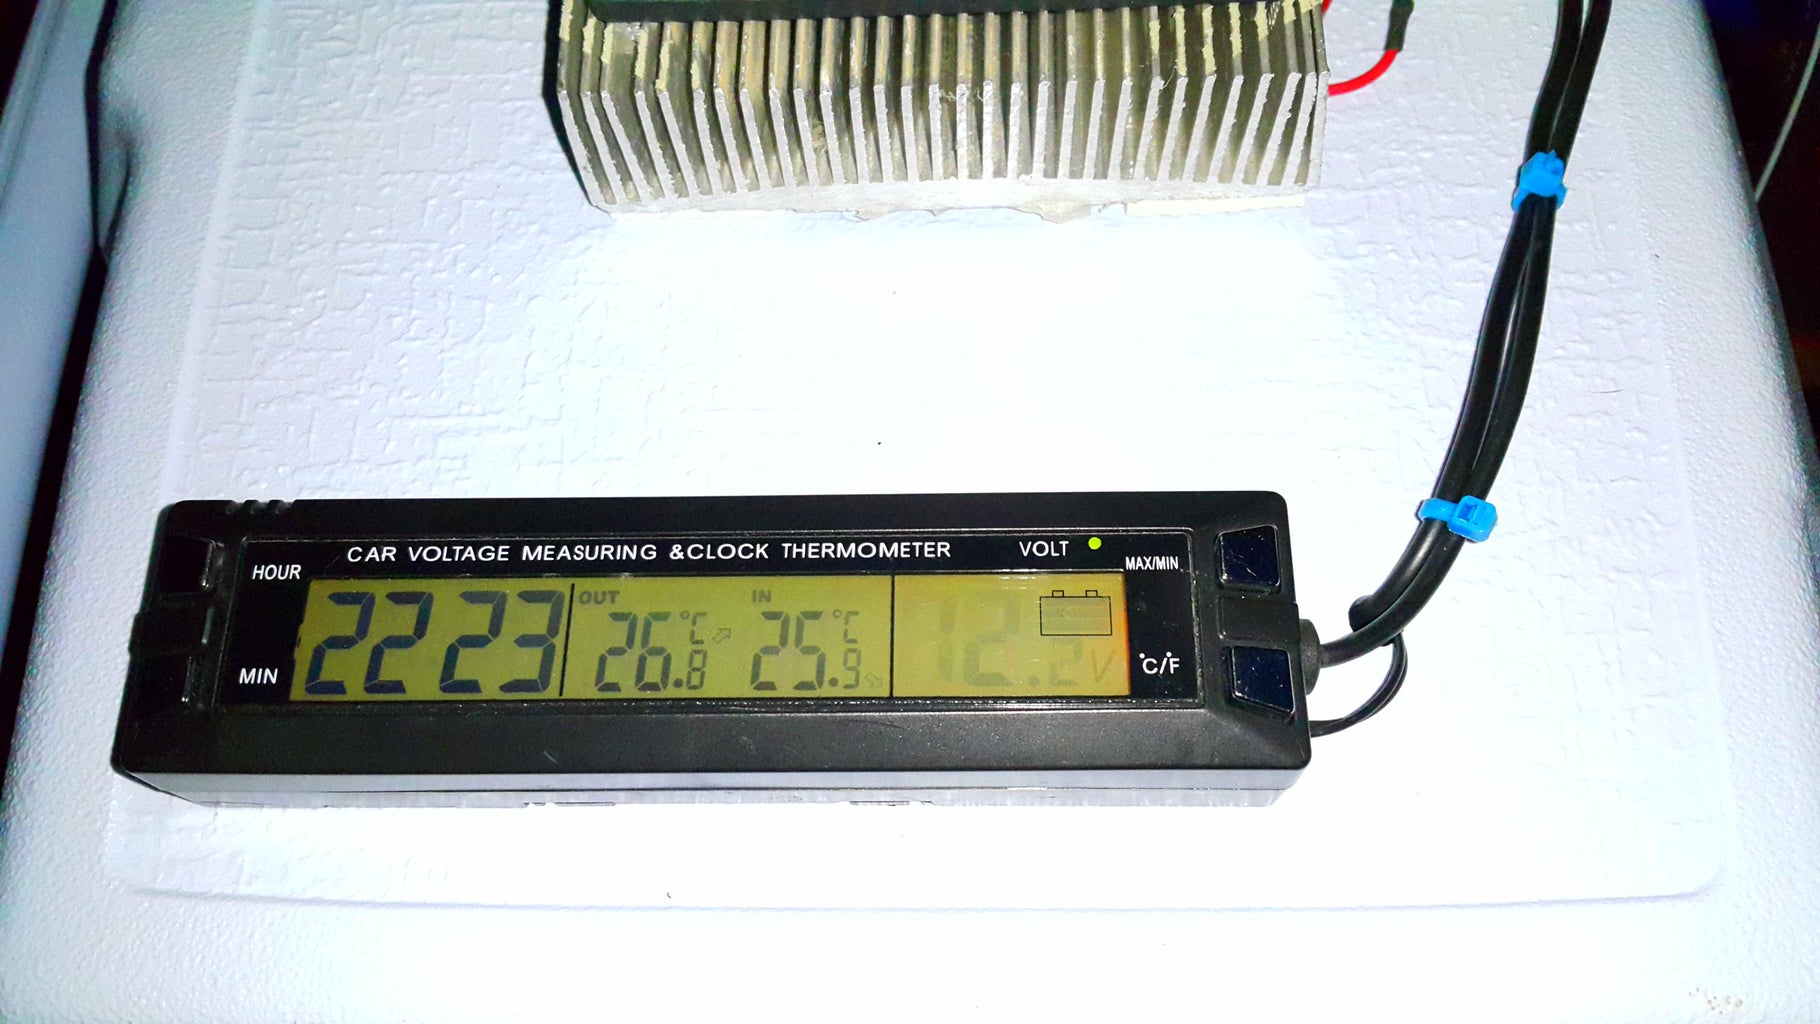
I had a spare digital thermometer that I siliconed onto the lid. Its sensor I stuck on the underside of the lid. Now I can easily tell the inner and outer temperatures to gauge the performance of my chiller.
Step 6: Getting Power to the Chiller.


For 12 volt power I used the standard car socket plug to give me the 5 Amps my setup requires. The power chord to the chiller I secured to the lid.
The power chord is split into 2 parts so I can power it from a wall adapter or the car 12 volt supply.
I actually used a 5 volt adapter to keep cold food chilled if I'm powering it from household voltage. At 8 watts I can safely keep cold foods cold! Once already cold food is in the cooler, that 5 volt adapter will be sufficient to maintain the coolness. Peltier devices are actually more efficient when powered from low voltages but they won't move as much heat.
Step 7: Testing and Completion!


My low cost diy Peltier chiller cooler works as per my expectations. I'm happy with the 2 hours involved in Making this neat little chiller.
I will keep it in my car so anytime I get groceries or medication, I don't have to worry about it getting warm!
I hope this instructable has been interesting to you folks.
Update: 4 hours later.
The steel epoxy gave out after 3 years of holding the setup together.
Step 8: RECOMMISSIONED!


After the failure of the expoxy with the first Peltier, I used another one I had in storage. I secured it with cable ties to the lid and it works well enough but not as good as the original heat exchanger. The plus side is it uses half the power as the original.
Step 9: Revamp!

I have since upgraded the cooler with this updated instructable:
https://www.instructables.com/id/Making-a-Beefy-Peltier-Cooler/
Check it out!


![Tim's Mechanical Spider Leg [LU9685-20CU]](https://content.instructables.com/FFB/5R4I/LVKZ6G6R/FFB5R4ILVKZ6G6R.png?auto=webp&crop=1.2%3A1&frame=1&width=306)


