

Introduction: Easy 3D Printing Class: Name That Keychain


In this project, you'll learn how they can make a keychain by connecting letters together to make a solid object for 3D printing.
I'll be using my Instructables alias, but you can make any word you want.
You can follow along with this lesson by opening the Name that Keychain project for a step-by-step guide in the Tinkercad interface.
Step 1: The Editor
Here's a quick video to get you acquainted with the editor interface where you'll be doing all your 3D modeling. It covers changing the view, where to find objects, and where the tools are and what they do.
Step 2: Select Your Letters

If you don't see the panel on the right side of the window, click the arrow in the middle to expand it.

Expand the Text panel on the right side of the screen, then click and drag the letters onto the workplane.
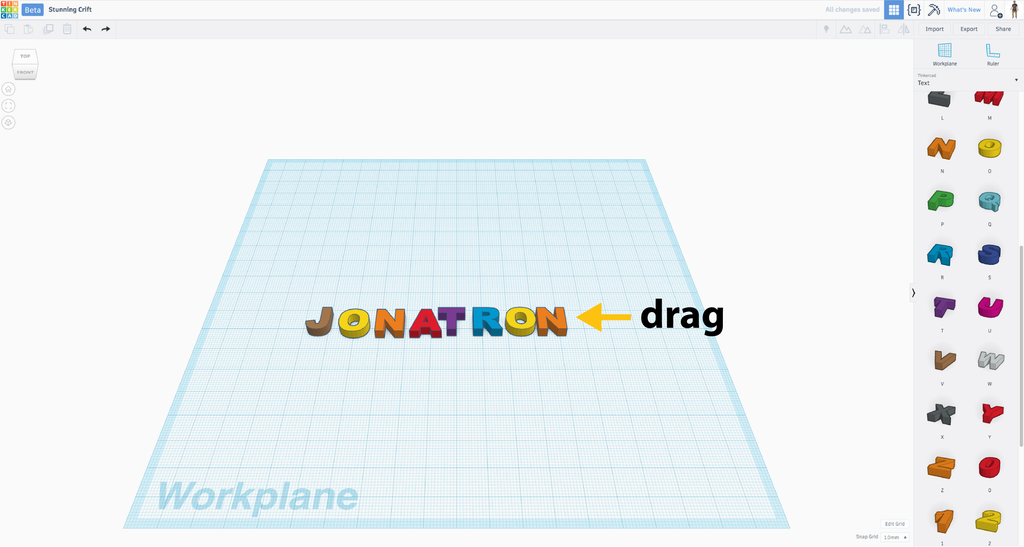
Drag each letter of your name onto the workplane. Remember: I used the letters of my Instructables alias, but you should use the letters from your name or any other word you would like to turn into a keychain.
Step 3: Align the Letters
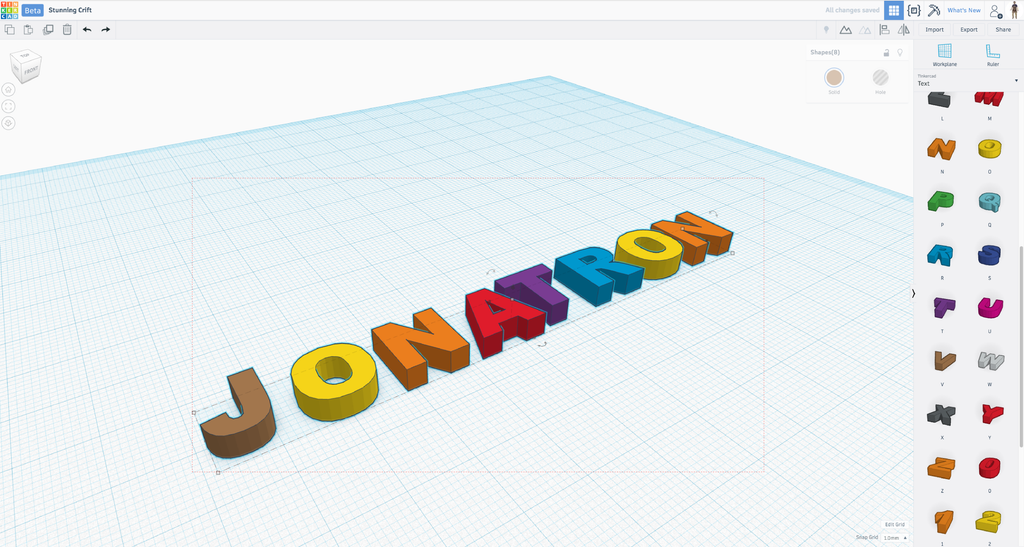
Select all the letters on the workplane.
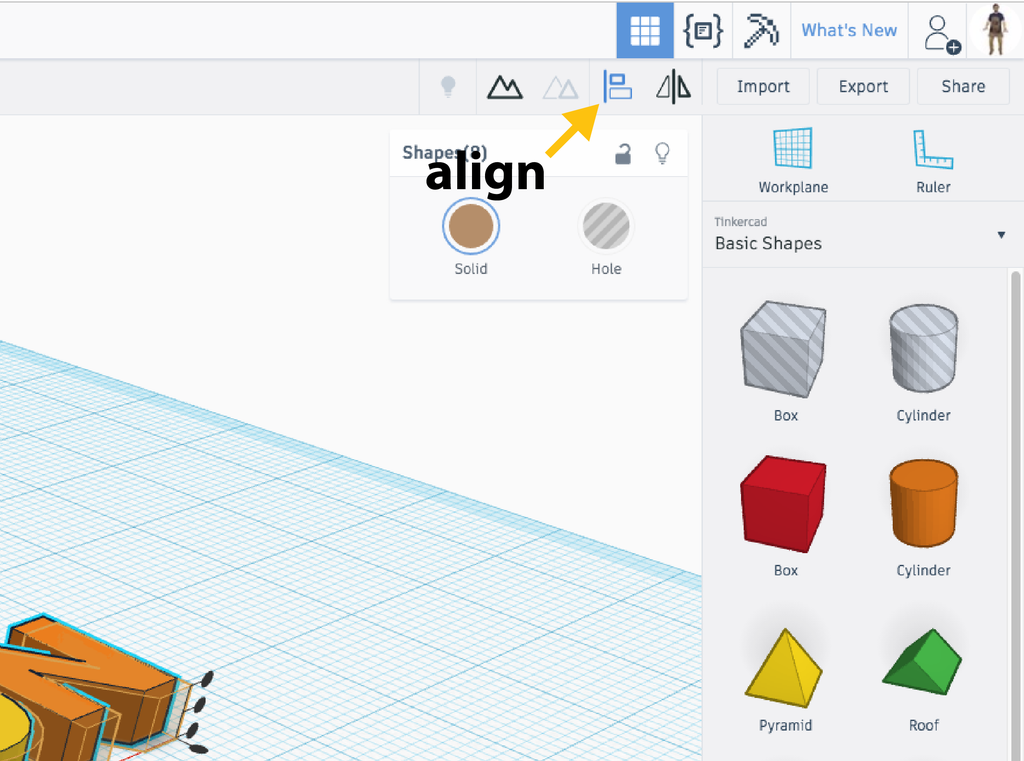
Select Align from the Adjust menu on the toolbar.
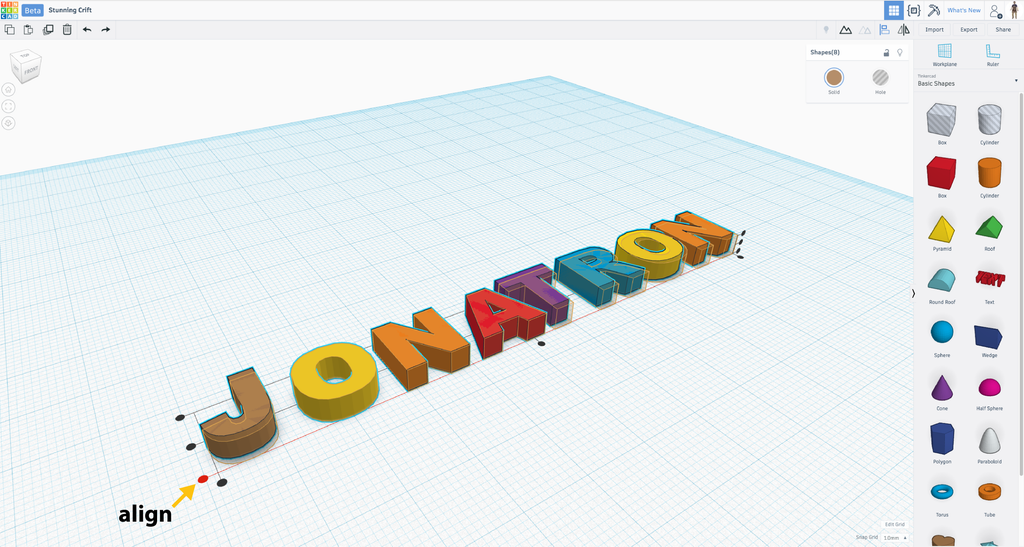
Align the letters so the bottom of each letter is in line with the others by clicking on the black dot.
Step 4: Make the Letters Overlap

Rotate your view so you are looking down on your name by clicking Top on the View Cube. Select the second letter in your name and use the arrow keys on the keyboard to nudge in closer to the first. Note: Each letter should overlap the letter before it by about 1mm, but this doesn't need to be exact.

Repeat the previous step for each of the remaining letters in your name. When each of the letters is overlapping the letter before it in your name, you are almost finished.
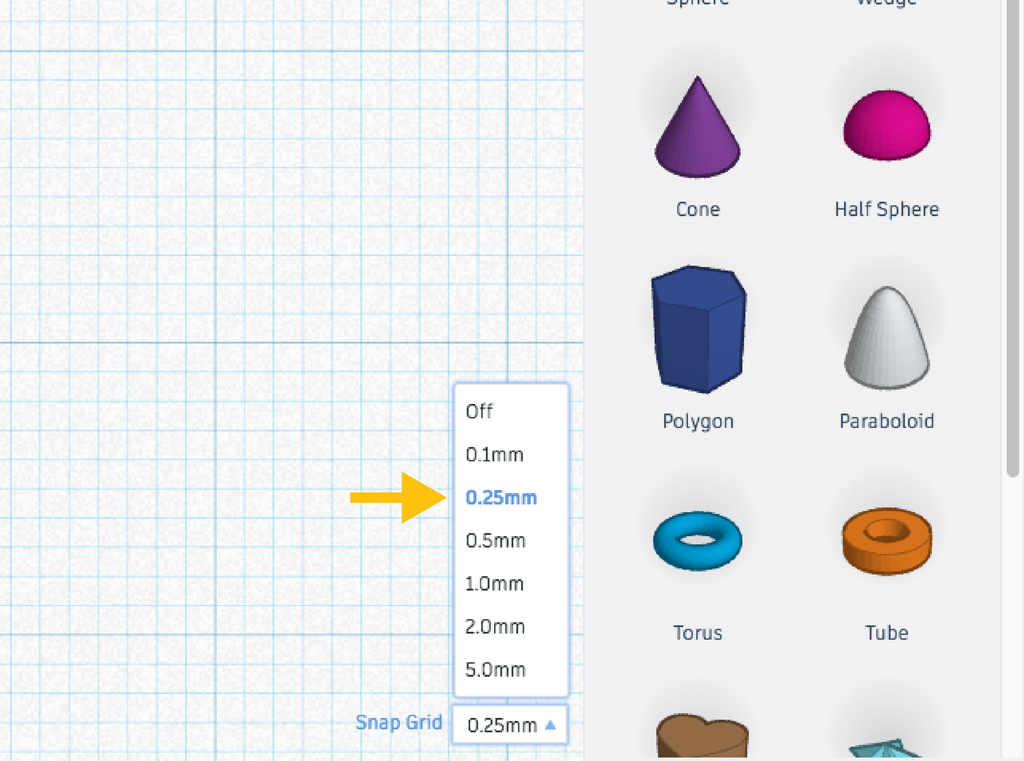
Not all the letters are the same width and you will probably find that some letters overlap more than others. If you want to fine tune how much your letters overlap you can set the grid snap to 0.25 and use the arrows on your keyboard to adjust the amount each letters overlaps it's nearest neighbor.

Step 5: Adjust the Letter Height
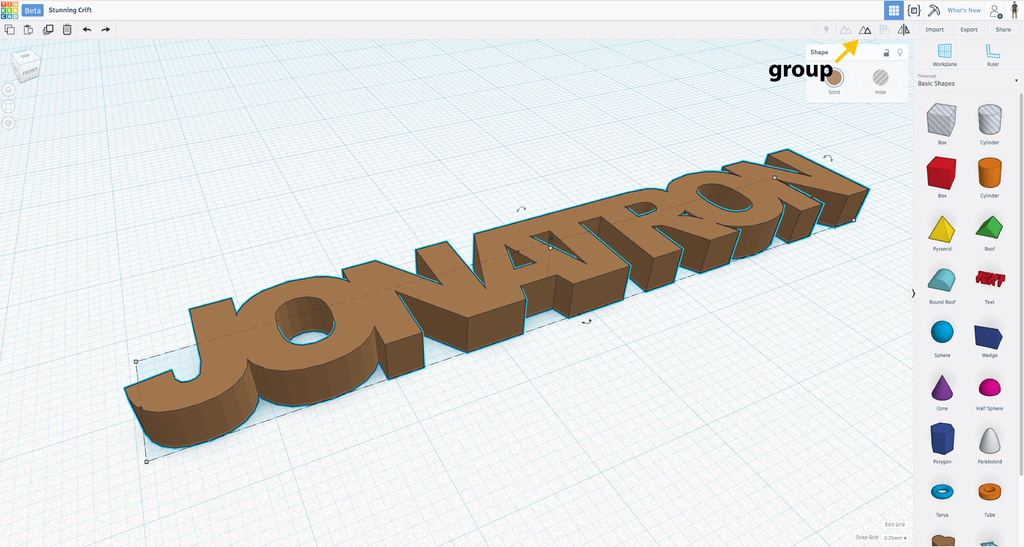
Select all your letters and group them into a single object. To do this, click and drag a box over all the letters, then click the Group button in the upper right corner of the editor as shown in the picture above. Is your name a little hard to read like mine was? Let's fix this.
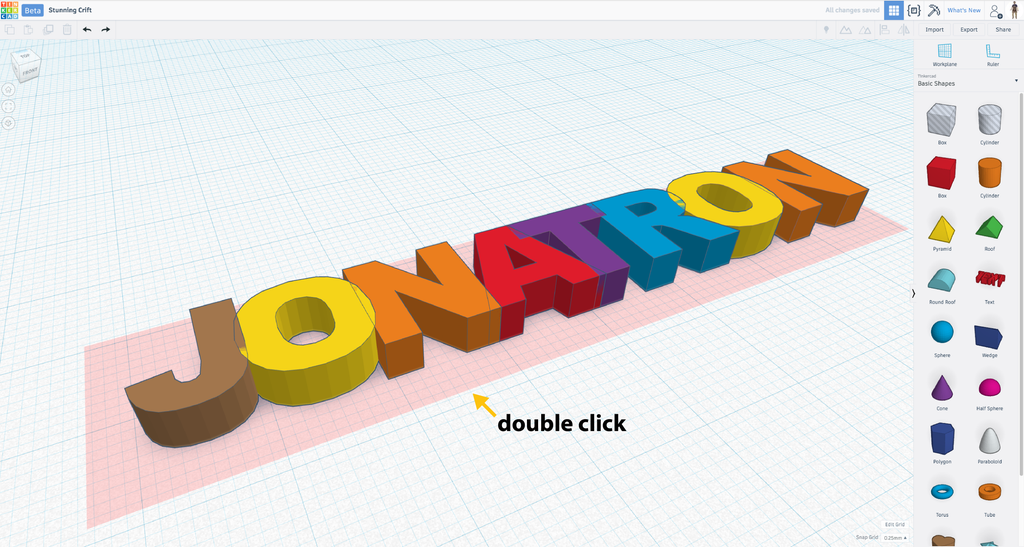
Double click on your name to edit the group. Note: You will know you are editing the group if you see a red rectangle under your letters. The letters should also return to their original colors while editing the group.

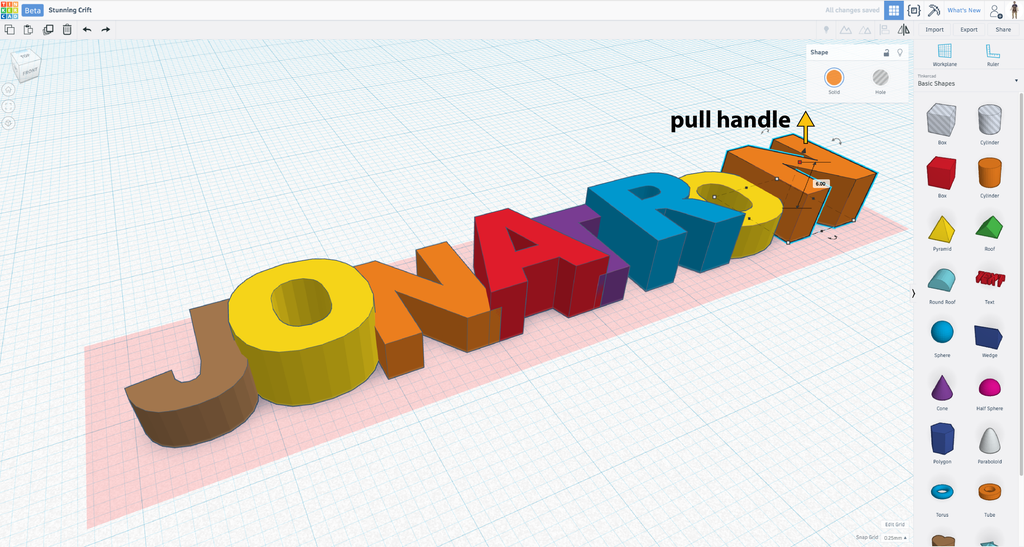
Select the second letter in your name and use the white dot (handle) on the top to make the letter shorter than letter next to it.
Repeat the previous step with every other letter in your name. By doing this we will be able to see each of the letters in the group better when we finish editing the group.
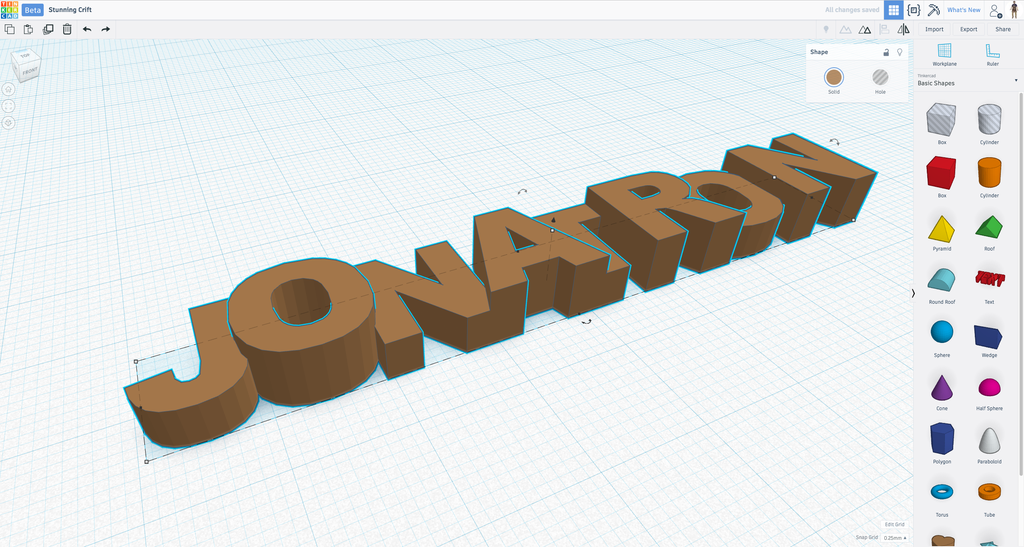
Click anywhere on the workplane outside of the red group edit rectangle to finish editing the group. You should see your name change back to the group color and it should be much easier to see each letter.
Step 6: Add a Keyring Loop
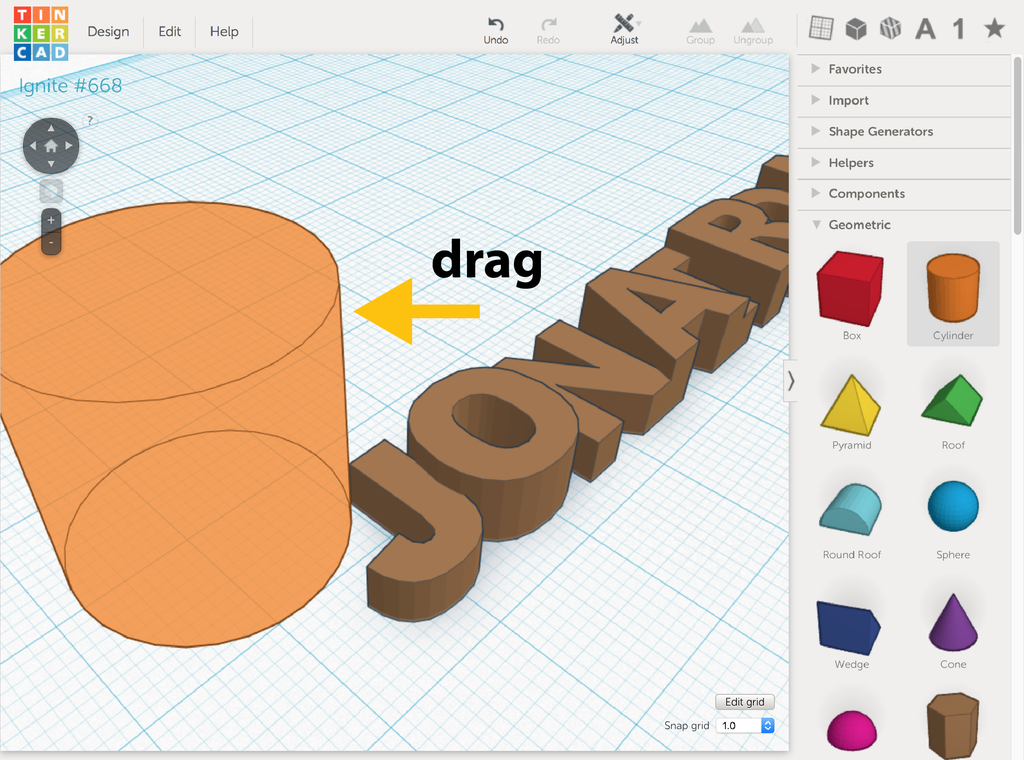
Drag and drop to place a cylinder on the workplane.
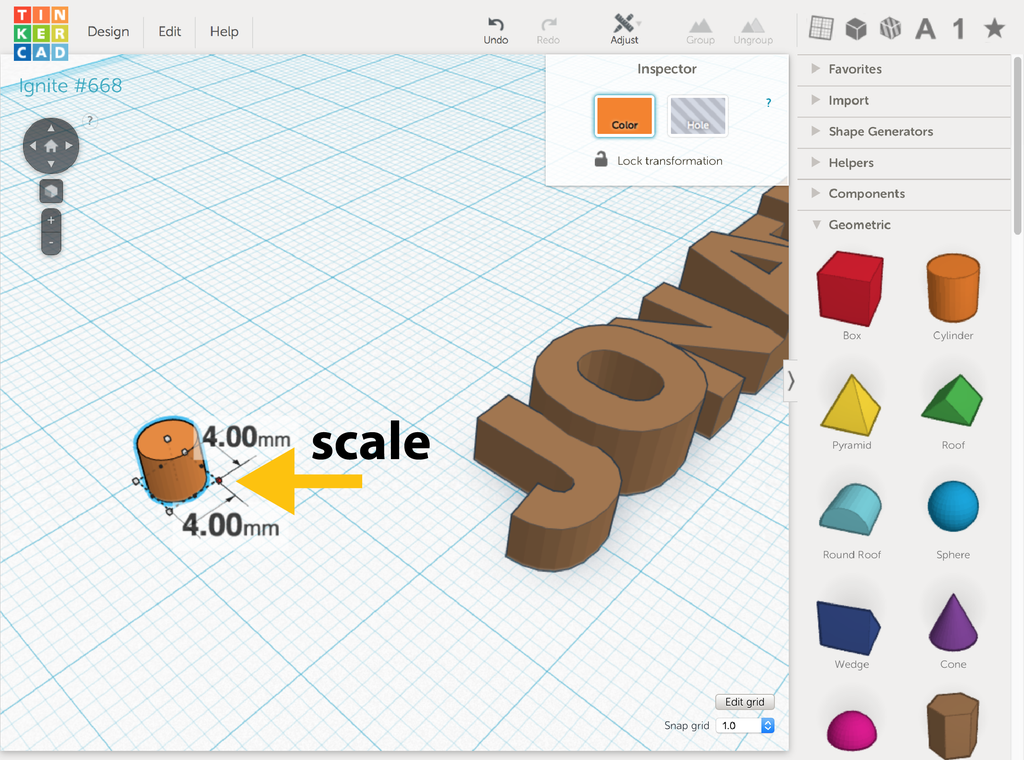
Shift + Drag the handle on the workplace and make the cylinder 4mm X 4mm in the X/Y dimensions.
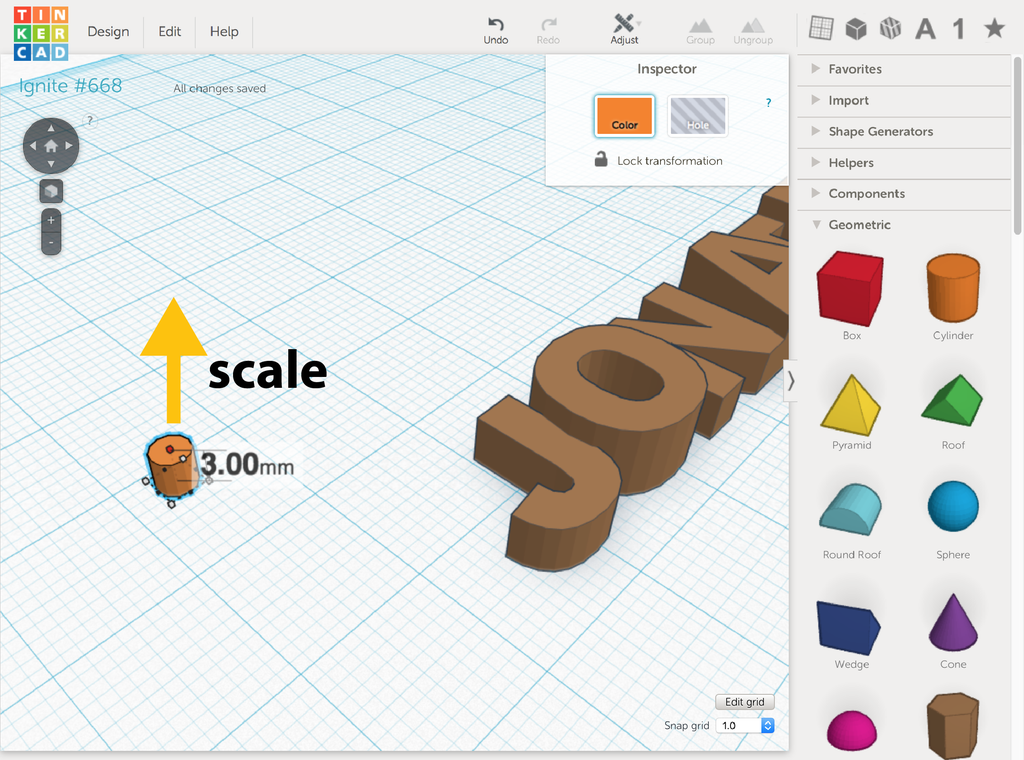
Drag the Z dimension (vertical) handle to make the cylinder 3mm tall.
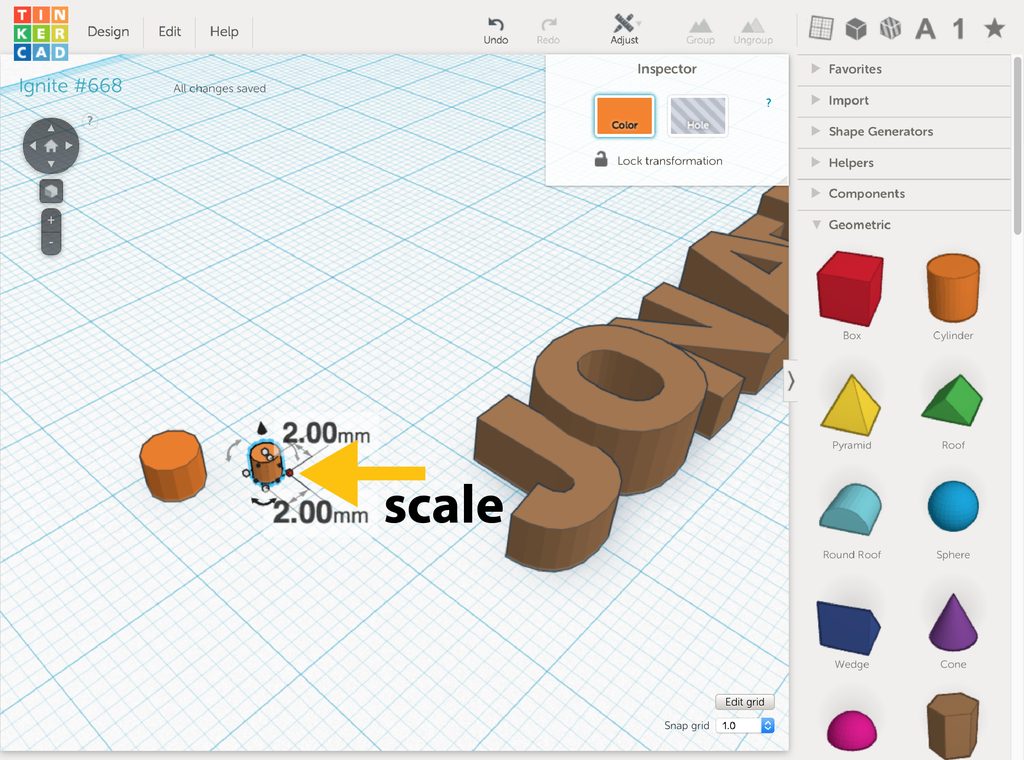
Drag and drop to place a second cylinder on the workplane and size it to 2mm square.
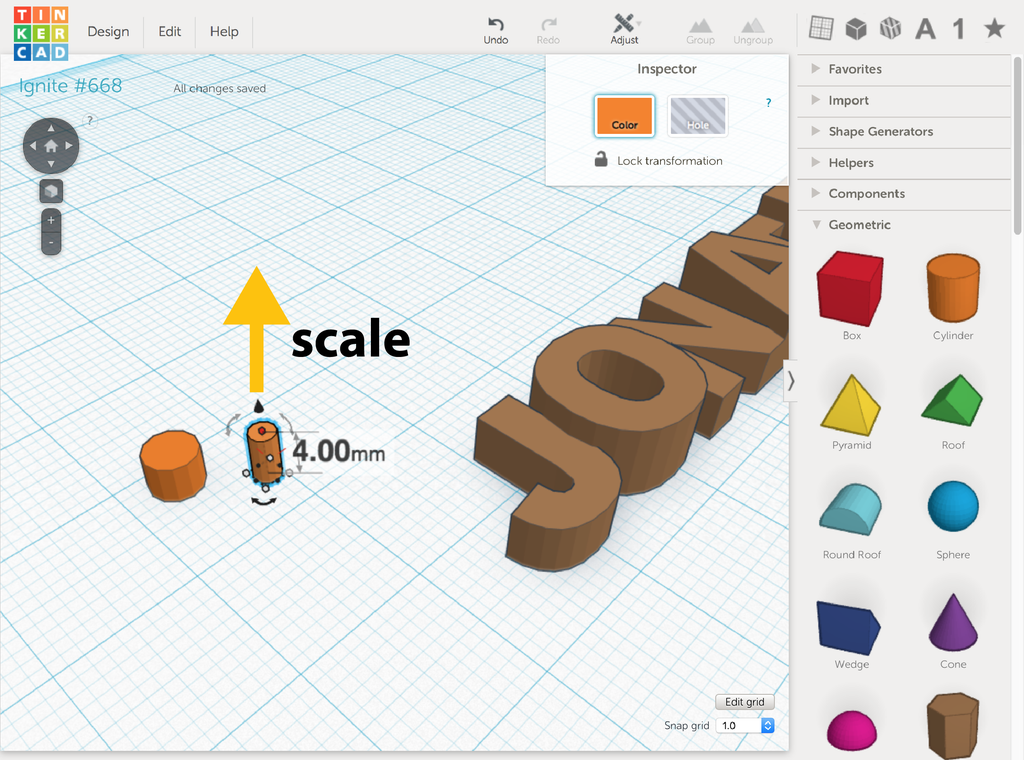
Drag the vertical scale handle to 4mm tall.
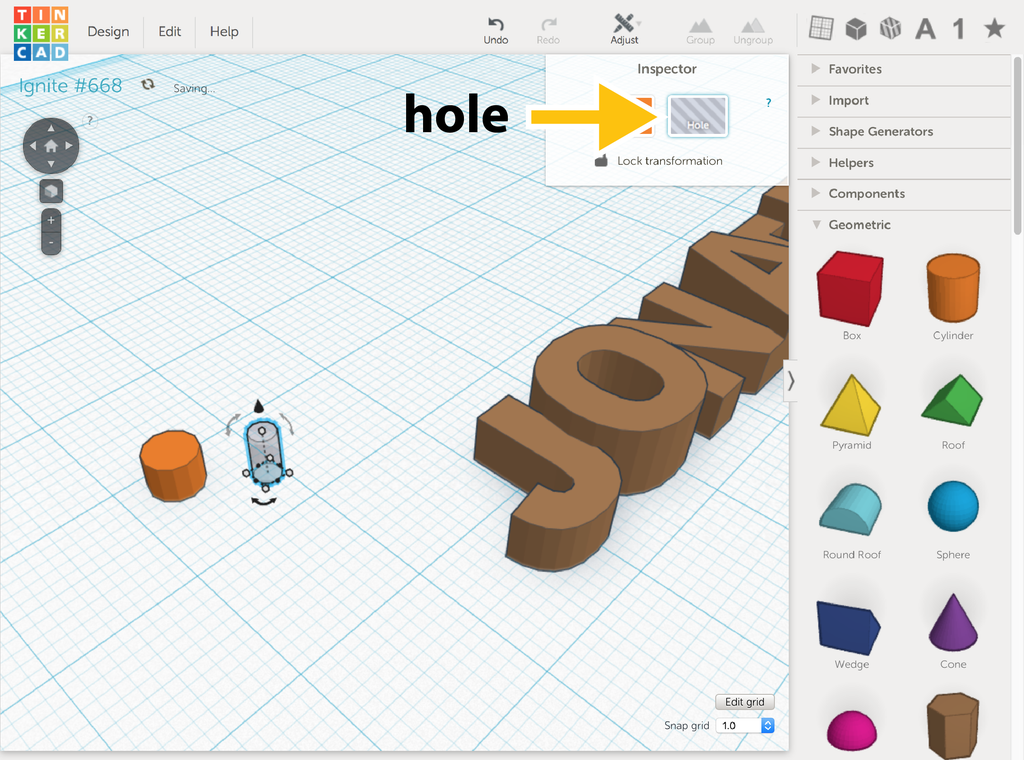
Select the second cylinder and make it a Hole in the inspector window.
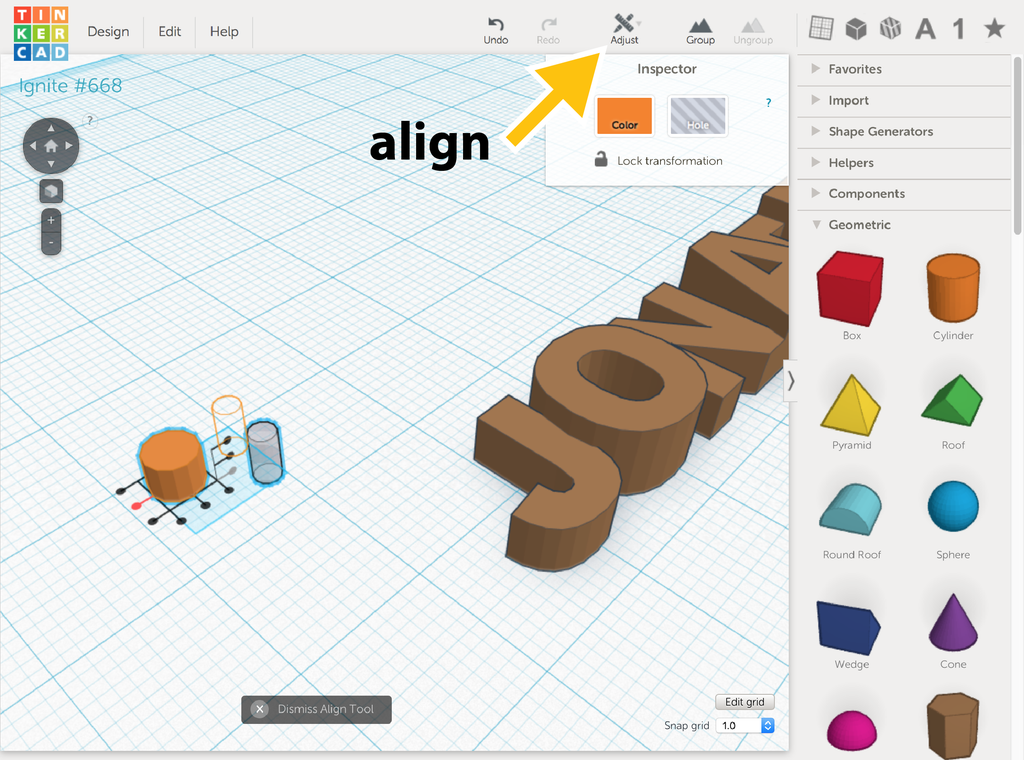
Select both cylinders and click on Align in the Adjust menu.

Click the dots to align the cylinders so they have the same center.
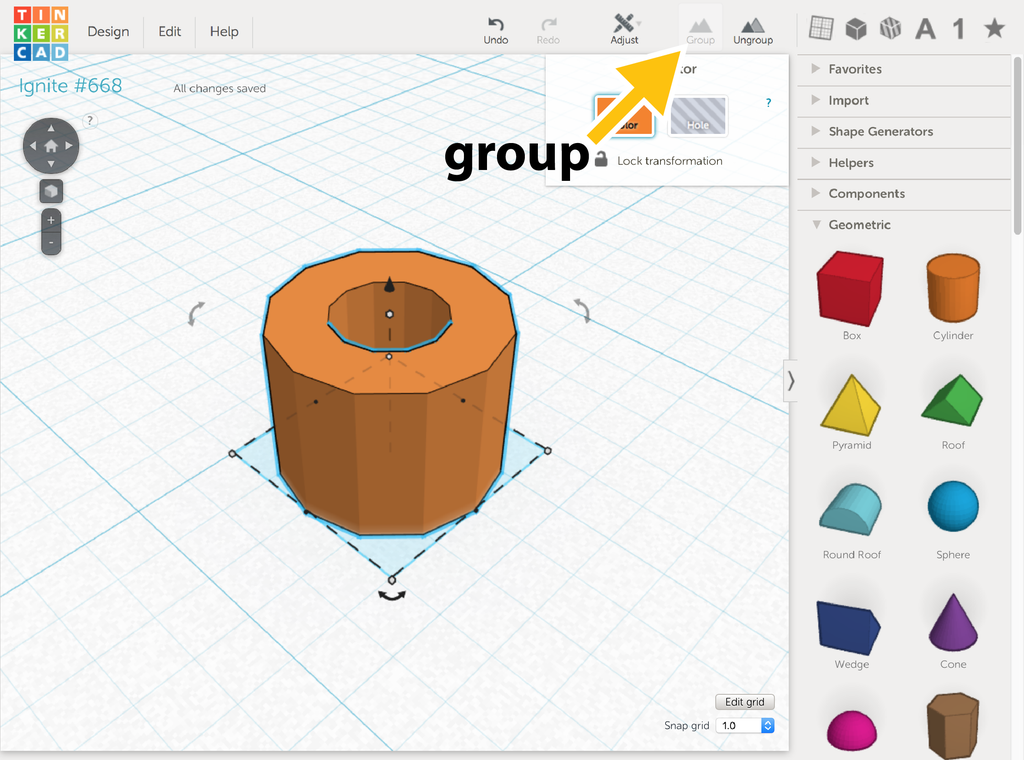
With both cylinders selected, group the cylinders into a single object by clicking the Group button on the top bar.
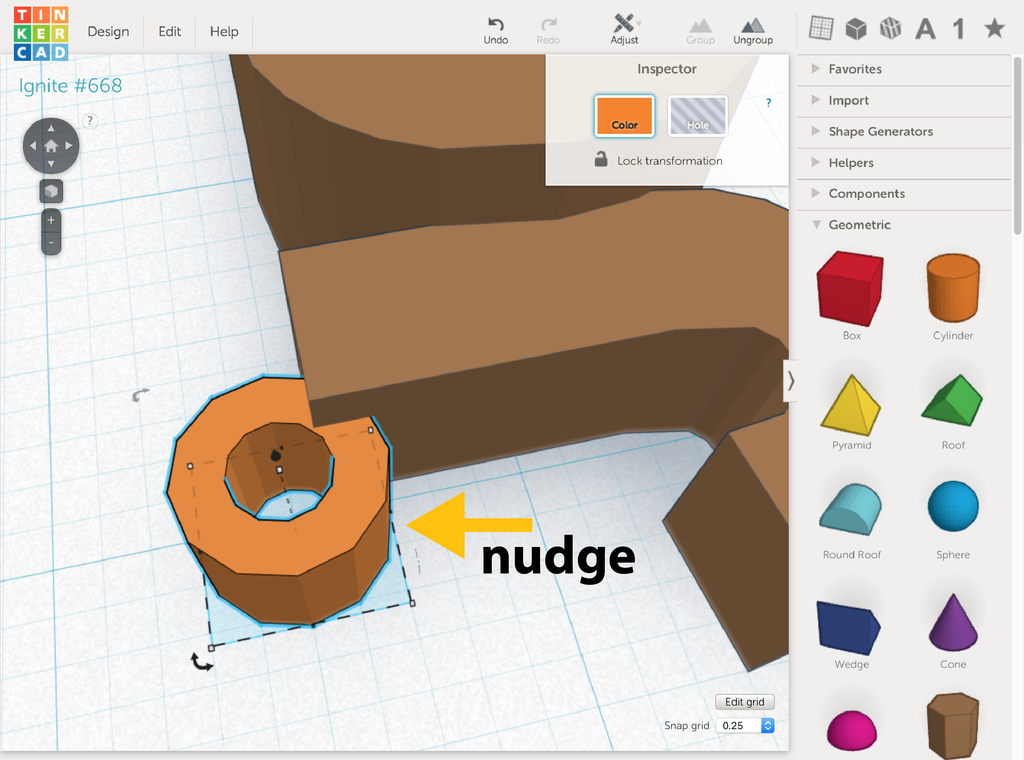
Select the key ring and use the arrow keys on your keyboard to nudge the ring into the first letter of your name.

To complete the key chain, Group your name and the ring together into a single object.
Step 7: You're Done!
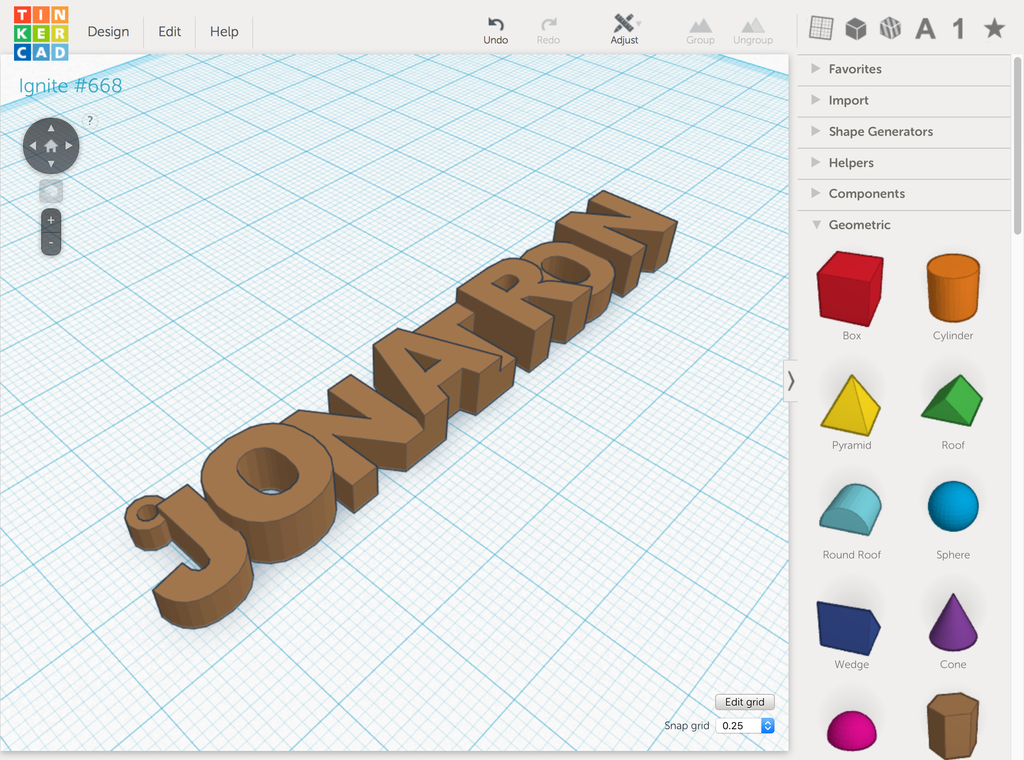
Good job! Now you've created a solid object you can use to make your own 3D printed monogram keychain.


