

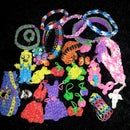
Introduction: Rainbow Loom Beginner's Tips Guide


organization is the 1st and most important tip there is for rubberband looming. it is always good to know what you have on first sight so you don't have to wait to have fun!
Step 1: (MATERIALS) Loom and Hooks


it is a very good idea to have more than one hook at your desposal. i have 4. two plastic and two metal. if you only have one, i recommend it being a metal one because it cannot break as easily as the plastic ones. you can buy metal hooks at Walmart, hobby lobby, Michael's, kmart, other craft stores. you can find the metal hook in the yarn section under crochet and knitting. you need to have a loom. my loom isn't the best and I plan on up grading. the best loom you can have is a movable loom.
Step 2: Clips

I find that s clips work the best but that's just me. it is a good idea for a 'band loomer' to always have clips on hand. there are so many different types of clips out there it will make your head spin! looming shouldn't be expensive so everyone can do it. i recommend sticking to clear clips because clear matches everything!
Step 3: Scissors


I find that small scissors come in handy when I make a mistake after locking my bands. my locks get tight to where all I can do is cut it off. you can buy these foldable scissors at Walmart or any craft store. they aren't super sharp but get the job done easily and they are easy to store with my bands.
Step 4: Charms


now there are all kinds of charms you can use. naturally the most fun are the ones you make. i also have other charms that are metal. again you can find metal charms pretty cheap at Walmart or any craft store. you can use jump rings to attach them to your bracelets, necklaces, rings and other loom projects, or you can just use a band to attach them. there are also rubber charms out there already molded that are cute as well.
Step 5: Googly Eyes

there are a lot of cute smiley face charms and Pom Pom charms (mine) lol that can always look cuter with little eyes. they are cheap and you can find them at the same stores you get your bands or even get them online.
Step 6: (BASIC STEPS TO ALWAYS KNOW) the Cap

the cap is when you twist a band onto your hook and then place it on your loom to begin the actual looming process.
Step 7: Cap and Thread


this is a step where you take a cap and thread a band.. or more than one band through it. this steel is most commonly used for eyes. when it is our in the hook like the last picture, it is most commonly used for ears, flower petals, and the beginning of bodies of things such as snake and pencil charms.
Step 8: Locking


this is an extended version of the cap and thread only instead of continuing to thread, you place one section of band over the other and 'lock it' like in the picture. this keeps your work from coming undone.
Step 9: (KEEP UR EYES OPEN) Loose Bands


when looming.. the step before you remove you're project from your loom, always remember to place your hook behind the cap to pull the very bottom bands up, over and onto those bands other peg. the second picture shows an example of a loose band and the reason why sometimes your work falls apart after taking it off the loom. look for loose bands before removing your work so you can fix it instead of having to do it all over again.
Step 10: All Around Boarders


when you are following instructions and they say to put bands in the outside of the loom and keep going all the way around the outside of the loom until you reach the beginning leg again... and your work falls apart, don't get discouraged! some people aren't clear in this step. what you need to do is put your bands on up the left side till you get to the top and then stop. go back down to the first peg and then put your bands on the loom up the right side so they meet. it doesn't seem that big a deal but it makes a big difference. try this next time you are putting a boarder on your loom for a bracelet or necklace or whatever your making.
Step 11: Extenders


if you're like me, you aren't a fan of the extended bands to make a bracelet fit. example picture one. I'd like the pattern that's on top of my wrist to go all the way around my wrist. so other than buying a couple more looms, i do this. picture two is a bracelet that took up my whole loom to make and I don't want to put extra bands on it to make it fit. so, i made a couple more of the same bracelet and I use three clips to connect them together. when you do this, remember to make sure the patterns continuous. another fun thing to do is to make a couple different short bracelets and make them one.


