

Introduction: Reinforced Duct-tape Playing Card Case.


In this instructable I'm going to explain how to make a sturdy duct-tape playing card case.
Unlike any other duct-tape card case instructable I've seen, I will be using plastic from an old DVD box to make it sturdy. This way my cards are safe in my school bag if it's dropped or anything.
This instructable will work with any card and deck size (including trading card games).
Step 1: Materials and Tools

Materials:
An old DVD box (you might need multiple depending on your deck/card size).
Duct-tape.
Small (thin) magnets (optional, used to close the box).
Your deck of cards (for measuring).
Tools:
Sturdy scissors.
An x-acto or hobby knife (optional but very useful).
A drill with bit the size of your magnets (optional, I didn't use one).
Ruler.
Pen or something else that can be seen on the plastic of the DVD box.
Step 2: Measuring and Drawing


Measure all sides of your card deck, and add a small amount to the size.
The more you add, the more room your cards will have, make sure it's enough so they fit in (count the thickness of the plastic and duct-tape).
Rip or cut your DVD box on the 2 folds, then draw out a rectangle for each of the 6 sizes of your deck on the book side of the DVD box.
My sizes were (in mm): 60x90, 25x60 and 25x90.
On the picture you can see a layout that worked out best for me.
On the dvd side, cut out a piece the width of your cards (60mm, in my case). The height doesn't matter very much, there isn't much room.
Now, cut out all rectangles using the scissors. You can use an x-acto knife but this will take a lot longer and might be more or less precise depending on your straight cutting skills.
The edges don't need to be perfect, just get them close to straight.
Step 3: Make Holes for the Magnets.


First, make the holes in the smaller part. Either drill them or cut them out.
If you got round magnets and no drill, just cut out square holes that fit your magnets.
Then lay the small piece over one of the biggest pieces and mark where the holes are, then make holes there also.
If you got strong enough magnets, 2 magnets (1 per side) will work also.
Step 4: Cosmetics! Part 1


This step is purely cosmetic, you can skip it but then the middle of your box will be showing the plastic.
Simply take a piece of duct tape (cut it with your x-acto knife, that will be a lot nicer looking then ripping it), put it over your piece and fold it around. Cut the duct-tape around the corners so you don't have 2 non-sticky sides touching eachother anywhere.
The smaller pieces only need 1 side fully covered, the other side will be covered in the next step anyway.
Make sure to include the magnets in the holes you cut in the previous step, and make sure they are in the right way (all north and south facing the same way) so they don't push off eachother.
Step 5: Finally! We Make the Box Itself!


First lay out all the higher pieces next to eachother (small-wide-small-wide).
Make sure you got the non covered sides up, this will be the inside of the box so put the most ugly side here for the other 2.
Then put a piece of duct tape over both the smaller pieces, so that it complete covers it and sticks to the other 2 also.
Then, tape the piece that sticks over the edge, to the other side of the box. Making it an actual box shape in the process.
Then, trim the duct-tape that's sticking over the edge using your x-acto knife.
Step 6: The Bottom


Pick one of the smaller pieces without the magnets and put a piece of duct tape over it that leaves at least 5mm on each side.
Then cut out the corners so you get 'glue tabs'.
Fold the tabs over eachother (so they just stick).
Then, choose what the bottom of your case will be and stick the piece in it. Unfold the tabs and stick them to the sides. The back of your x-acto knife will help a lot if your fingers aren't long enough to reach in.
Now, do the same thing on the outside to make it look better.
Step 7: The Top Flap.


Take the only 2 pieces that aren't used and tape them together in the same way as in step 5.
Make sure you got the right side for your magnets (the duct tape side will be the inside).
Then cut off the excess on the sides and paste it inside your box.
The box is now done, but it got some ugly edges and you can see sticky tape on some points... So it's time for more cosmetic taping!
Step 8: Cosmetics! - Part 2


Put a piece of duct tape all around the top, making sure about half of it sticks over the edge.
Then cut the corners with your x-acto knife, make sure to leave a small strip in each corner.
Fold the big flaps inwards.
The small strips are to make sure you don't need to make any weird (and ugly) folds. Just fold them over the corner after the other ones.
One of the flaps will be covering the top in stead of folding inwards for obvious reasons.
The edge on the top of the box should now look nice (no sticky sides visible, no cut off edges)
Step 9: Cosmetics! - Part 3


Put a piece of tape all over the top flap, making sure it's bent while taping it.
If it's straight, the tape will prevent it from bending later on.
Now cut out the corner, making sure to leave a bit extra on one side.
Fold over the longer piece first, then the other ones.
Use the same way as step 8 to fold the tape around the bending part (cut out a small strip first)
Step 10: Cosmetics! Part 4


Put a piece of tape around the middle of the case, so just a little edge covers the piece from step 8.
Now put another piece of tape that sticks out from the bottom.
Cut the 'corners' of this piece and simply tape all 4 sides down.
Now, run your nail down the edges of the case to make a little dent. This looks better I think.
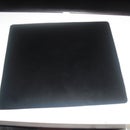
Congratulations! you're done!


