

Introduction: Selmer Acoustic Guitar
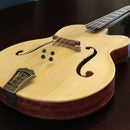


This is the a tone sample and build Images for my Selmer style acoustic guitar build. The back, sides, and neck are mahogany, the top is sitka spruce, and the fretboard and bridge base are rosewood. The fretboard inlay, bridge saddle, and nut are all made form elk antler. The neck fixed truss rods are quarter sawn maple as is the top binding. I purchased all the lumber at a local hardwood supplier and did all the resawing and milling myself. I'm extremely pleased with the tone of the instrument and I know the next one will be even better.
Step 1: Templates


The templates for the mold, neck, headstock, sound hole, fret slotting, and corner block templates where designed in Auto cad according to the plan and laser cut. To have your own templates made contact www.twocherriesinstruments.com templates cost about $0.20 per inch of cutting or engraving in 1/8" acrylic and they can accommodate almost any design.
Step 2: Top and Back


The lumber came form a local hardwood supplier, the pieces I picked out are not officially tone wood quality but they where high grade stock. I purchased a 6' x 9" of 4/4 mahogany and a slightly shorter piece of sitka spruce that was also 9" x 4/4 . I surface planed and the re sawed the lumber and was able to get enough stock for 2 backs and 2 tops for just under $100.
Step 3: Ribs

the sides where bet using an electric bending iron and clamped into the mold. I then glued in the corner blocks and kerfing and sanded the edges to make a good joint for the top and back.
Step 4: Bracing


I then glued in the bracing. For the Selmer guitar there is a forced arch that is made by pre-shaping the the bracing and gluing the tip to it under tension. next the bracing was shaped and the back and top are glued onto the ribs.
Step 5: the Neck

The headstock is a scarf joint that is cut and glued. then the truss rods slots are cut and glued in. then the neck outline is cut and the neck is shaped and fitted the the mortice in the body.
Step 6: Fretboard


The fretboard is slotted, radiused, inlays cut shaped and glued in and then fretted and glued onto the neck that is then glued to the body.
Step 7: Finish and Setup


For finish I choose french Polish, it is reduced in denatured alcohol and the apply in a specific manner that I don't have time to explain here, perhaps another time.


