

Introduction: Thermally Insulated Pallet Kennel


During winter also a dog claims a warm place where to sleep. This kennel is a clear and easy example.
To create it, make sure you have all of this supplies:
- pallets;
- OBS panels;
- extruded polystyrene;
- nails;
- headless nails;
- screws;
- 2 mm / 0.07 inches flexible synthetic glass;
- wood impregnating agent;
- solar light ( https://www.amazon.it/dp/B072V9CNPD/ref=cm_sw_r_wa_apa_i_nH1iDbXH0QPQA );
- blue painting (choose the colour you prefer);
- glue (I used Vinavil);
- clips ( https://www.amazon.it/dp/B078GDR7YG/ref=cm_sw_r_wa_apa_i_ot3iDbCMSGXZC ).
And all of this tools:
- jig saw;
- ruler;
- scissors;
- drill;
- table saw;
- sander / sanding paper;
- screwdriver;
- brush;
- clamp.
Step 1: Pallet


The first thing to do is to disassemble some pallets taking the boards from them.
Step 2: Cut Off


Then I designed the kennel by choosing the dimensions and cutting off the walls and the entrance. Every single wall has its "double", because lately I will create a "sandwich": two panels of wood will embed pieces of extruded polystyrene.
Step 3: Main Structure


I removed the bottom deckboards and then I used the same pallet to lift the kennel from the ground. The pallet itself was hidden by adding 4 further boards on the sides. On the pallet I positioned an OBS panel (that it's 10 cm for side longer than the pallet). Half of this OBS panel was covered with a frame made out of pieces of the first pallet I disassembled; then the space in the centre of the frame was filled with extruded polystyrene. On top of this frame another OBS panel was positioned. On top of it I started building the external walls, supported by pieces of the first pallet we disassembled.
Step 4: Trim


I trim the edges of the blocks that support the pallet with an angle of 45 degrees to hide them under the side panels.
Step 5: Insulation


Panels of extruded polystyrene were cut down and added on the external wall, but on the interior side. The main purpose of adding extruded polystyrene is to thermally insulate the kennel. The idea of creating two frames on the backwall was also used before for the floor.
Step 6: Internal Walls


On the internal side of the kennel I added OBS panels: the internal walls.
Step 7: Parquet Effect


The half-part of the OBS panel that during Step 3 was left uncompleted is now covered with the pieces of the pallet we firstly disassebled, creating a parquet design.
Step 8: Door


As was explained in the previous steps, the structure is composed by three layers, that now are hidden by wooden boards, taken from the pallet that we firstly disassembled. Trying to avoid the external cold temperatures enter in the kennel, a curtain made out of flexible synthetic glass was added. The curtain is kept by a wooden board and three screws, so that if the dog breaks the synthetic glass, it is easy to replace it. The curtain has some cuts on it; the photo shows that they end with a little hole which purpose is to help the curtain close perfectly.
Step 9: From a Kennel to a Home


On the entrance I added a tiny canopy with a solar light. The backwall and the sidewalls were painted blue. The borders of the paint weren't so accurate because they will later be covered. Wood impregnanting agent was used for a first protecting coat. As I did in the previous step, some wooden boards were added to hide the "sandwich effect".
Step 10: Roof


Also the roof is made out of three layers, to make it thermally insulated. Like the walls, it is painted blue. Using two hinges on the roof, it was settled on the backwall. The roof has the possibility to be opened and closed. In fact, as it is shown in the photos two long pieces of wood keep it open: they can opportunely be rotated and hidden. On the other hand, two clips keep it closed and avoid its unwanted opening.
Step 11: Shingles


The shingles aren't cut in a regular way. From a parallelepiped of wood (taken from the pallet I firstly disassembled) with an oblique cut two shingles can be obtained. The shingles are fixed with headless nails.
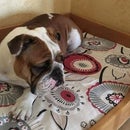
Step 12: Enjoy!


Runner Up in the
Pets Challenge


