

Introduction: Hand Router


A hand router is one of the most versatile tools in woodworking. More than just a way to bevel an edge, a router can create all kinds of edge profiles, be used to square wood edges, and even used as a thickness planer to level uneven wood. In this lesson we'll be covering all those uses as well as breaking down the router to understand just how handy this humble tool can be.
First we need to understand what a good router looks like. A router's power is measured in horsepower, with more horsepower allowing faster work as the motor can power through jobs without getting bogged down. For a lot of woodworking projects a simple handheld router is perfect, I use a 1hp Bosch palm router which is more than enough for the average woodworker.
Safety:
As with all tools, safety is very important. This is doubly so with a tool like the router. Sharp router bits spinning at very high speeds can pose a very serious safety risk if you're not careful. Whereas some power tools can take a finger off, the router basically chews up whatever it touches and can leave you with nothing to reattach. Always exercise caution when using the router and never put your hands anywhere near the blade during operation.
Step 1: Router Anatomy

Whether you have a palm router (shown on the left), or a plunge router (shown on the right), or a big table router, they all work the same and will have many of the same features. Whichever router you have will require wrenches to undo the collet that holds the router bit, will have a flat surface to rest the router on and reference your work on, and be able to set the depth of the router bit. Let's take a look at the anatomy of a handheld router in detail:
Removable base


All handheld routers will have method to set the router depth, continuing to extend the router beyond the minimum depth of the tip will allow the base to slide off completely. Removing the base will allow you easier access to the collet to change the router bit, and allow you to change the fixed base for a tilting one (as seen below).
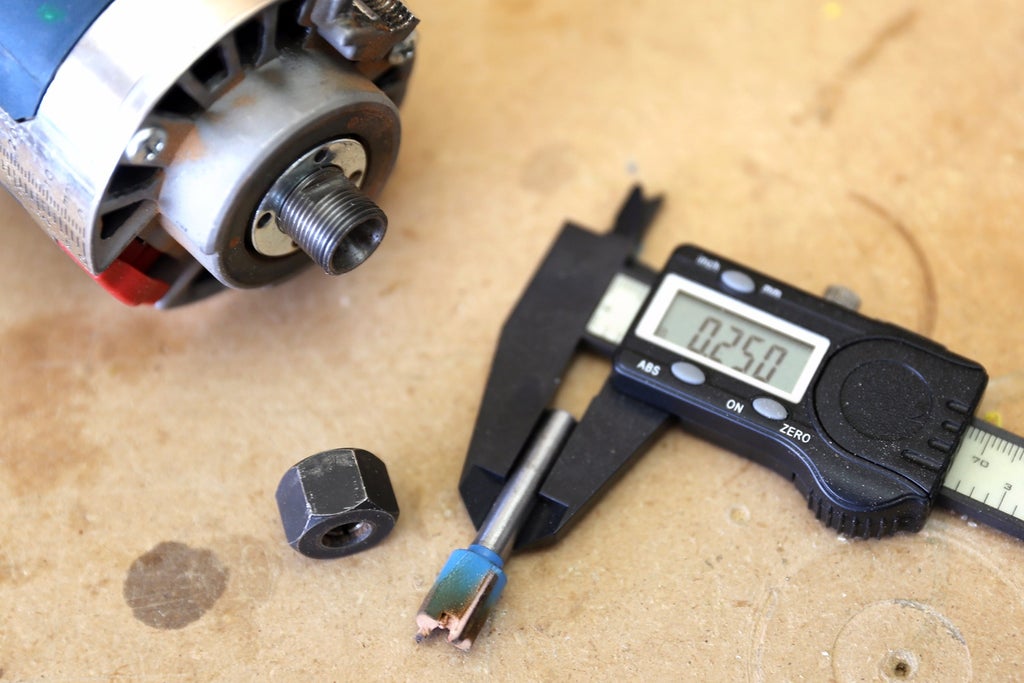
Removing collet and bit

Routers have a threaded neck close to the router body that the collet and nut fit onto, the way the bits are are inserted the nut will tighten onto the threaded bolt when it's spinning. Changing router bits is easy, but should only be attempted when the router is unplugged. Using two wrenches one wrench will fit into the keyway on the threaded neck and another fit onto the hex nut, twisting counterclockwise the nut and collet will come undone from the threaded neck.
Flat fixed or tilting base

All hand routers (palm and plunge) will come with a base that fits onto the router body and will have a base that is perpendicular to the router bit. There's an option to have a removable router base that can be tilted, meaning you have have your router bit placed at an angle to the piece you are working on. The angle of the tilting router base can be set with a thumb screw on the side, which will also have an angle indicator so you can set it to the correct degrees.
Bit depth
Some routers have a plunge feature, which allows the router to be dipped into the work piece and will spring back to a preset distance. This simple router doesn't have a plunge feature but does allow you to set your bit depth by unbuckling the hasp and setting the depth of the fixed base.

The measurement notches are measured from the collet and are meant to be an estimate, since the height of the collet can vary slightly based on how tight your bit is screwed in, and how much of your router bit shank is revealed.
Router Attachment - Edge Guide
Some routers come with attachments that serve a function to help you with your work, such as a straight edge guide. Edge guides are able to be attached to the router base by a hand screw and will allow you to set the distance of the guide to act as a fence.

The edge guide travels over your work piece and along a straight edge, this will guide the router bit to trim a straight edge on the opposite side of the work. Either measure the distance from the edge of the router bit to the inside edge of the fence, or set the fence distance by hand by placing the fence over the piece you wish to cut. The fence distance can be set with a thumb screw.
Step 2: Router Bits

There are hundreds of types of router bits designed to give you any profile you could want
It helps to have a variety of router bits on hand so you have options, like with a router bit set. The most common (and helpful) bits are the rabbit, flush trim, roundover, and straight cut.

Shank Size
The shank of the router bits that fit into the collet are usually in either 1/4" or 1/2", so know the size of your collet before buying a router bit (or buy a secondary collet so you can switch).
To make things easy on myself, I just stick with one size of router bit shank, but your needs may vary.
Top vs Bottom Bearing
Some router bits have a steel bearing on the axis, this bearing allows the bit to ride up along your work and use it as a reference.

The bearing can be located at the top of the bit, close to the router body, or bottom which will ride against a smooth surface and trim everything between the bearing and the shank. With the bit inserted into the router and held in your hand, the bottom bearing is at the bottom, and the top bearing is at the top.
Step 3: Attaching Router Bits

Routers have a threaded neck that the collet and nut fit onto, the way the bits are are inserted the unit will tighten onto the bot when it's spinning. Changing router bits is easy, but should only be attempted when the router is unplugged.
If you look below the nut you can see a keyway on the threaded neck that a wrench can be fitted into, with a wrench on the top nut you can hole the threaded neck and turn the nut counterclockwise to undo and remove the nut and collet.
Some routers have a momentary lock on the side which locks the threaded neck in place, eliminating a wrench needed for the threaded neck.

The lock button needs to be held in to engage the lock, and will disengage when released. The lock will only fully press into the router when the threaded neck is in a particular part if the rotation, so the threaded neck may need to be rotated slightly for the lock to engage.
When tightening the nut only use enough force to snugly hold the router bit, overtightening will make the bit very difficult to remove later.
Amount To Insert
It might seem that when inserting a router bit into the collet that it should be seated in as far in as it can go, however that's not always the best option.
Some routers have a shallow arbor that can prevent long shaft router bits from being inserted this far, but from a safety stance having the bit slightly set out from the threaded nut means that the collet is just grabbing onto the bare shank of the router and not the painted portion. On the other end, obviously extending the router bit far from the collet can produce a speed wobble that is very unsafe.

Of course, all routers are different and you will need to determine the best for your router and bit set.
Step 4: Conventional Vs Climbing Cut
A milling cutter can cut in two directions, sometimes known as conventional (or up) and climb (or down). For almost all cutting with a palm router a conventional cut is recommended, but know that it can cause tear out when reaching the end of a cut.


Conventional cut
Climb cut
Conventional milling (left): The chip thickness starts at zero thickness, and increases up to the maximum. The cut is so light at the beginning that the tool does not cut, but slides across the surface of the material, until sufficient pressure is built up and the tooth suddenly bites and begins to cut. This deforms the material (at point A on the diagram, left), work hardening it, and dulling the tool. The sliding and biting behaviour leaves a poor finish on the material.
Climb milling (right): Each tooth engages the material at a definite point, and the width of the cut starts at the maximum and decreases to zero. The chips are disposed behind the cutter, leading to easier swarf removal. The tooth does not rub on the material, and so tool life may be longer. However, climb milling can apply larger loads to the machine, and so is not recommended for older milling machines, or machines which are not in good condition. This type of milling is used predominantly on mills with a backlash eliminator. [source]
For hand routing, it's advised to only use conventional milling, this will prevent grabbing and kickback.
*conventional and climbing cut images used are public domain.
Step 5: Router Edges

By far the most common application for the router is to tackle edges. There's a wide assortment of router bits that can achieve all kinds of edge profiles. Here's an example or a roundover with the bearing using the work piece as a reference.

Set the router base to the depth desired, its always a good idea to run the router on a test piece of wood before committing to the project - that way you can make multiple adjustments if necessary. Carefully router every side until the edge profile desired is achieved.

In the above example you can see the depth was set a little too low, leaving a small ledge from the to of the router blade profile. Most times ledges like this can be fixed with sanding.
Step 6: Router Fence

Although the bearing on some router bits helps guide the blade based on a reference, sometimes you may want to make a cut with the router where there is no existing reference. This is where a fence comes in handy.
Most router bases will allow for some kind of attachment for a fence to be installed.
This video shows the fence being used to reference the flat side of the wood on the opposite edge being routed.
The edge guide can also be used to make channel cuts, using a flat reference edge, as shown in the video below.
Remember, for cuts that remove a lot of material use shallow passes to achieve the depth desired, rather than making one pass. This will prevent your router from getting bogged down, will result in a better cut, and will make your router much easier to handle.
Step 7: Surface Planing With Router - Setup

A great application for the router is surface planing. Using a flat bottom router bit to plane down irregular height of wood. To perform this action there's a little setup required.
SECURE WOOD TO BE PLANED
There will need to be clear and unobstructed access to the entire top of the piece to be planed. I use hot glue most times, as the work piece can be easily removed from the workbench and the hot glue doesn't leave much residue to be removed after the surface has been leveled.
Add a small dab of hot glue to the backside of the glued up work piece and then firmly press the work piece down to the workbench in between the rails.
RAILS
The router will need a flat reference to glide across in order to surface plane. Setting up a temporary fence or rail is a great way to quickly get a flat reference that can be taken down or modified for future planing operations.
Find flat sections of wood to make 2 rails that will be used as the reference rails for the router to glide on.

With 2 rails we can attach them to the workbench and use them to plane down the glue up to a uniform height.

With both rails set up on your workbech a plank can be laid across the top of the rails to check if they are level. If there's any discrepancy check the workbench for levelness first, then check the rails to ensure they are symmetrical.
Having level rails means that when the router is riding on top the router bit will carve a level surface.
ROUTER SLED
To level the top of our work piece a sled will need to ride along the rails. The sled needs to be long enough to pass over the entire spacing of the rails, and wide enough to accommodate the router base. It's also important to make sure the sled is thick enough not to deflect when the router is placed on top, which can cause the routing to not be level and dish.
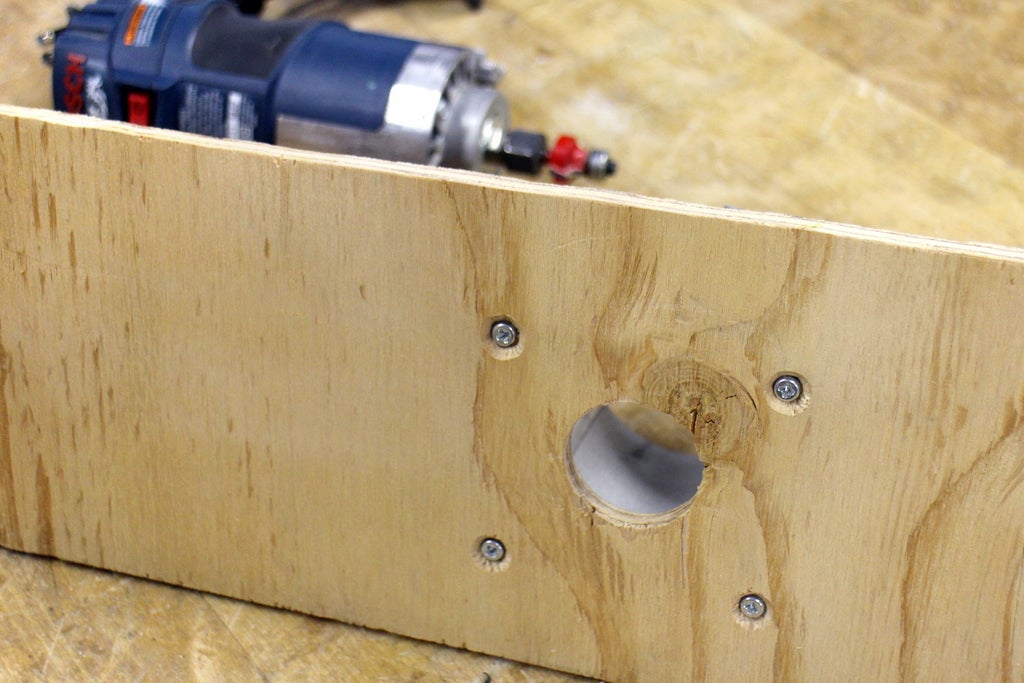
Find the center of your wood that will be your sled and drill an opening with a hole saw large enough for the router bit to pass without interference.

Router bases have a removable plate held on with 4 small screws. Remove the plate and center the router base over the drilled opening, then use a pencil to mark the screw holes from the base plate onto the sled. A drill bit the same size as the screws was used at each of the four pencil marks.
Once the holes are drilled a countersink was used so the base plate screws will sit inside the sled. Use the same screws that were in the removable plate to attach the sled to the removable router base.
Step 8: Surface Planing With Router - Planing
Insert the router bit into the collet and screw the nut into the threaded neck until it's snug. Set the router into the sled and put the sled in the rails, then set the router depth to about 1/4" lower than the highest point of the glue up. Starting with the router away from the glue up, power up the router and slowly move towards the glue up and gently eat away at the highest points from the glueup.
Continue routing at 1/4" depth increments until the lowest point of the glue up is reached. This may be several passes as minimal amount of material removal is desired. To plane down this piece of glue up took about 30 minutes.
It may happen that you will see striations and burn marks (indicated with arrows below) from the router achieving different depth cuts along the same path, or if the router is left too long in one area the bit can make a burn mark in the wood.

These striations and burns aren't a big deal as long as they aren't deep or too different from the adjacent wood, these imperfections can easily be accounted for when sanding with rough sandpaper after routing.


