

Introduction: Stacked Braid


Braids on Braids! If you've completed all the lessons so far, you've got to be bonkers for braids by now. If you've been skipping around, welcome to the braids metaverse-- this one is deep down the rabbit hole. In this lesson, you'll learn how to create a decorative braid on top of a bigger braid, resulting in a stacked braid. You can use this technique with plain crossing-under braids as well as any Dutch style.
This Instructable is part of my beginner braids series. If you like this lesson, try the rest!
Supplies
To get started learning to braid, you really just need some hair, a mirror, and dexterity in both hands. Everything else here just enhances your results!
- Brush
- Comb
- Hair elastics
- Bobby pins
- Duck bill clips
- Dry shampoo (or make your own)
- Hairspray
- Styling paste
- Conditioning oil
To keep up with what I'm working on, follow me on YouTube, Instagram, Twitter, Pinterest, and subscribe to my newsletter. As an Amazon Associate I earn from qualifying purchases you make using my affiliate links.
Step 1: Start a Side Braid
As with all the braids in this class, it's easier to learn when you can clearly see what you're doing. For this reason I recommend starting with a single side braid, either Dutch or just plain crossing-under (with an elastic at the top if that works better for you!).


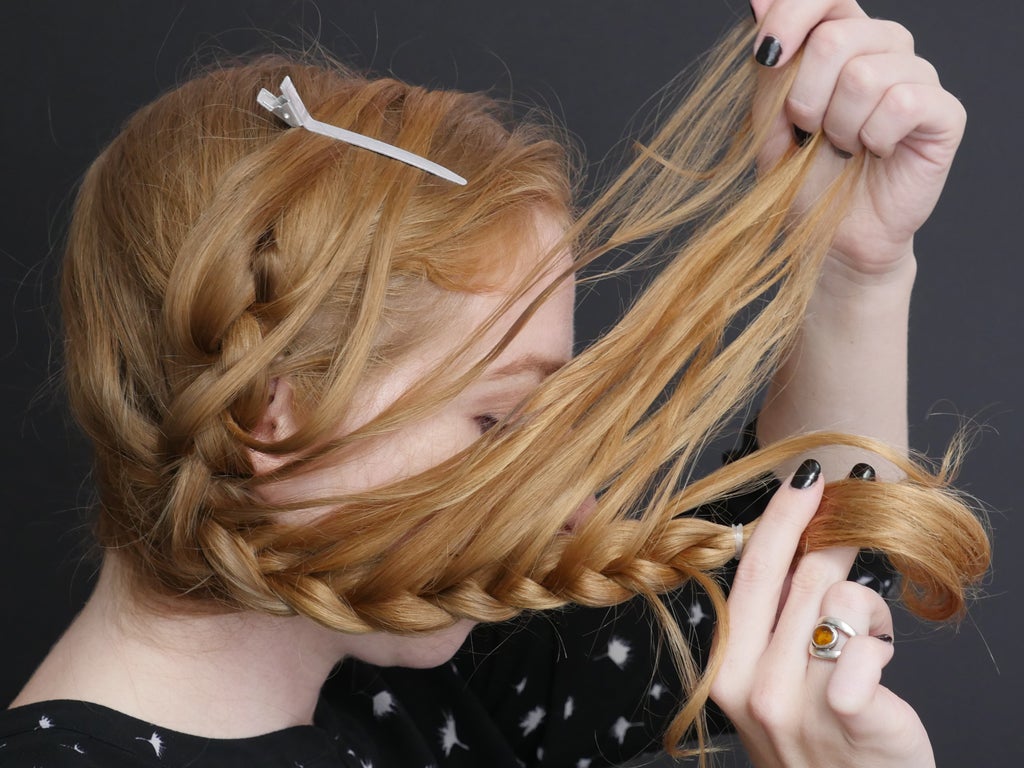
Create a side part and gather all your hair to the opposite side, then pick up the top two thirds and divide into three sections and begin a crossing-under braid.

After the first pair of crosses (one stitch), pick off a very small section of hair from the just-crossed section, and clip it out of the way (or use your mouth).

Smooth the remaining section and get ready to resume braiding.

Step 2: Very Small Sections

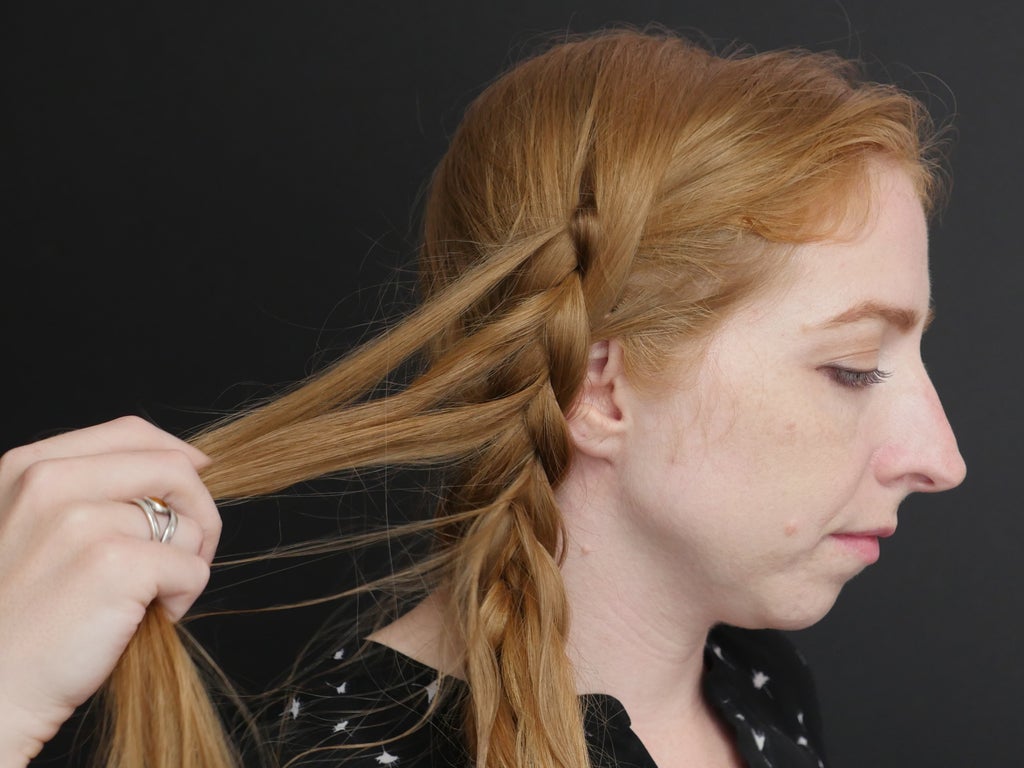
Remember to grab more hair to incorporate into your Dutch braid if you're making one. It can be easy to forget with all the new sectioning going on!

With each subsequent section cross, separate another very small section of hair to add to your clip.

Step 3: One-Handed Clipping


Though you don't have to use the same exact smooth alligator clips as shown, it is important that whatever clip you are using can be operated with one hand, without losing the sections you've clipped previously!

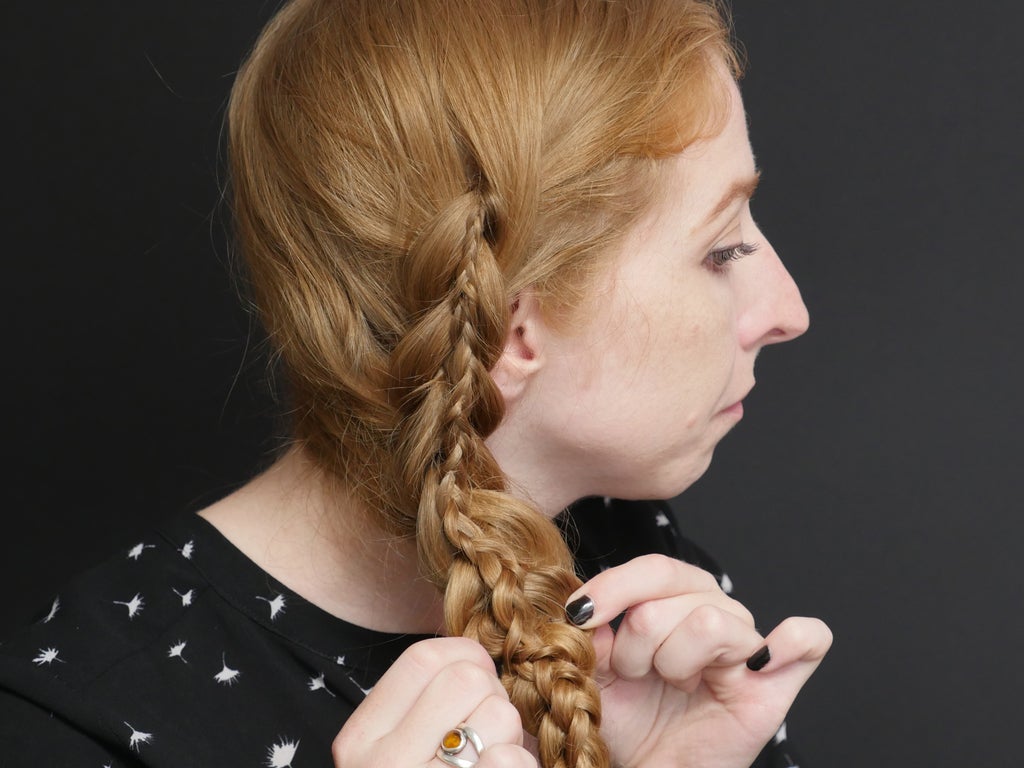
Step 4: Repeat All the Way Down

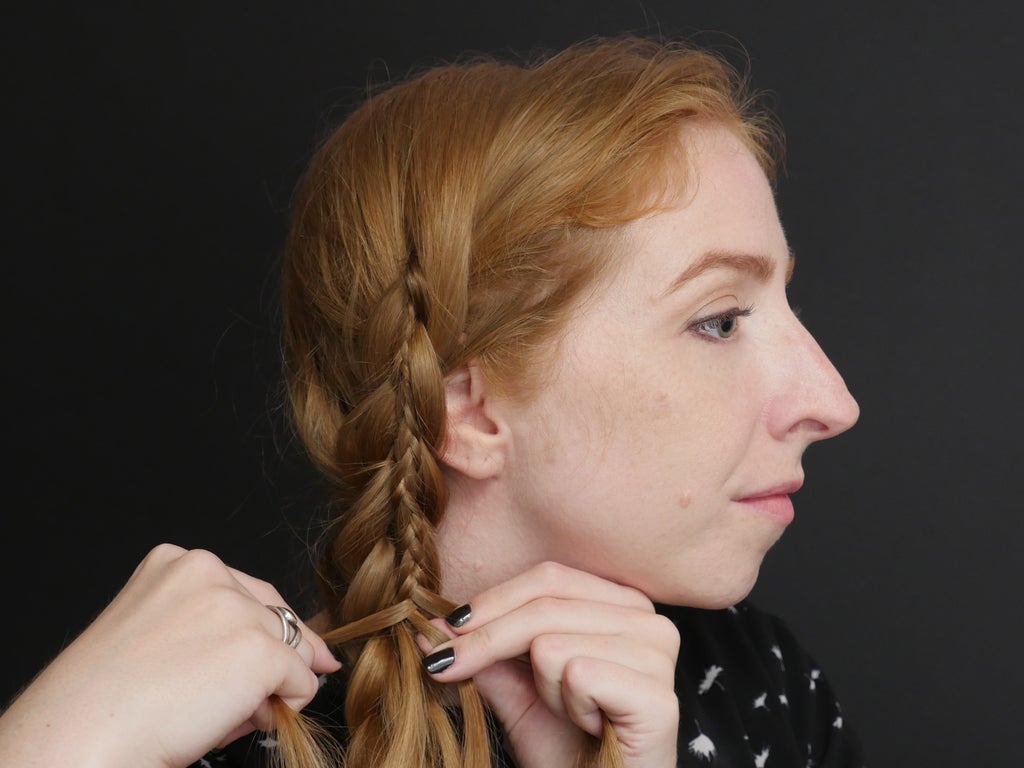
Here's where this braid starts to get ridiculous. Keep braiding and liberating small sections! They can get a bit unruly, so do whatever you need to keep them out of your way, like adding more clips, or stowing them in your mouth.
Keep your sections super small, or the stacked braid will end up being just as big as its base!
Use a small elastic to secure the tail of the main braid, and release the fringe. Cheers to you, it's a breeze from this point forward! Take a well-deserved break.
Step 5: Braid the Fringe

Begin another Dutch braid comprised of just the fringe.
You may create several stitches before adding a new section as you make your way down the braid, and even split sections into multiple sections in your quest to make the braid sections evenly sized.
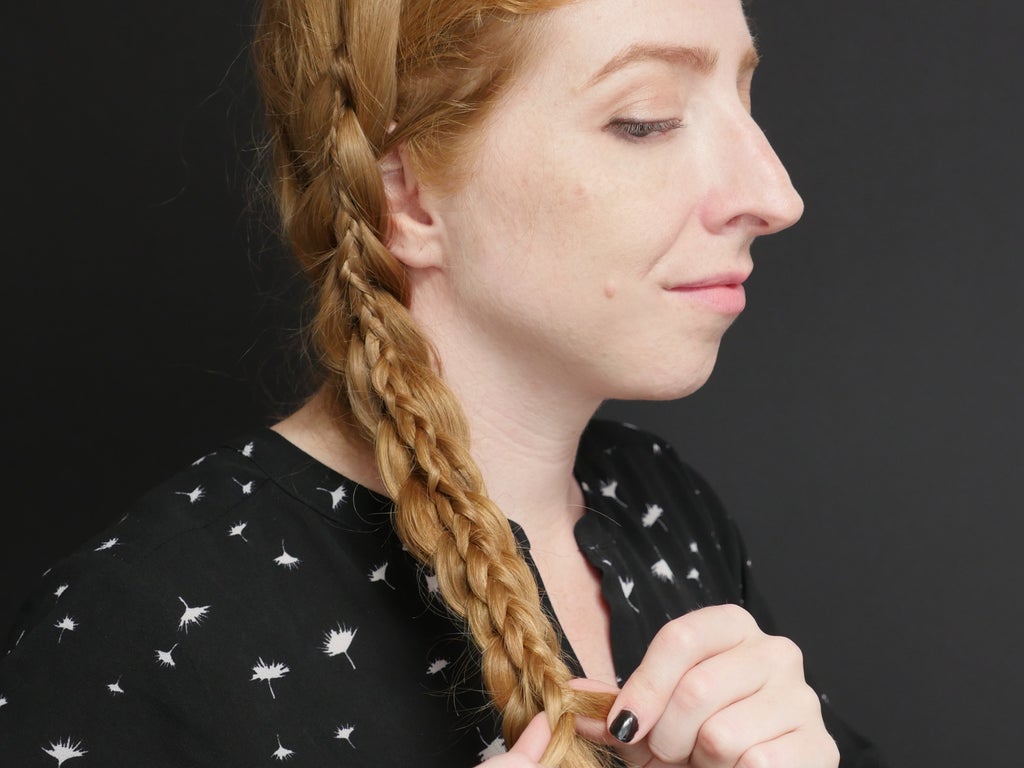
When you get to the end, you can secure the stacked braid with another elastic or combine with and retie the main braid.
Gently pull on sections of the base braid to make it appear fuller.
Step 6: Wear It!

Huge congrats to you for finishing this uniquely difficult braid! You can now employ this stacked technique into any style.

How would you make it your own?
This Instructable is part of my beginner braids series. If you like this lesson, try the rest!


