

Introduction: Jewelry Class: Tools, Materials, and What You'll Learn


Class table of contents:
- Tools, Materials, and What You'll Learn (you are here)
- Beads
- Wire
- Piercing Sheet Metal
- Torch Soldering & Going Further
Whether you're new to the craft or returning to jewelry making after some time away, welcome to the beginner-level Instructables jewelry class! The topic of jewelry making is extremely broad; this class is organized to introduce you to four domains, each with an example project. Even if you've got experience in one or more of the topics covered, I hope you will find something new to learn from this course. The supplies you need are listed here and again at the start of each project.
The class starts out quick and easy with a beaded bracelet that you can make almost anywhere, then levels up your skills with pliers and wire to make some wire-wrapped earrings. Next you'll cut out shapes from copper, silver, or brass and make a pendant or keychain. The final project is a simple soldered silver ring. After finishing the basic projects in this class, you'll be all set to tackle almost any DIY jewelry project of your own design.
Although the lessons are designed to be completed sequentially, building in complexity and investment, you are welcome to skip around. Apologies in advance to the folks reading who really would prefer the spelling "jewellery," y'all are just going to have to bear with us Americans (although metric measurements are included throughout).
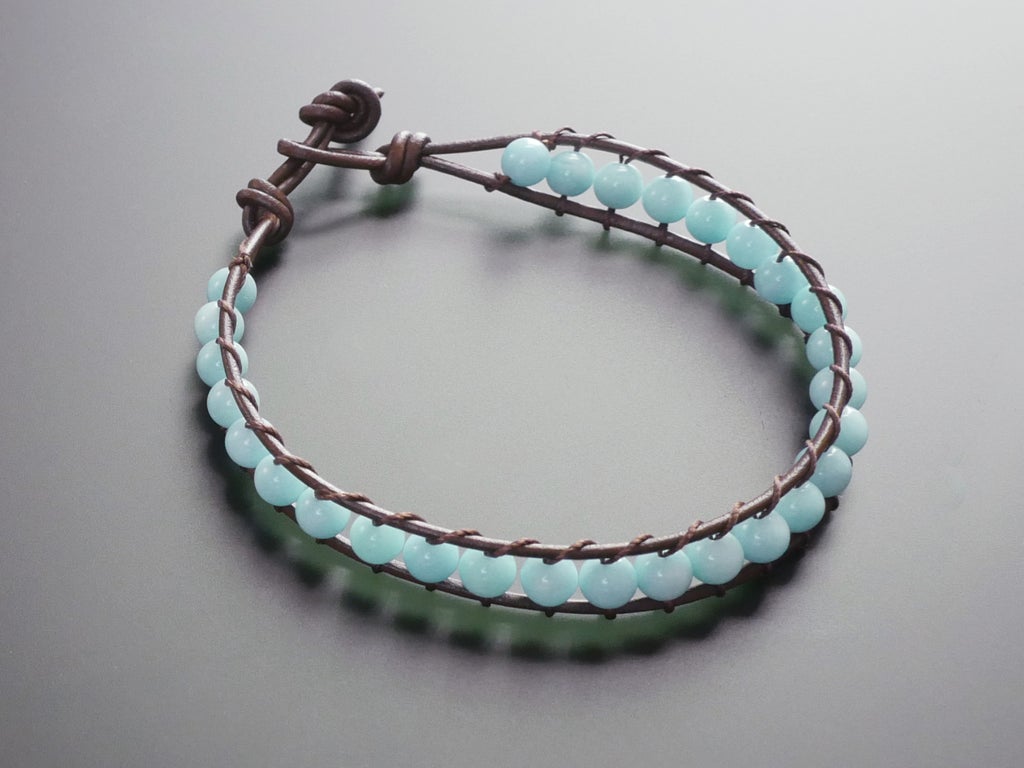


The first project you'll make is a beaded wrap bracelet made with Amazonite stones and leather cord. You might find this project quite satisfying and soon all your loved ones may have personalized versions you made just for them.


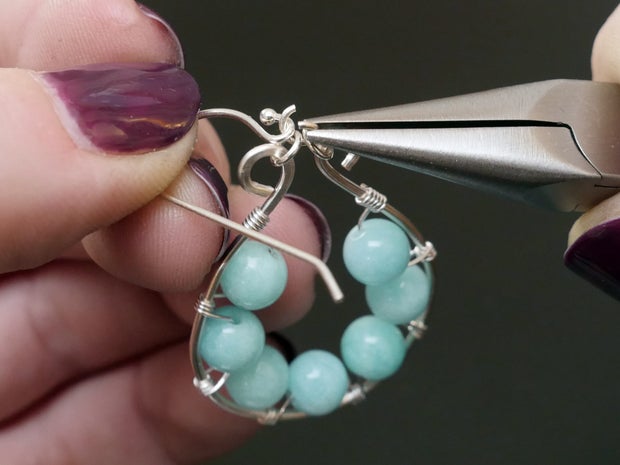
Trading soft, flexible leather for firm, yet still flexible, wire, the second project guides you through creating a pair of wire wrap and beaded earrings. Don't forget your safety glasses! You can use the same Amazonite beads as the bracelet project, or switch it up with something different. You'll build skills in shaping wire and jump rings with pliers, and optionally add some surface texture with a hammer and bench block.


The third class project teaches you how to cut, or pierce, sheet metal in any shape you choose. You'll use a jeweler's saw and needle files to create and refine the shape, then use various grits of sandpaper to create a smooth surface. Optionally speed things up and create a mirror finish with a flex shaft rotary tool and polishing compounds.


Soldering may be intimidating, but it's really not as hard as it may seem! While a few special tools are required to get things right, this simple silver ring project walks you through the process and explains each new tool. This final class project builds on the metal forming and finishing skills you learned in the wire and sheet metal projects.
As you work through the lessons in this class, please feel free to ask questions using the Q&A modules at the bottom of each page. I'm looking forward to seeing what you make!
Step 1: Tools and Materials for Jewelry

This lesson contains a complete list of supplies you'll need to complete this class. The required tools build over the course of the class, so don't feel like you have to invest in everything right away. Each lesson will list the required supplies at the start, so feel free to peek ahead! Although I recommend reading through the whole class before digging in with your tools, the lessons do not have to be completed in order. Most links are to Rio Grande, my favorite American solar-powered supplier, and Amazon.
Here's everything you will need:
- Round leather cord (1.8mm brown)
- Silk bead cord size F
- Beading needle
- Beads (round 6mm Amazonite, jade, etc.)
- Tape or clipboard for securing project
- Scissors
- Smooth jaw pliers (set including flush cutters)
- Safety glasses
- Silver-plated wire (26ga and 18ga)
- Jewelry findings like ear wires, jump rings, chain, clasps, key rings
- Small ruler
- Calipers (optional)
- Step mandrels (optional)
- Bench block
- Household carpenter's hammer
- Chasing hammer
- Rawhide mallet
- Needle files
- Bench pin
- Saw frame, blades, and bur lubricant
- Sandpaper (handi-files, wet/dry sheet, and/or sanding pads in various grits 200-1000)
- Dust mask
- 18 gauge (1.1mm) non-ferrous sheet metal (Sterling silver, copper, brass, etc.)
- Paper sketch and glue stick
- Small towel
- Apron (optional)
- Bench brush
- Center punch
- Drill bit (2mm or smaller)
- Old toothbrush and soap
- Finishing wax
- Butane torch with fuel
- Fire extinguisher
- 14 gauge (1.62mm) Sterling silver (or nickel alloy) round wire
- Chemical-resistant gloves
- Silver solder (small bit of each hard, medium, and easy)
- Quench container with water (ceramic/Pyrex)
- Ring mandrel
- Flex shaft or Dremel with polishing accessories and polishing compounds (optional, see below)
- Ring clamp
- Silver soldering accessories available as a kit:
- Fireproof work surface (fire bricks)
- Pickle pot and pickle
- Flux and brush or dispenser
- Solder pick
- Cross locking tweezers
- Tweezers
- Copper tongs
You can get good deals on student starter kits containing many of the items listed here, both online and from your local jewelry supply store. If you're outside the USA and have a favorite vendor of these supplies, drop me a message and I'll add it to this international suppliers list: Cooksongold (UK, Spain, France), The Bead Shop (UK)
The remainder of this lesson provides more information about some of the specialized tools used for jewelry making.
Step 2: Safety

Each lesson introduces new tools and techniques while you create a piece of jewelry, and some of the tools we'll use are dangerous! The animation above depicts the escalating amount of protection needed to safely complete this class. At first, no safety equipment is required (beading lesson). Then, cutting wire necessitates the use of protective eyewear (wire lesson). Next up we'll add sanding and filing into the mix (sheet metal lesson), so it's helpful to wear an apron and a dust mask. Finally, the torch soldering lesson uses dangerous chemicals, so gloves should protect your hands and a fire extinguisher should be kept nearby.
Step 3: Beads & Wire


You don't need many specialized tools to get started making beaded and wire projects! These supplies are commonly available at craft stores, and widely available online.
Leather cord and coordinating silk beading cord are available in a wide variety of colors and sizes. Beading needles are especially long, flexible, and have large eyes to easily accommodate the beading cord.
Beads can be made from almost any material. This class uses round blue 6mm beads made from Amazonite stone, but you're welcome to use beads in the material of your choice, whether it's stone, crystal, or something else entirely, like seed pods and coral (pictured above).
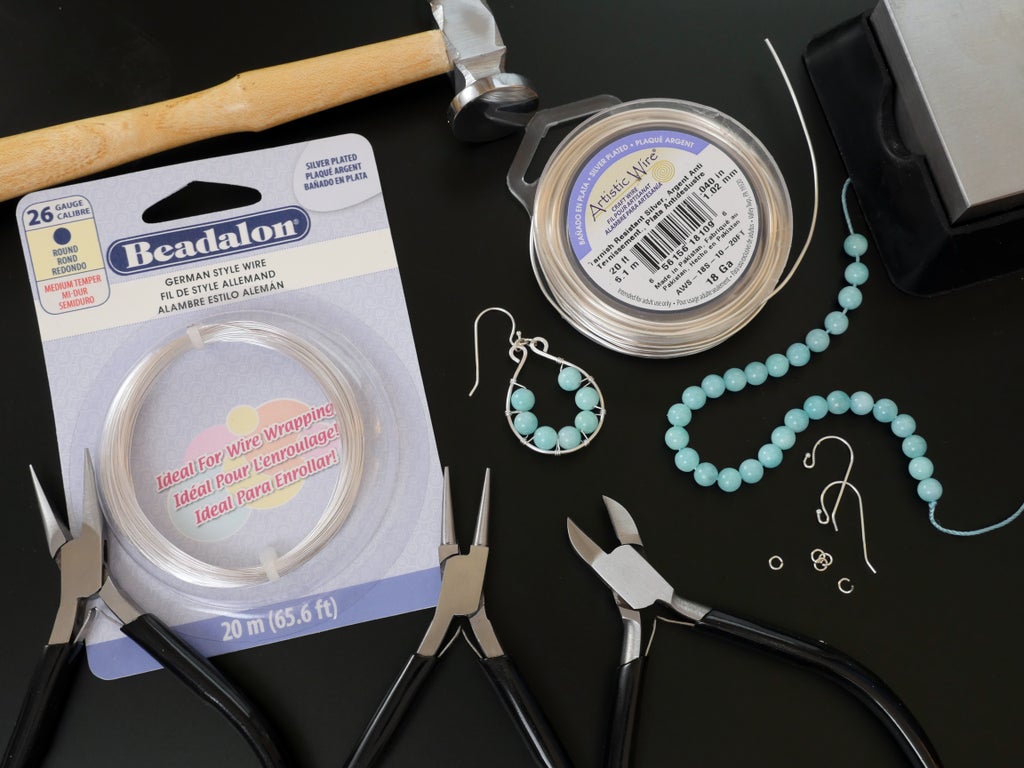
The wire wrapping project in this class uses the same round beads to make some silver-toned earrings with two different thicknesses of silver-plated wire (26ga and 18ga). Small jump rings and ear wires are called jewelry findings, and they too are available in different styles and sizes. If you prefer a different wire color, go for it!


A variety of clean, smooth-jawed pliers is essential for making jewelry with wire. Jewelry pliers have smooth surfaces (no teeth to imprint marks on soft jewelry), and come in different shapes for different purposes. Yes, you really do need this many! To open and close jump rings, you will use two pairs of pliers at once. Do yourself a favor and get a dedicated set of jewelry pliers!

Jewelry is a precision craft. At the very least, you'll need a small ruler to measure materials and draw straight lines. Analog or digital calipers can help you determine the size of beads, wire, and sheet metal after they've been collecting in your supplies box, but aren't strictly necessary to complete any of the projects in this class.
Step 4: At the Jewelry Bench

A bench block is a smooth (usually stainless) steel surface that's used for hammering. Use a smooth chasing hammer for pounding wire flat or applying surface texture. Use a rawhide mallet (or nylon mallet) to shape metal without deforming the surface, like when you want to straighten round wire or flatten smooth-finished sheet.

A full size carpenter's hammer comes in handy for driving a sharp center punch, which is the first step in drilling a hole in sheet metal. Don't use your polished chasing hammer with steel tools; you'll scratch up the surface, and those scratches will transfer to other work later!

There are many more specialty jewelry hammers for all kinds of shaping and texturing, but these three will get your collection started and help you complete the projects in this class.

A jeweler's frame saw is fitted with tiny blades to cut intricate shapes from sheet metal. You can use any 18 gauge (1.1mm) non-ferrous metal for this class (copper, brass, sterling silver, etc.), which differ greatly in price. A bur lubricant is needed to reduce stress on the fragile blades.


To work with small bits of sheet metal and other in-progress metal jewelry, a sturdy bit of wood with a V-cut (called a bench pin) is extremely helpful. It'll let you brace your work and access every nook and cranny as you cut, file, sand, and polish. You can transform any sturdy table into a jewelry bench with a clamp-on bench block/ bench pin combo. New bench pins may require you to cut the notch yourself, so if you don't have a hacksaw handy, double check the one you buy already has a notch.

Needle files help you refine your metal's shape and prepare for sanding, and come in different shapes. Get a variety set to dedicate just to soft jewelry metals.

To refine the surface of your metal, you'll use sandpaper of coarse to fine grit, which refers to the abrasive particle size. You can tape sandpaper to a flat surface to create a mini sanding board, and get sanding boards that work like nail files. If you don't plan to polish your projects with a rotary tool, you can achieve a very respectable lustrous surface by finishing with some superfine sanding pads.


To form perfect circles, loops, and other rounded shapes, you'll use steel mandrels. The small step mandrels pictured on the left are useful for small wire projects, and the large ring mandrel on the right will be used to shape your soldered silver rings.
Step 5: Rotary Tool
Used in this class for drilling holes and polishing metal, a rotary tool is incredibly useful for small jewelry projects (and can shorten sanding time quite considerably). Although I love my Foredom flex shaft, which has a hanging motor, lightweight handpiece, and foot pedal for speed control, you can get by with a Dremel or a full size power drill held in a vice.

These tools spin very fast, and run the risk of launching a bit of material or broken tool into your eyes or someone's near you. Always wear safety glasses and a dust mask when using rotary tools, and tie long hair back.


The function of the rotary tool changes based on what accessory is loaded in the chuck (a dedicated wrench is often required). This class uses tiny drill bits to pierce internal cutouts in the sheet metal project, and polishing buffs to finish the surface of the soldered ring project. Polishing compounds are very fine abrasive materials used with soft buffs to refine surfaces all the way to a highly polished mirror finish, if desired.

There are many other types of rotary tool accessories available for sanding and polishing (brushes, bristle discs, silicone with embedded abrasive, etc.), and you may discover a preference for certain types and shapes based on what you like making (e.g. flat broad shapes vs. more intricate designs with hard-to-reach places).
Step 6: Soldering Supplies

The final skill you'll learn is silver soldering, where the metal is heated above the melting point of a low-melting alloy called solder, which then flows between the metals to create a bond. Technically the temperature range of silver soldering is actually brazing, but the term is rarely used when referring to jewelry making.
You can find small and relatively inexpensive butane torches at kitchen supply stores and online. These household-type torches are perfectly suited to the small silver wire project in this class. Store the torch and fuel in a safe place, protected from extreme temperature, and be sure to keep a fire extinguisher nearby.

To protect your work surface, you'll solder on fireproof bricks, which are available in many materials such as vermiculite, charcoal, and ceramic.

Cross-locking tweezers (as a third-hand tool or alone) are great for holding onto hot jewelry pieces. They operate opposite from regular tweezers, clamping down by default and only releasing their grip when you squeeze the handle.

Silver solder is an alloy with a low melting point. It's available in a gradient of melting points: hard (745-788°C), medium (720-765°C), easy (705-723°C), and extra-easy (667-709°C). The first solder joint(s) are created using hard solder, then if any more elements are to be soldered on later, medium solder is used so as not to melt the previous joint(s), and so forth with easy and extra-easy. Flux is a liquid or paste that helps enable solder to flow. Tweezers and a solder pick are handy for moving bits of solder around.

After soldering, a byproduct of oxidation called firescale will have formed on your metal, which is best removed by a pickle solution. This acid works better when it's warm, so you'll use it in conjunction with a little slow cooker called a pickle pot (never again to be used for food). If you can't use a dedicated pickle pot, a mason jar is a suitable alternative, although the process will take considerably longer at lower temperatures. Be sure to read the chemical safety information and instructions with your pickle: some are very hazardous and others rather benign (safety glasses, gloves, and a well-ventilated area are recommended regardless of pickle type). Many pickle solutions react to steel tools, ruining the batch by copper-plating anything that enters it afterward. For this reason, copper tongs (or wood, or plastic) are used to deposit into and fetch jewelry pieces from the pickle pot.
Now let's put all these new tools to use by making some jewelry!
Class table of contents:


