

Introduction: Tools and Supplies for Intermediate Leatherwork


Here are all the tools you'll need for the specific kind of leatherwork we will be doing in this class. You will be continuing to use most of the tools you used in Beginning Leatherwork, but you will need some additional supplies as well. You can buy your tools individually, or you can also choose to buy a leatherworking tool kit. I'll talk more about each tool and material specifically in a minute.
Essential Tools for this Class:
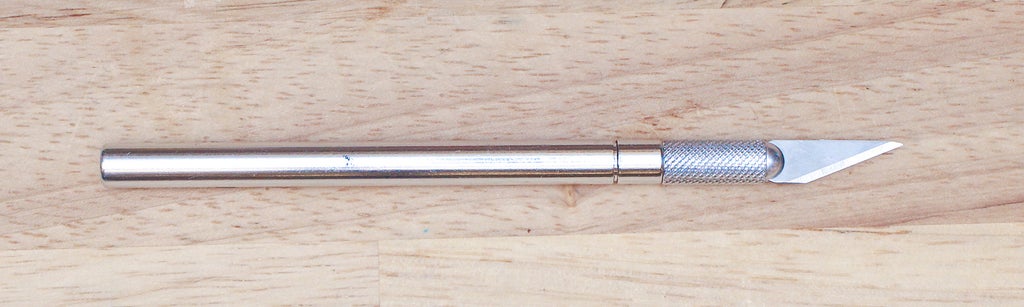
- X-acto knife or Industrial knife
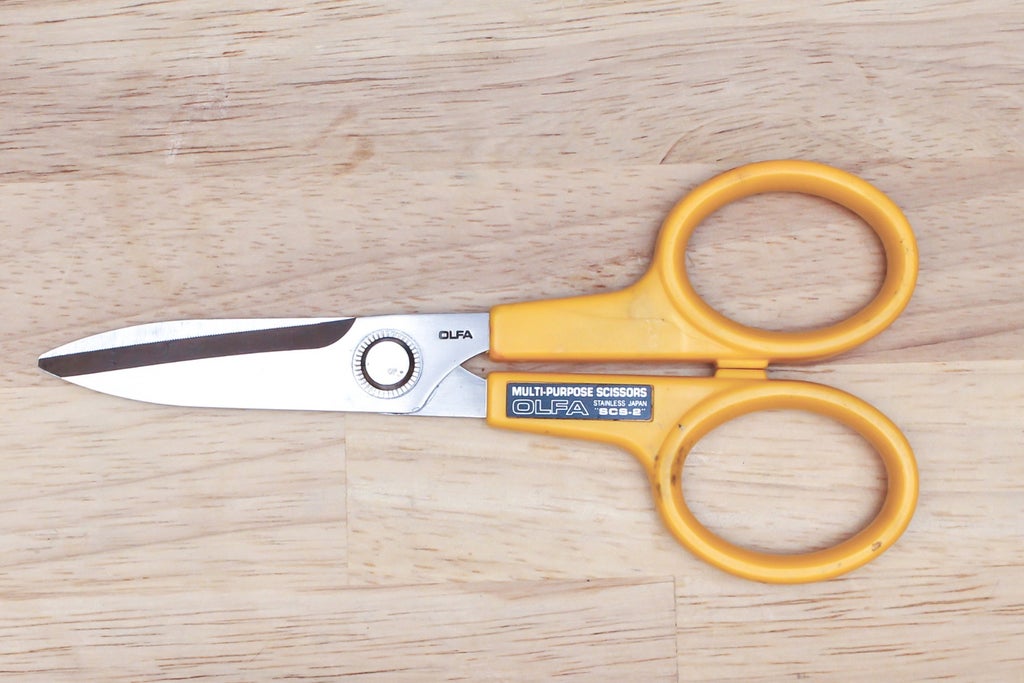
- Shears or strong sharp scissors
- Adjustable V-gouge
- Overstitch wheel
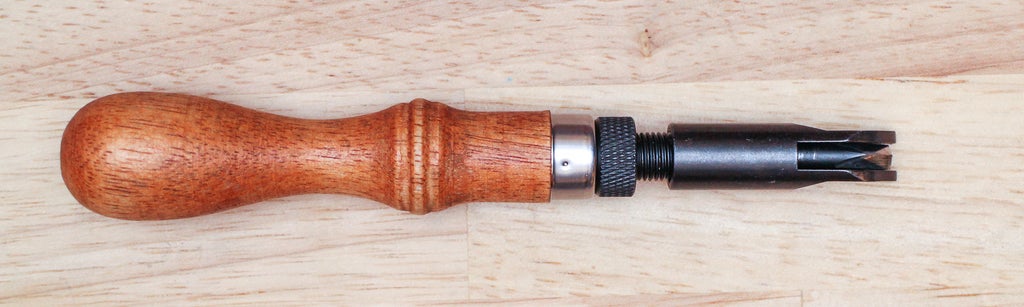
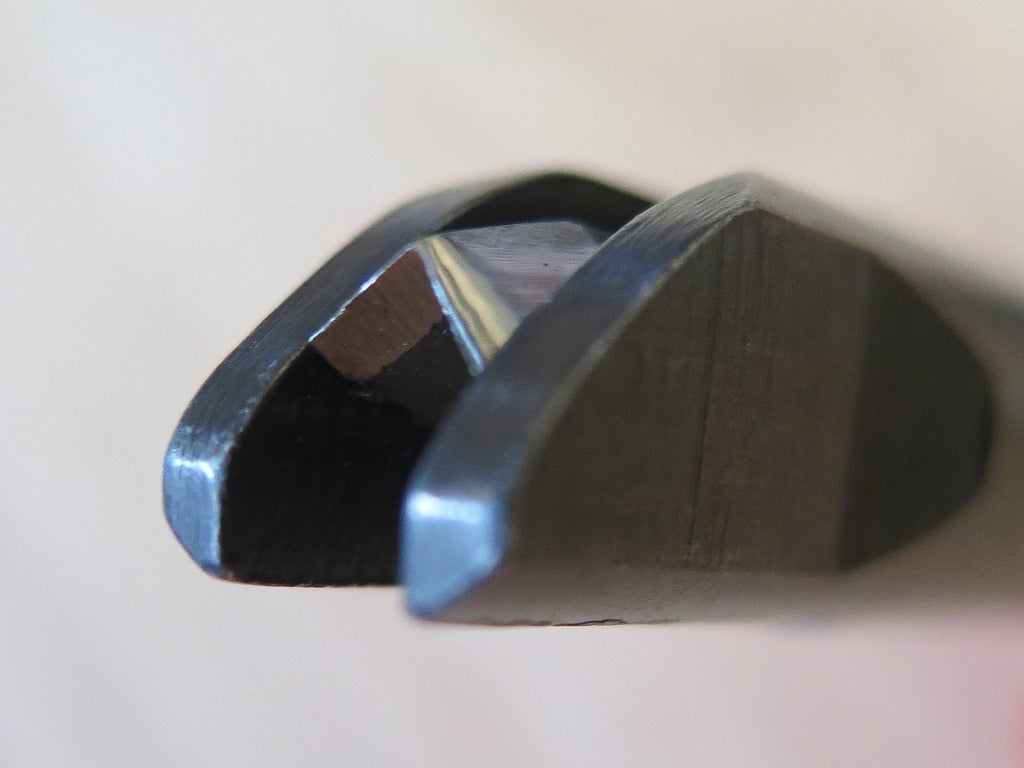
- Stitching chisels
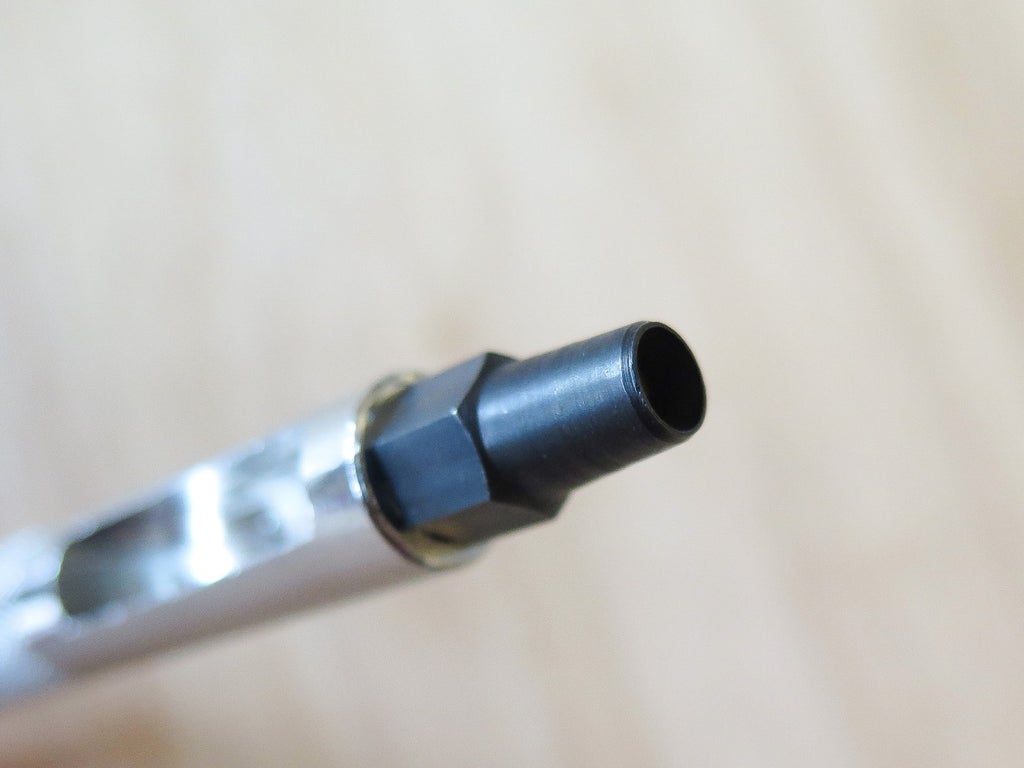
- Manual punches, or rotary punch
- Awl
- Super skiver, safety skiver or Japanese skiver
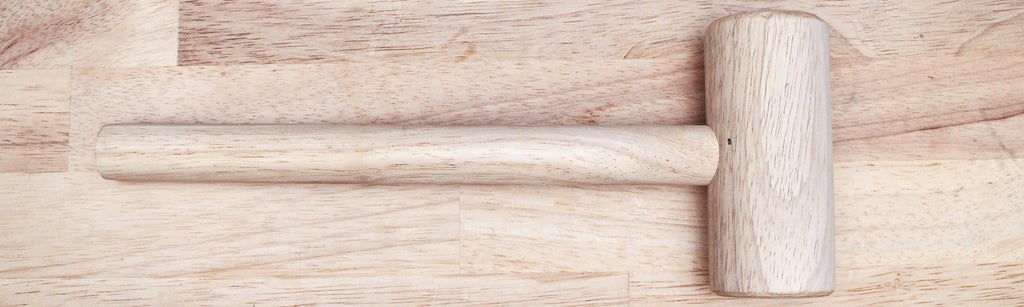
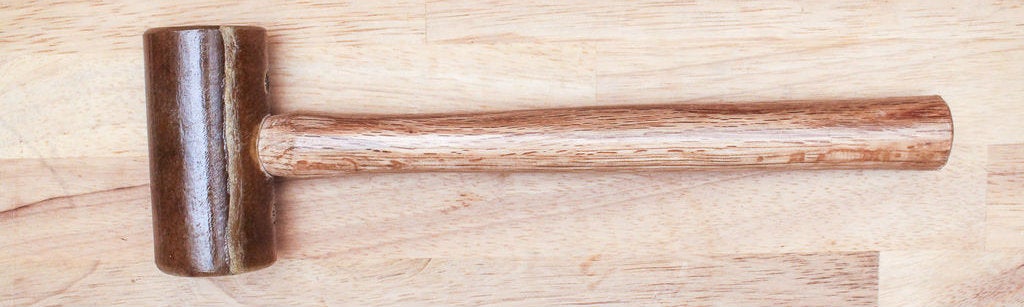
- Mallet (wooden, plastic or rawhide)
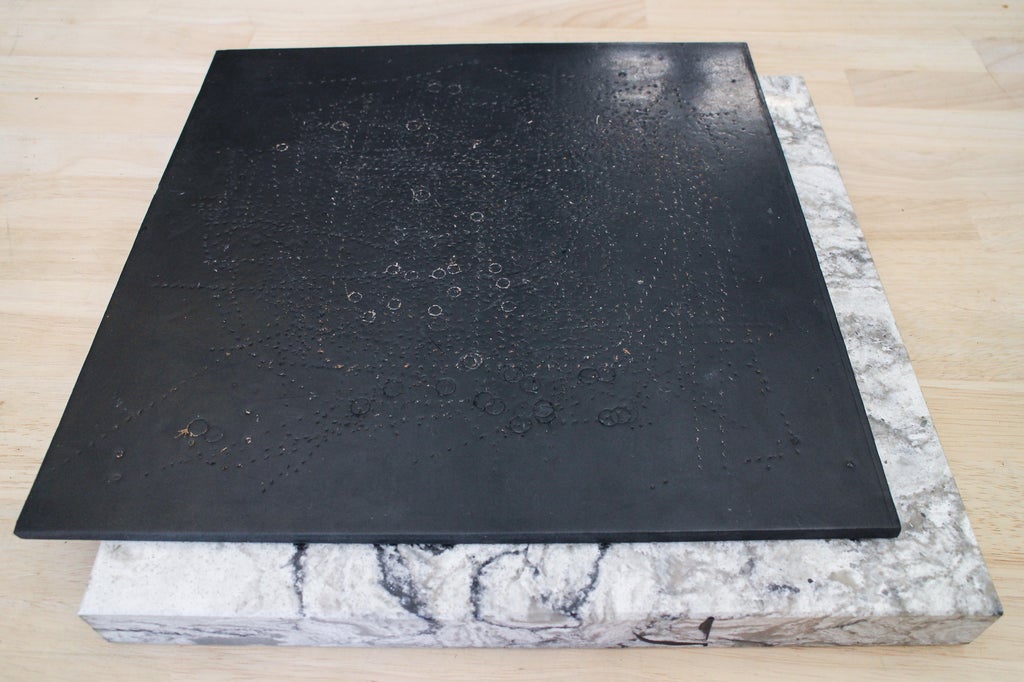
- Quartz slab and poundo board or heavy wooden cutting board
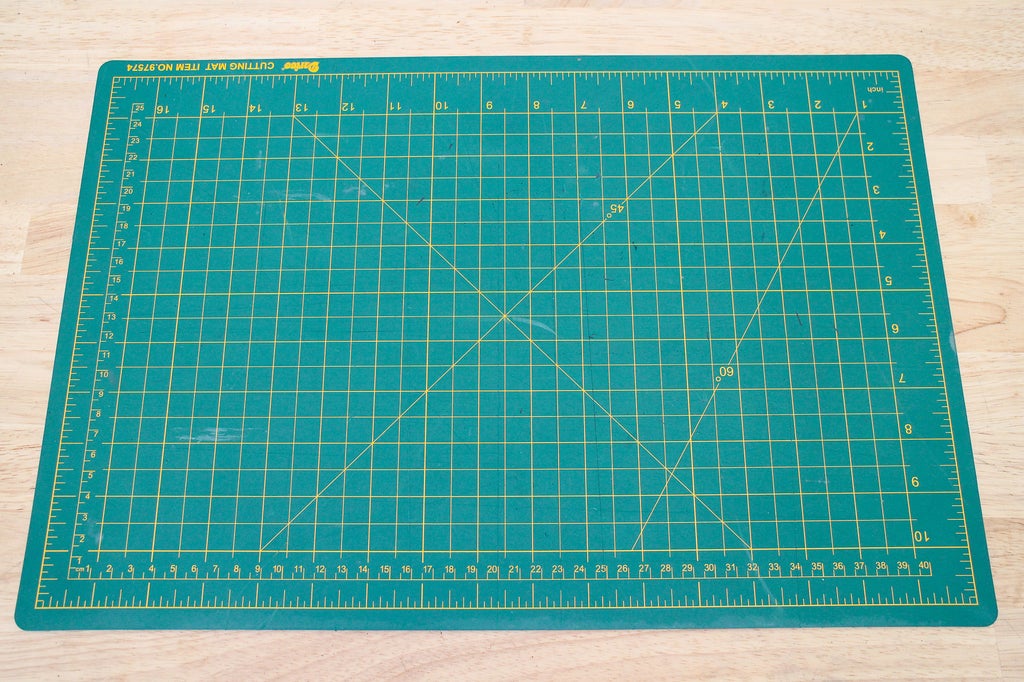
- Cutting mat (or other appropriate large cutting surface you don't mind damaging)
- Leather needles
- Thick thread (preferably waxed)
- Double sided tape
- Line 20 snap setter
- Rivet setter
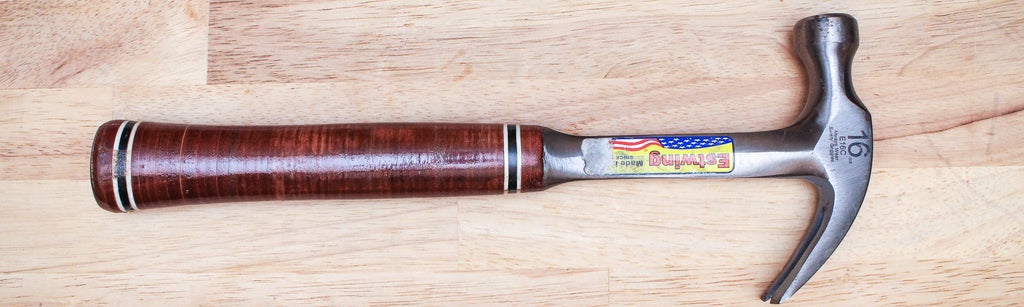
- Hammer
- Wire cutters
- Clear 18" x 2" ruler
- Metal ruler
- Cloth tape measure
- Pencils
- Semi translucent paper (I like to use marker paper for drawing small-ish patterns, and pattern paper for larger ones)
- Thin cardboard scraps
- Sponges or rags
- Scotch tape
- A printer or access to a place to print pattern files
- Clamps or binder clips
Materials
- Flexible 3-5 oz leather
- Stiff 6-8 oz leather
- 3/4" center bar buckles
- 3/4" D rings
- Line 20 snaps
- Small and medium rapid rivets
- 1" center bar buckles
- 1" D rings
- 1 1/4" buckle
- O-rings
Step 1: Know Your Tools

There are many online resources for buying leather and leather tools, and depending on where you live, you may even have a local leather supplier. There are a surprising 108 Tandy Leather stores located across North America, and quite a few local independent stores as well. Leatherworking requires some initial investment in tools, there's just no getting around it. Here's some information about each of the basic tools we'll be using. To see some of the more specialized tools, check out the Leatherworking Encyclopedia at the end of this class.
X-Acto Knife - a cheap and easy to use leather cutting tool, great for details but not as good for cutting very thick leather. Make sure you have a lot of extra blades.
Leather Shears - I prefer these semi-serrated Olfa shears for cutting leather. They always stay sharp and are great for cutting out small patterns in thin to medium leather.
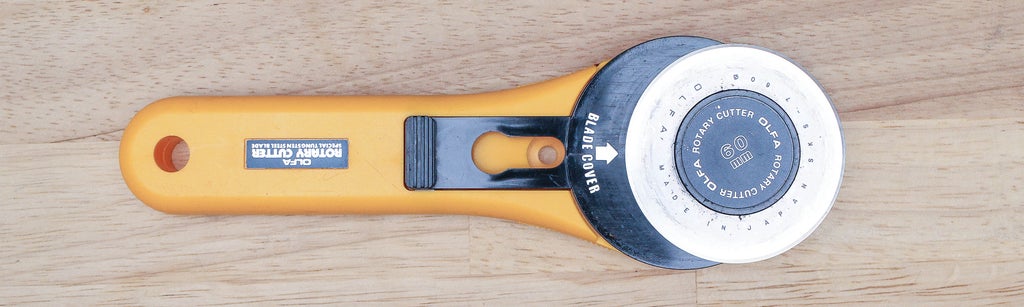
Cutting Wheel - a good way to cut long straight lines in leather when used with a metal ruler and a cutting board, not an essential tool, but great for cutting straps.
Cutting Mat - a self healing cutting mat or another smooth, damageable, surface with some give is essential for cutting leather.
Stitch Groover - marks sewing lines by creating grooves a consistent distance from leather edges. Not an essential tool but a very useful one, especially when you are sewing stiffer leather like what we are using for the wallet.


Adjustable V-Gouge - carves variable depth grooves for creating clean folds in leather. A very important tool, make sure you get one of these.
Skiver - thins leather in select areas by shaving off layers with a razor blade. Useful for removing bulk when you are layering thick pieces together.


Mallets - for stamping, setting snaps, and using manual punches, you always want to use a mallet, not a hammer. Leather mallets come in rawhide, wood or poly, and come in different weights. A medium weight mallet is a good all around choice
Hammer - sometimes you do need a metal hammer for leatherwork though, folding, setting rivets etc, it's a good idea to have one around.
Mini Anvil - as useful as it is adorable, a mini anvil gives you a stable hard surface when you need one, helping you punch holes and set snaps and rivets in awkward places.

Quartz - a smooth solid base for stamping and punching. If you don't want to spend the money to get one of these a salvaged paving stone, slab of hardwood or steel will work too.
Poundoboard - a plastic slab like a cutting board that goes over your quartz slab so your tools aren't deformed or dulled during punching and stamping
Rotary Punch - easily punches different sized holes in leather without having to use a hammer and a punching surface, but can't punch more than a few inches in from an edge.
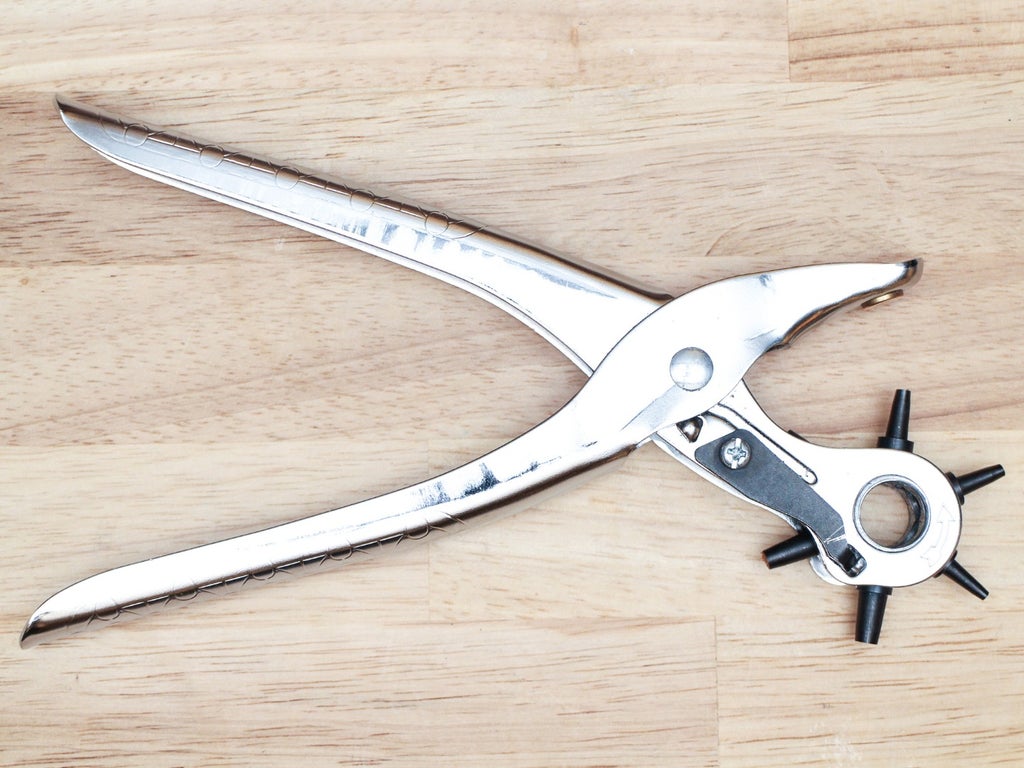
Manual Punches - individual punches that create holes when hit with a mallet on a punching surface. Not as convenient to use as a rotary punch, but they can make holes in hard to reach places and come in more sizes. Sets with interchangeable heads are the most economical.
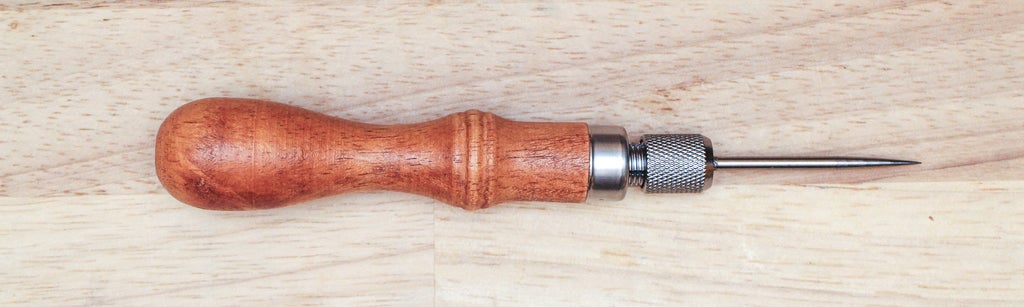
Awls - poking and scratching tools for creating small holes and marking leather. I mostly use them to punch sewing holes, or trace the outlines of patterns onto leather.
Diamond Stitching Chisels - pronged punches designed to create evenly spaced sewing holes. Available with different prong spacing and prong numbers. Sets with interchangeable heads are the most economical if you want spacing options.


Leather Needles - there are a few kinds of leather needles for different applications, we will mostly be using blunt needles in this class.

Waxed Thread - thread for hand sewing leather is usually fairly thick and often waxed to help it from unraveling. You'll need some to sew the bag project in this class.

Overstitch Wheel - used as a marking tool to lay out stitch distance and to mark pattern edges through paper. It can also be run over stitches to help tighten them. The one I have comes with interchangeable heads that have different spacing. Not an essential tool, but very useful.

Stitching Pony - holds your leather project stable while you saddle stitch. A great tool if you want to try mastering the two needle saddle stitch. You can also make your own by following this Instructable.

Leather Contact Cement - leather glue that works when applied to both surfaces.

Double Sided Tape - narrow tape with a strong adhesive on both sides that is used to adhere leather together. Comes in permanent and re-positionable varieties

Disposable Brushes - used to apply glue to leather.

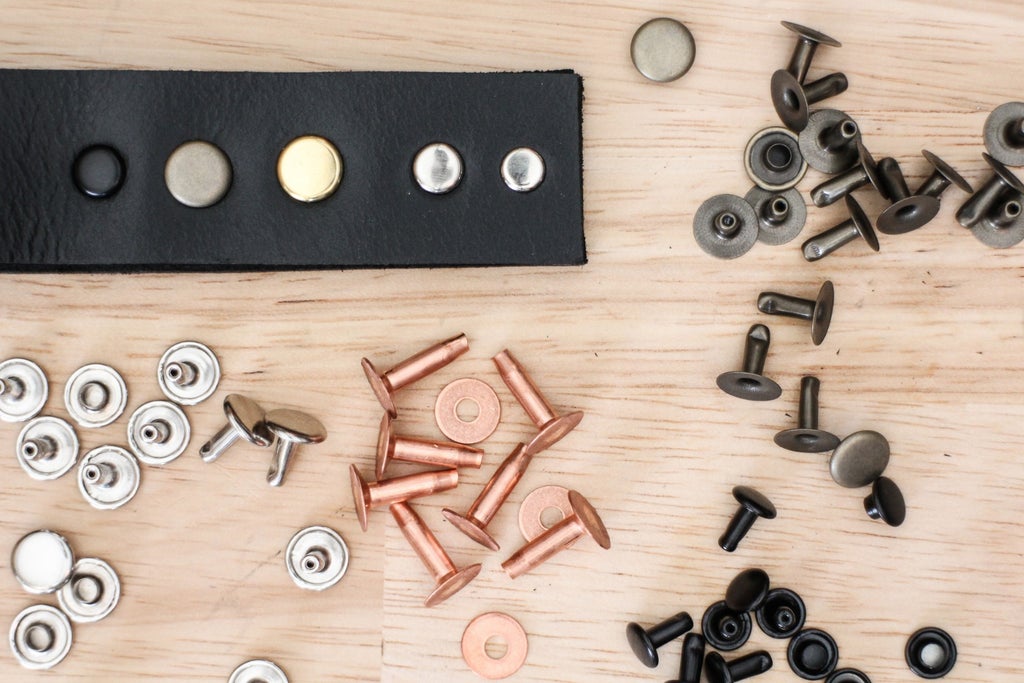
Rivets - simple two part metal fasteners used to join layers of leather together. Available in different sizes and finished. Some varieties can simply be set with a hammer, others require specialized setting tools.
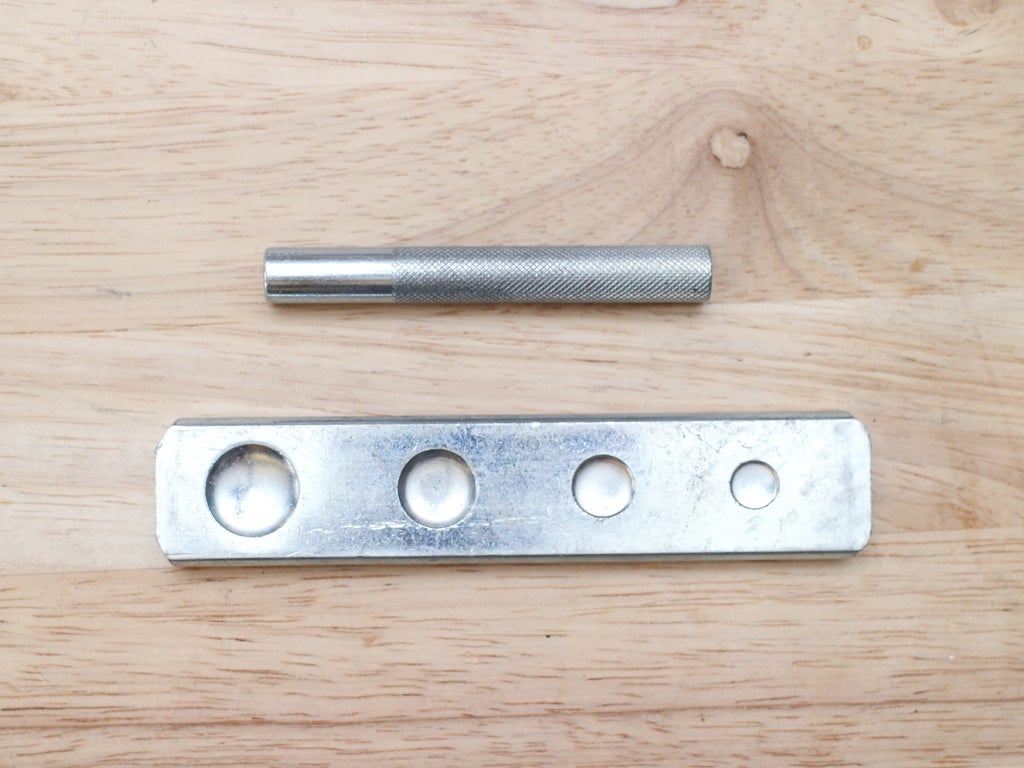
Rivet Setter - tool use to set certain types of rivets, usually two metal parts used with a mallet.
Snaps - Simple metal closures that are set into leather much like rivets. Snaps consist of 4 parts: the cap and the socket, and the post and the stud, and each pair it attached using a specialized setting tool.
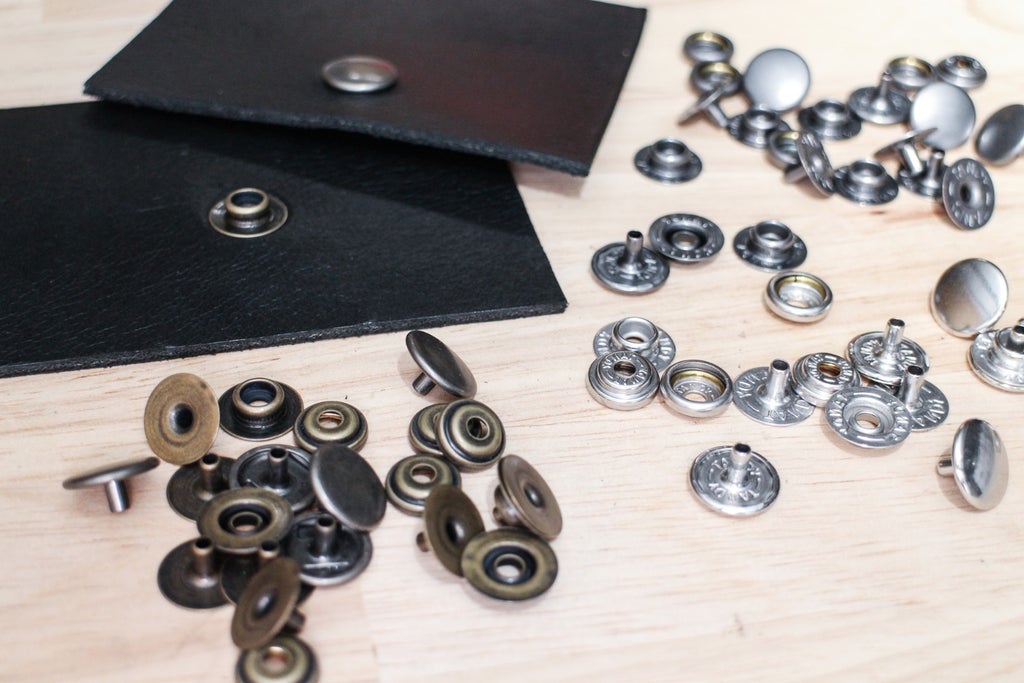
Snap Setter - tool used to set the halves of a snap together, usually two metal parts used with a mallet.

Buckles - a type of metal or plastic hardware used to create adjustable connections on leather straps.

Rings - metal loops of various shapes and sizes used as connection points in leather projects.

Step 2: Materials for Each Project

You'll need slightly different materials for the different project options in this class. Here's are exactly how much of everything you'll need to complete each design.
Small Bag:

Hardware for one bag: one 3/4" center bar buckle, two 3/4" D rings, one line 20 snap and some small and medium rapid rivets in the finish of your choice
Leather for the body: a piece of 3-5 oz leather at least 24" x 24" per bag. Your best bet is probably flexible upholstery or chap leather leather. Any of these would be good choices: Distressed brown upholstery chap, Brown heavy side, Black moto chap, Distressed pigskin


Leather for the straps: a piece of a slightly stiffer and thicker 5-8 oz leather at least 12" x 6" (this could be the same leather you used for the wallet, or even an old belt). These would be good options: Austin Double Shoulder, Latigo Side, Meza Double Shoulder, Warrior Double Shoulder

Larger Bag Option:

Hardware: one 1" buckle, two 1" D rings, and some small and medium rapid rivets in the finish of your choice
Body: a piece of the same flexible 3-5 oz leather at least 36" x 24"
Straps: a piece of the same stiffer 5-8 oz leather at least 38" x 6"
Shaped Hip-Belt Variation:

Hardware: one 1 1/4" buckle, two line 20 snaps, and some small and medium rapid rivets in the finish of your choice
Leather: more of the same leather from your small bag, at least 30" x 24"
Shoulder Harness Strap Variation:

leather: more of the strap leather from your small bag, at least 12" x 24"
hardware: one 1 1/2" - 3" O-ring, 4 line 20 snaps, and some small and medium rapid rivets in the finish of your choice
To get more specific, I got my leather at S.H. Frank in San Francisco. The reddish-brown leather I used for the bag is a soft 4 oz top-grain upholstery cowhide with a pull-up finish and a light pebble grain, the black leather for the fringed bag is a 3 oz chap with a pebble grain, and the black leather for the straps is a stiffer, 5 oz full grain cowhide.

...If you don't recognize all the leather terminology I'm using here, go look in the Leatherworking Encyclopedia :)
Step 3: Let's Get to Work!

Now that you've seen all the supplies and tools you'll need to complete the projects in this class, let's get started learning how to design patterns for simple leather accessories!


