Introduction: .:. BEER CAP EARRINGS .:.
Recycled bead cap earrings with sterling ear hooks.
They are super fast and easy to make, and very few tools are required.
Don't feel like to make them? Here is the ones I sell!
Step 1: WHAT YOU NEED
Materials:
-1 beer cap;
-20 gauge ear wire (sterling, brass, copper…or anything safe to wear).
Tools:
-hammer;
-jewelry saw or tin snips;
-sanding paper and file;
-round needle nose pliers, small jewelry pliers;
-metal awl and metal punch (or anythings that can serve the same purpose);
-hard metal surface.
Step 2: PREPARE THE CAP
Drink one beer and keep the cap.
Start flatten it with the hammer from the sides, slowly so you wont break it.
Than start to hammer the center, flip it over from times to time.
Remove the plastic seal from it, than hammer again, on a hard metal surface, till completely flat.
Step 3: DIVIDE THE CAP IN HALF
With the jewelry saw or tin snips cut the cap in the exact half.
Step 4: SANDING AND FILING
With the file smooth all the angles, than with the sanding paper remove the cap varnish.
Step 5: DECORATE
With the metal punch, or anything else that can serve the purpose, make some small bump on the back of the half caps. You can do many different decoration, I choose a really simple one.PoP
Step 6: POKE HOLES
With the metal awl poke 2 holes in each half cap, on the top side corners.
Than file down the back of the holes with the file or sanding paper.
Step 7: JUMP RINGS
With your wire (18 or 20 gauge), make 4 jump rings: roll the wire around the round needle nose pliers, or anything else that can serve the same purpose, than cut them with the jewelry saw.
Than place them in the half cap holes you made.
→Remember to open the jump rings always from side to side, and never enlarge them to the outside, or they will loose their round shape.
Step 8: EAR HOOKS
Take your ear wire (20 gauge for standard ear holes, 18 gauge if you are planning on making heavier earrings, so they wont cut trough your holes), cut a piece and bent it in a bigger curve, smooth the edges with the file, than to one edge make a small curve with the pliers, like in the photos (not to bent or they wont enter in to your ear holes). Slightly hammer the wire on a hard metal surface, so it will keep the shape better.
Make an hoop on the other side of the wire, flip it into to one of the jump ring, and than wrap it around the wire again (see photos).
Than adjust the curve of the ear hooks, so that it wont come out of the jump ring while you wear it.
Step 9: DONE!
You are done! You can make many different variation, poke some holes in the bottom part and hang some beads, or connect more half cups with the jump rings...

Runner Up in the
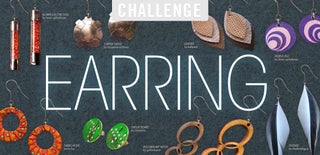
Earring Challenge

Participated in the
Crafting 101


