Introduction: 6-axis Sensor Module FSP200 Calibration and Testing
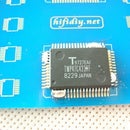
The FSP200 is a 6-axis inertial measurement unit processor that provides heading and direction output. It performs a fusion of accelerometer and gyro sensors for stable and accurate heading and direction. The FSP200 is suitable for use in robotic products such as consumer floor cleaning products, garden and lawn robots, pool cleaners, and the hospitality and medical markets. Assistant robot.
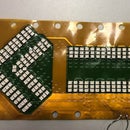
Here we introduce the factory calibration and R&D application test process of the FSP200 sensor module factory produced by Shanghai Runxin Technology. FSP200 module factory calibration process The simple calibration system consists of a single set of fixtures, motors, motor drives, home position sensors, motor button pads and power control boxes, as shown in Figure 1.
Before starting the calibration, make sure that the FSP200 simple calibration system is level, as shown in Figure 2.
Step 1: Start Calibration: Press CAL Button:
The green LED begins to flash, indicating that the module is in "calibration" mode.
Step 2: Calibrate Motion (turn the Motor 180 Degrees):
Press S2 (green button) on the motor button panel to move the counterclockwise 180 degrees. Wait for the motor to turn 180 degrees before proceeding to the next step.
Step 3: Complete the Calibration:
Press the CAL button again to end the Calibration mode. The calibration results look at the red and green LED display status: if the module is calibrated, the green LED will turn green; if the module fails to calibrate, the red LED will turn red.
Step 4: Verify Calibration Function:
Press the RST button on the FSP200 fixture plate to ensure that the display shows the module's heading (should be close to 0.00 degrees). Press the S3 button (blue button) on the motor button panel to move the motor 180 degrees clockwise, waiting for the motor to stop. , view the display. Verify that the heading reading should be 180 +/- 0.45° (179.55 to 180.45°).
As shown in Figure 3:
Step 5: Calibration Is Not Successful:
If the "result" red LED illuminates at any time during the calibration process, there is a failure.
If the Results light is not lit, it may be a connection problem or a power problem. Module calibration fails if the value displayed by the verification step is outside the specified acceptable range.
If any of these faults occur, remove the module from the fixture and install it back onto the fixture and try again. If the fault occurs repeatedly, the module is bad; if the module passes, the module is good.
R&D application test process example In order to achieve the best performance effect of the sweeping robot navigation, in addition to the calibration error calibration of the sensor itself in the factory, we also need to do a lot of error reduction testing in the initial stage of practical application: by implementing the recommended operation to the maximum Reduce the source of error and improve the heading error estimation.
The heading error estimate will vary due to the length of time, due to gyroscope scale (or sensitivity) errors in the short term and gyroscope offset (ZRO, zero rate offset). It can be learned from the following calculations: Heading error estimate = scale error x unremoved rotation + zero rate offset x time
The FSP200 provides three interfaces: UART-RVC (PS0=0, PS1=1 as shown in Figure 4) UART-SHTP (PS0=1, PS1=0) UART-RVC –DEBUG (PS0=0, PS1=0) When designing the hardware, it is best to be compatible with these three interface modes to facilitate switching tests.
Step 6:
Sweepers are mass-produced using the UART-RVC mode. The way to test module performance is interactive software testing and non-interactive testing. The following two test procedures for improving ZRO are described below:
1) HOST does not use interactive software testing process as follows: 1: After the FSP200 RVC mode is calibrated on the test rack, connect the serial port to the PC and use motionStudio2 to open the RVC data. However, this data has been changing, so it is best to record the initial and 180 degrees after the normal serial port tool. Turn back to the value of this end point of 0 degrees (total 360 degrees), then open the LOG and take the value of the two hexadecimal data RAW and divide it by 180 degrees. If the percentage is less than 25%, the requirement is satisfied. The smaller the better.
(The last data - the initial data is generally 0 after reset) / 180 < 25%, which is a better calibration module.
2: Pick out 5 to 10 pieces of module with the smallest error in the visual module, place it on the sweeping machine, fix it in glue, power on RVC mode, and charge the sweeper for half an hour. After charging is completed, reset the module and save the module to learn the current temperature mode. If a module does not turn off after charging, you can run directly on the sweeper without resetting. Carry out the next test.
3: Move the sweeper to the site, mark the starting position, wait for 2 seconds for the module to power on, and connect the module to the computer. Use motionStudio2 to open the RVC real-time data, let the sweeper start to walk the word line for 20 minutes, then stop and move back to record. Position, view the RAW angle, calculate the 20-minute average error. Then reset the module and save the data learned by the module for just 20 minutes.
4: Change the PS1 and PS0 of the module after learning to SHTP mode, connect to the computer, Run “sh2_ftdi_logger.exe test.dsf --raw --calibrated --uncalibrated --mode=all” ? , and extract the DSF file for analysis. Check the DCD actual test module error. 5: Number the module, record the error, and change the module to RVC mode. The smaller the error is, the better the performance of the module is. The module with good performance is selected to enter the cleaning test stage of the sweeper, and then the module consistency test, high and low temperature test, judge The overall effect of the module, dynamic calibration effect with temperature changes.
2) HOST uses interactive software testing process as follows:
1: After getting the factory-calibrated module, the RSP200 needs to be set to RVC_Debug PS0=0, PS1=0 mode. Through the PC software ftdi_binary_logger_RVC_Debug, connect the serial port of the module to obtain the LOG.BIN data of the sweeper for 2 to 3 minutes. The sweeper software needs to set the local static to open only the largest fan and roller brush action. The LOG.BIN data is analyzed to judge the subsequent HOST. How much time does the end software set to execute the dynamic calibration command.
2: There are four kinds of notifications for the expected motion of the device sent by the Host to the FSP200: 0 is the initial state assumed by the sensor hub, 1 is static without vibration, 2 is static brush rolling vibration, and 3 is normal cleaning. Each time a state is switched, a corresponding status command is sent to the FSP 200, and the feedback information of the FSP 200 is read to determine whether to execute the dynamic calibration instruction. After the software is set up, the FSP200 module flying line (VCC, GND, RX, TX) will be connected to the PC serial port. It should be noted that the module needs to be loaded into the machine to fix it. Turn on the computer and turn on the ftdi_binary_logger_RVC_Debug software to get the sweeper from the beginning to the end of the cleaning area. The implementation of the motion data is automatically saved as a LOG.BIN file, and the LOG.BIN file is used to analyze whether the interactive software settings on the HOST side are correct.
3: If the interactive software is set correctly, switch the FSP200 RVC-DEBUG mode to RVC PS0=0, PS1=1 mode, perform multiple machine cleaning tests, record the machine operation 1 hour position angle error, the smaller the error, the module performance The better, the module consistency test, high and low temperature test, judge the overall effect of the module, dynamic calibration effect with temperature changes.

Participated in the
Sensors Contest


