Introduction: Atmega328P Shield for Quick Prototyping on Breadboards
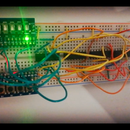
There are many situations in which you want to replace an Arduino board for an Atmega328P chip, which is cheaper and more compact. However, using an Atmega328P can be inconvenient, since you need to wire up the power, UART, reset button and the 16 MHz crystal. This Instructables provides a quick and reliable solution using a PCB design. The PCB significantly reduces the number of messy jumper wires, and is specifically designed to fit onto the breadboard with a single push, allowing for convenient prototyping and experimentation. The image above summarizes the some of the features and benefits of the design.
You may think that you can prototype and simulate the Atmega328P with an Arduino Nano on the breadboard. Most times this is fine, but this is not completely accurate. For instance, Arduino Nano can supply 3.3V, when Atmega328P does not. The Nano uses a SMD Atmega328 instead of a through-hole one, so the pin out would be different.
Supplies
Most of the components are soldered onto the PCB, so you can see most of them in the photos above. I have attached a complete list of supplies as a PDF below.
Attachments
Step 1: Order PCB
I order mine from JLC PCB. Altium files for PCB design are on GitHub: https://github.com/bz36912/PCB
It is under "Atmega328P_Shield" folder with library files under "shared_Altium_resources" folder and you will need to download the repository.
I also attached the Altium smart PDF output below, showing the schematic and PCB design.
If you look at Step 3's image, you will see I accidentally used an over-sized footprint for the push-button.
Attachments
Step 2: Check Breadboard
For some breadboards, the power rail holes aligns with the rest of the hole (the top image above), which means you need to solder male header pins to P2 on the PCB.
If the power rail holes do NOT align (the bottom image above), you need to solder male header pins to P4 on the PCB.
Step 3: Soldering
Solder the components, as shown in the photos above. The list of components is under the Supplies section above. As shown in the image above, I accidentally used an over-sized footprint for the push-button, but it still works.
Step 4: How to Use
The video above covers:
- burning the Arduino bootloader
- for more info: https://docs.arduino.cc/built-in-examples/arduino-isp/ArduinoToBreadboard
- upload code using a USB TTL adapter (FT232RL module)
- for more info: https://electronicseternit.wixsite.com/electronicsforlife/post/part-2-arduino-code-upload-ftdi, which has an example without using a PCB
- the reset button
The red wire connects AVCC to VCC, which is what you typically want to have.
Step 5: Fixing Issues
Skip this section, if everything works fine.
Issues with FT242RL driver
When connected to the computer's USB port, FT242RL module should show up under "Ports COM & LPT" in Device Manager (see image above). Right click on the relevant COM port and select Properties. When you look at its properties, under the "general" tab, the manufacturer should be FTDI. If not, go to https://ftdichip.com/drivers/ and download drivers. Follow the instructions on that website. Then, to update FT242RL, go back to Device Manager, select "Update driver" and update the driver MANUALLY.
Synchronization issue when uploading code
You may see "stk500_getsync()" in the error message. Press the reset button might help. You can also try adding a 10uF capacitor between ground and the reset pin.
Not entirely sure about the next fix, but it worked for me. Fix: short FT232RL's CTS to its DTR. According to Arduino UNO's schematics: https://content.arduino.cc/assets/UNO-TH_Rev3e_sch.pdf, CTS is directly connected to DTR.


