Introduction: How to Display and Set Numbers With 7 Segment Display and Joystick
This project uses a 4-digit seven segment to display numbers, a joystick to change/set the numbers and a buzzer to alert the user. Many measuring devices, such as kitchen scale, voltmeter, clock, thermometer and speedometer, require numerical displays. For the voltmeter, you may want to use the buzzer to alert the user when a threshold voltage is reached, and this threshold is set by the joystick inputs. Thus, The design has a variety of applications (which will be discussed in the final step).
In fact, my goal is to make something useful and versatile. I have uploaded the Arduino code, PCB design and STL files for the 3D prints, so you can modify it and add your creativity to it. The design is is powered by a mini USB B port and uses Atmega328P micro-controller with Arduino bootloader. It has a TTL USB adapter (FT232RL module), so the USB port can both supply power and upload the Arduino code onto the micro-controller.
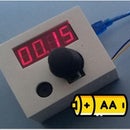
In this Instructable, I will use the design to make a count down timer, as demonstrated in the video above.
Supplies
Most of the components are soldered onto the PCB, so you can see most of them in the photos above. I have attached a complete list of supplies as a PDF below.
Attachments
Step 1: Order the PCB
I order mine from JLC PCB. Altium files for PCB design are on GitHub: https://github.com/bz36912/PCB
It is under "joystick_n_7seg_PCB" folder with library files under "shared_Altium_resources" folder and you will need to download the repository.
I also attached the Altium smart PDF output below, showing the schematic and PCB design.
It uses an atmega328-PU micro-controller, with a 16Mhz crystal and bootloader. I used two 8-bit shift registers, so the 7 segment display only takes up 3 GPIO pins on the atmega328-PU instead of 12 pins otherwise.
Attachments
Step 2: Insulate the Bottom of the Joystick
If you are using the same joystick module as me, you need to stick a piece of cardboard under the joystick module. This prevents it from shorting the PCB, since there are electrical conductors poking out of the bottom of the module.
I just taped a piece of cardboard under the joystick.
Also if you are de-soldering pins from the joystick module, avoid damaging the module by excessive heat or force. The joystick module seems to use a low quality black PCB board and is vulnerable to heat damage.
Step 3: Solder the PCB
Solder the components, as shown in the photos above. The list of components is under the Supplies section above. Soldering on the joystick module may be tricky. You may use an IC socket for the atmega328-PU; there is enough space.
IMPORTANT:
- MUST have bootloader on the atmega328-PU before soldering
- Solder the back side before the front side
- Make sure the joystick, 7 segment display and buzzer are pressed down close to the PCB board when soldering.
Step 4: Upload the Arduino Code
The code is on GitHub: https://github.com/bz36912/timerArduino
Test the code works before moving to the next step. The code is explained using in-line comments. On the GitHub, the "Arduino Timer documentation.docx" contains further explanations and diagrams (finite state machine diagram and subsystem breakdown diagrams). I uploaded the code onto the Atmega328-PU using the USB TTL adapter. The adapter is plugged into P2 header on the PCB.
It may be confronting that the code uses multiple CPP and header files, but this file structure improves code modularity and organisation.
Step 5: 3D Printing
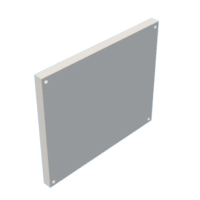
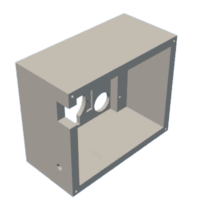
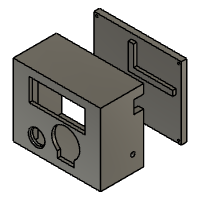
I use PLA for 3D printing the packaging of the timer. The STL and Fusion360 files are attached below.
Step 6: Screw on the PCB
The PCB is secured on the front cover using four small screws.
Step 7: Tape the USB TTL Adapter
The USB TTL adapter (FT232RL module) is slid into the L-slot on the back plate (see image in Step 5). Then, the adapter is duct taped onto the back plate. The FT232RL is connected to the P2 header on the PCB using female to male jumper wires.
Step 8: Assemble
The back plate is attached to the front cover using four screws at the corners, and it is finished! You just need to power it on.
Step 9: Multi-purpose PCB
The PCB used in this project is designed to be versatile and adaptable. In this Instructables, the PCB is used for a timer. In another project, I used the PCB for a voltmeter/battery tester: https://www.instructables.com/How-to-Make-a-Battery-Tester-and-Voltmeter/. In a future Instuctable, I will show how it can be used as a bluetooth remote control for a robot car.
Feel free to add your creativity and post photos in the comments section below.


