Introduction: Backyard Kid's Javelin


This is a science/ math project my son was assigned by his grade 1 teacher. The students are to watch a video of Olympic javelin throws and are then to throw and measure a paper towel 'javelin' and then the students were to improve their 'javelin' to see if they could throw it further. According to the website this involved closing the end of the paper towel tube and then adding weight. My children all do archery though, and understand how an arrow works to stay stable, so the idea of filling a cardboard baton with weight so it would cartwheel through the air further didn't seem very 'javelin-y' to us. So we set out to start with some supplies we had lying around the house and see if we could make a javelin that would fly without pitching end-over-end, and stick in the ground.
Safety is paramount with this project. Under no circumstances does anyone stand downfield during a throw. My kids all practice archery and understand a firing line and no that 'STOP!' means no one is to launch any arrows. We treat the javelin exactly the same way.
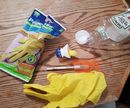
Supplies
For the Javelin:
40" length of 1/2" grey pvc electrical conduit with socket end
6" length of grey pvc electrical conduit with socket end
3" 5/16" bolt and nut
four 1/2" flat washers
one 3/4" washer
nut for a 5/8" bolt
1" length of 1/2" pex pipe
one 3" #10 duplex nail
Surveyors tape
Step 1: Safety First!

PPE for this project is a welding helmet, long nonflammable sleeves and
pants, and non-flammable work gloves. Safety glasses are usually a given, however in this project, other than the javelin, nothing hard would be flying through the air at velocity.
Step 2: First Throw

Establish a throwing line and then stretch out the tape. Throw the pvc pipe as closely as you can to a javelin. Observe how the pipe rotates through the trajectory. Measure the distance of the throw.
Here we throw just a section of pipe, that will become a javelin. It cartwheels through the air around a center of balance located about the center of the pipe, making two full rotations.
Step 3: Adding Weight to the Front of Javelin


We added a heavy bolt assembly to the front of the javelin which is the socket end of the pipe. The assembly is constructed by cutting a one inch section from the pex pipe and setting it aside. We used a pex cutter which makes the cut through the pipe perfectly square and is a much safer tool than a sharp knife. Next fit a 1/2 inch washer onto the 5/16 bolt, followed by a 5/8" washer. The second washer keeps the bold assembly from being driven into the pipe on impact and is the same diameter as the outer diameter (O.D.) of the socket of the pipe. Next is the 5/8"hex nut that friction fits perpectly to the inside of the socket and holds the entire assembly snugly in place and then another 1/2" washer. The 1/2" washers also fits the inner diameter (I.D.) of the socket perfectly but doesn't provide much in hold but keeps the assembly aligned. The next three components are the 1" pex which is a spacer and can be replaced with anything suitable, another 1/2" washer for alignment and a nut for the bolt to tighten the whole assembly and hold it together. You will need some wrenches 14 mm or 9/16 box ends or adjustable wrenches, deep sockets whatever your tools of tensioning choice are. Then drop the whole assembly into the socket. My 6 year old boy did all this on his own and is a great job for inquisitive little minds!
Step 4: Test Throws for Weighted Pipe
The trajectory of the weighted pipe through the air is very different that the pvc pipe alone. The center of balance is now shifted into the weight assembly at the extreme end of the pipe. Now the rotations are much slower , in our case only one half a rotation per throw and the javelin usually impacted on the weighted end. The javelin also initially flies very flat until become unstable and tumbling.
Step 5: Spikey Dangerous Bits


We welded a thick duplex nail to the top of the bolt assembly. This required a welder and we used a Lincoln Electric 180 wire feed welder with .035 flux core wire, but I am hoping to soon upload a no-weld version of this project.
Step 6: It Amazes Me How Fast Kids Catch Onto Technology


Wire feed welders are extremely simple to use. They may not be first in the tools you need but they are useful and it amazes me how often I use it to repair or build around the house. Best though to wear a respirator to protect from fumes even when wearing outdoors.
Step 7: Kidding! Dad Did the Welding!

I did the welding. Fumes, electrical current and heat are not a good mix for children. But I have an extra auto-darkening helmet for the kids. They have to stand far back about 15 feet (~5 m) and wear the helmet if I am welding and they want to stick around. I have however am teaching them the principals of welding and get them to help fit the pieces after they are cut and ground. I also usually wear a half face respirator when welding.
Step 8: Throw Number Three: Will It Stick?

The javelin after some practice was landing most often with the weight down. Adding the nail meant when it did it now usually stuck in the ground. Unfortunately almost as often as it stuck, the angular momentum of the spear usually caused it to pitch the shaft past the point of impact. But still it is definitely improved. Unexpectedly, since the nail didn't add muck more weight the javelin actually rotated less in flight, the small movement of the center of balance provided a noticeable improvement in stability.
Step 9: Adding a Tail to Improve Stability


We needed to stabilize the javelin just a little more and that meant inducing some drag at the back. To do this we cut two pieces of surveyors tape about feet (~1.5 m) long. And then fed each piece through a 1/2" washer until they were at the center of the tape. Then we pulled the tape through a 6" length of PVC pipe with a socket until the washer was seated in the bottom. Then we stuck the socket with the tape onto the back of the javelin.
Step 10: Fourth Throw and Our Finished Javelin

The flight of the javelin is completely controlled now. Unfortunately by this point Brennan was too tired to continue to throw and we missed getting his best throws on video. That said, I was able to consistently throw the javelin and get it to stick in the ground. The drag induced by the tape kept the shaft behind the weight and spike and kept the impact into the ground at about 45 degrees. The tail acts like the flights of an arrow.


