Introduction: Bio-Adaptive Media Controller for Accessibility or Entertainment


In this instructable you will learn how to build your own bio-optimized media controller using Arduino just like the open-source system I developed. Watch the linked video for an additional quick explanation.
If you build one and do further testing with it, please share your findings so that we can upgrade the open-source system together!
If you really enjoy this instructable, please consider sharing it or voting for it in the Arduino 2019 contest!
Backstory:
Situation: According to the CDC, kids now spend 7.5 hours a day on screens. For many such as those with autism this can lead to sensory overload where little learning or engagement can occur. There is a need for improving engagement, focus, and relaxation in sync with a person’s biology especially in schools, healthcare, and entertainment industries.
Action: User research was conducted to find needs and the data collected was analyzed. Ideation led to a potential solution and a hardware / software solution was developed that can optimize screen time media in real time by adapting music and video elements based on heart data. UX testing was then conducted to evaluate the invention and improvements were iterated forming a working product.
Results: A working minimum viable product was developed to solve the initial problem by adapting video to sync with bodily rhythm with calm or thrill boosts when optimal. Further testing showed increased potential for use in home theater and entertainment industries.
Step 1: Theory of Operation


There are three modes for the device. - Thrill mode, Calm mode, and Focus mode. The images below explain how they each ought to work. The hardware device reads heart rate and sends it to the web app over USB to adjust the media played to the optimal characteristics.
Step 2: Get Parts Needed

You can find all the necessary parts on Amazon or similar marketplaces
Here is an Amazon list link to all the parts needed: Amazon Idea List
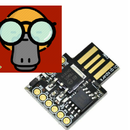
Arduino Pro Micro (5v 16MHz version), Pulse Sensor Amped Module, Solder, Soldering Iron, Heatshrink Tubing or Electrical Tape, Magnetic Breakaway Micro USB Cable
The files needed are attached to this step.
There's also a live version of the prototype Optimote Player App if you don't want to run it locally from the files. Here's the link: https://donovanmagryta.github.io/optimote
Attachments

Step 3: Solder It Up
Solder the circuit according to this:
Arduino A0 to Sensor Signal out
Arduino 5V to Sensor VCC 5Vin
Arduino Ground to Sensor Ground
If you don't know how to solder or install the Arduino IDE used to flash the scripts onto the Arduino, I highly recommend this free class right here on instructables: https://www.instructables.com/class/Arduino-Class/... It's one of those things where I couldn't explain it as eloquently or with the same level of brevity as that class author, Becky Stern does. Kudos to you!
Attached to this step is a PDF of the circuit schematic which zooms with less pixelation than an image file.
Attachments

Step 4: Encase It


I found two different ways to encase the device. I later went with heat shrink tubing with a hole for the sensor which is the method I recommend, but you could also do it the first way from a salvaged dual AAA battery holder.
Using a rotary tool cutting disc, cut slots in the case to add ports for the USB connection. Using a cone-shaped grinding cone bit, cut a hole for the optical part of the sensor. This needs to be in direct contact with skin when sensing. Wrap the whole thing in tape or paint it to make it look nicer, and hot glue the electronics in place.
Step 5: Flash the Code
Open up the Arduino IDE. If you haven't downloaded it yet, you can get it from arduino.cc.
Unzip / Extract the file you downloaded from the earlier step
Select Arduino/Genuino Micro under "boards". Plug your board in and pick the corresponding COM port under "ports". Open the sketch ending in "dot INO" from the unzipped folder, and flash to the Arduino by clicking upload.
Step 6: Test It!


Open the index.html from the unzipped folder in your web browser (Google Chrome tested) and plug in the Optimote. Load an MP4 video file and it will begin playing. You can program peak climactic modes using the GUI for the device to automatically jump to when heart rate has steadily decreased (calmest or bored, THRILL mode) or in CALM mode, you can set it to skip past this section when heart rate spikes as a calm boost. Alternatively, it can jump to the most relaxing section of the media if reprogrammed to do so with that media.
You can export biodata by clicking the download button on the player app. It includes a column called "pred" which is the device's predicted heart rate. Optimote is working well when pred is close to bpm on average.
There is live version of prototype Optimote Player Web App in case you don't want to run it locally: Optimote Player Web App
There is sample video file for an entertainment (thrill mode) use case in the folder. You can set it up to skip to the jump scare part when your body least expects it (heart rate has steadily decrease for X readings) thanks to the smart device.
Step 7: But Wait, There's More!
Thank you for reading this instructable. I hope you found it interesting or plan to build your own!
Please consider voting for this one in the Arduino contest 2019 or sharing your findings if you make one.
For further reading, see the attached PDF.
Happy tinkering!