Introduction: Cardboard Spinners From Recycled Materials
Watching these spinners spin is mesmerising and cool. Easy to make, these spinners are made from cardboard and recycled materials found around the house... and in the recycling bin!
Supplies
- CARDBOARD you don't need much, but keep it clean!
- TAPE, useful in many ways
- TIN SODA CAN (do not use a regular tin can)
- WOODEN SKEWERS or PLASTIC SKEWERS or a POPSICLE STICK
- a small bit of STRING (optional, for decoration)
- some PENS
- a pair of SCISSORS
- a COMPASS (for making circles) is optional but very useful
- a HOT GLUE GUN and some HOT GLUE GUN STICKS, be careful!
- ONE PUSHPIN, don't poke yourself!
Step 1: Make Your Circles
You want to gather the materials listed above and then...
Use your compass (or if you don't have one, your roll of tape will work fine) and trace a circle on your cardboard. Cut out the circle you traced. Make about 6 circles, all of them should be different sizes.
Step 2: Cut Up the Can
Cut up the soda can so you have about 6-10 pieces, about 2 cm by 1cm. WARNING! they are SHARP and can CUT YOU! Please be careful!
Step 3: Make Holes in Your Circles
Take the circles you cut up for the first step and poke them in the center with the pushpin (the center of the circle will be marked if you used the compass to make them, otherwise, just guesstimate it). Then, take the pointy end of the skewer and widen the hole by pushing it through the hole you just made with the pushpin.
Step 4: Color Your Circles and Attach the Fins
Now that we have our circles ready, we can attach the 6-10 metal pieces (aka, the "fins") from the soda can. Hot glue the fins to the sides of the circle, keeping them evenly aligned. Now it's time to color! Get some markers or colored pencils and color in your circles with patterns. *protip: tape can be used to decorate too* Remember, make big and easy to see patterns so that you can see them even when the spinner is spinning really fast!
Step 5: Adding the Axle
We've got our spinner, now it's time to make it spin! When adding the axle it is important to keep it straight! Applying a little hot glue can make it stay in more firmly.
Step 6: Finishing Up!
We're all done! Time to spin! *protip: you can spin by twisting your fingers on the top, or turning it really fast on the wide parts* Please experiment around with the design and do cool things like adding more layers or making an arena to 'fight' them! Like and share please!
P.S.
I wanted to enter this in the recycled materials challenge (as of 9/12/2020, but it didn't work, so please check out:

Participated in the
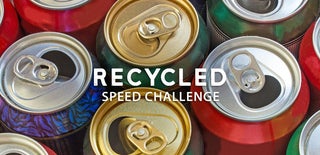
Recycled Speed Challenge


