Introduction: DIY Cat Tower Hack

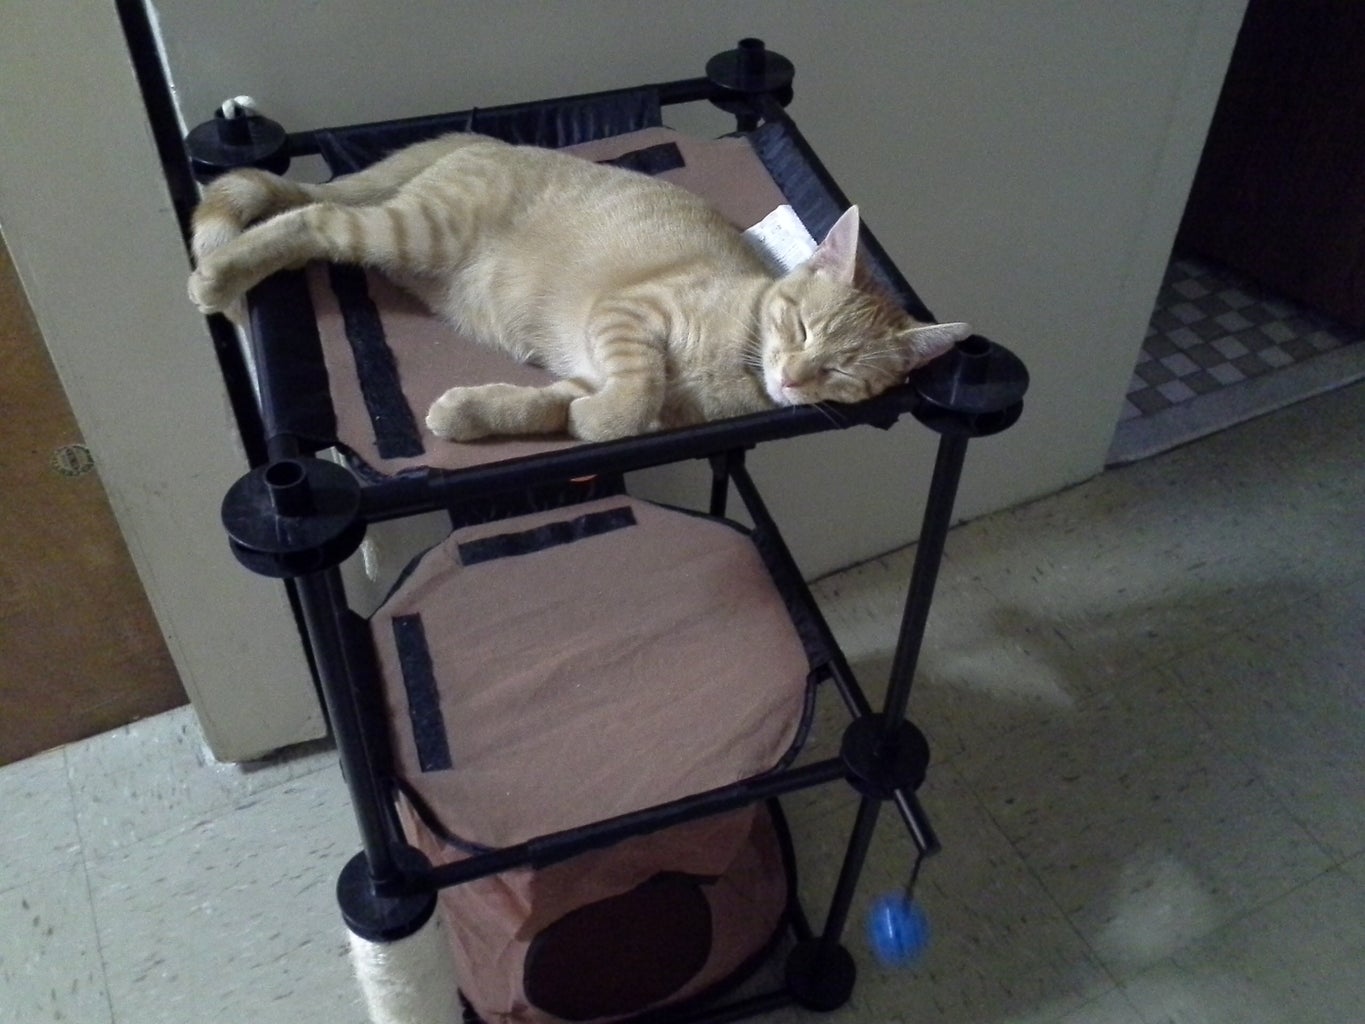


So, if you’re anything like me…you loooooooooooooove your cat! Now cats, they’re rather finicky about their stuff. Once they “like” something they’re good. Good luck introducing new things. They could take days to warm up to something new…sometimes NEVER. My two year old [Lynxx] just loves catching sun in her tattered old tower, but as you can imagine at 11 lbs (I think) she’s kind of worn it out. So with a Groupon for some fabric and a little bit of sweat and a lot of creativity I set out on this adventure…Have fun! Happy crafting…
Step 1: Part 1


Step 1 – Plan out your IDEA
Imagine what you want your finished product to look like. As they say what can go wrong, will go wrong! It’s not a bad idea to come up with a few alternative ways to execute your project as well. I examined my product thoroughly and came up with several ideas just in case the first plan didn’t take shape the way I had hope for. I knew that the tower was multi-level and I wanted to create interest, as well as have some versatility.
Step 2 – Make a LIST
1. Staple gun/Staple remover
2. Masking tape
3. Scissors
4. Pen/Highlighter
5. Ruler
6. Fabric(s)
7. Two Cardboardboxes
Step 3 – Making the Hammock (Top level)
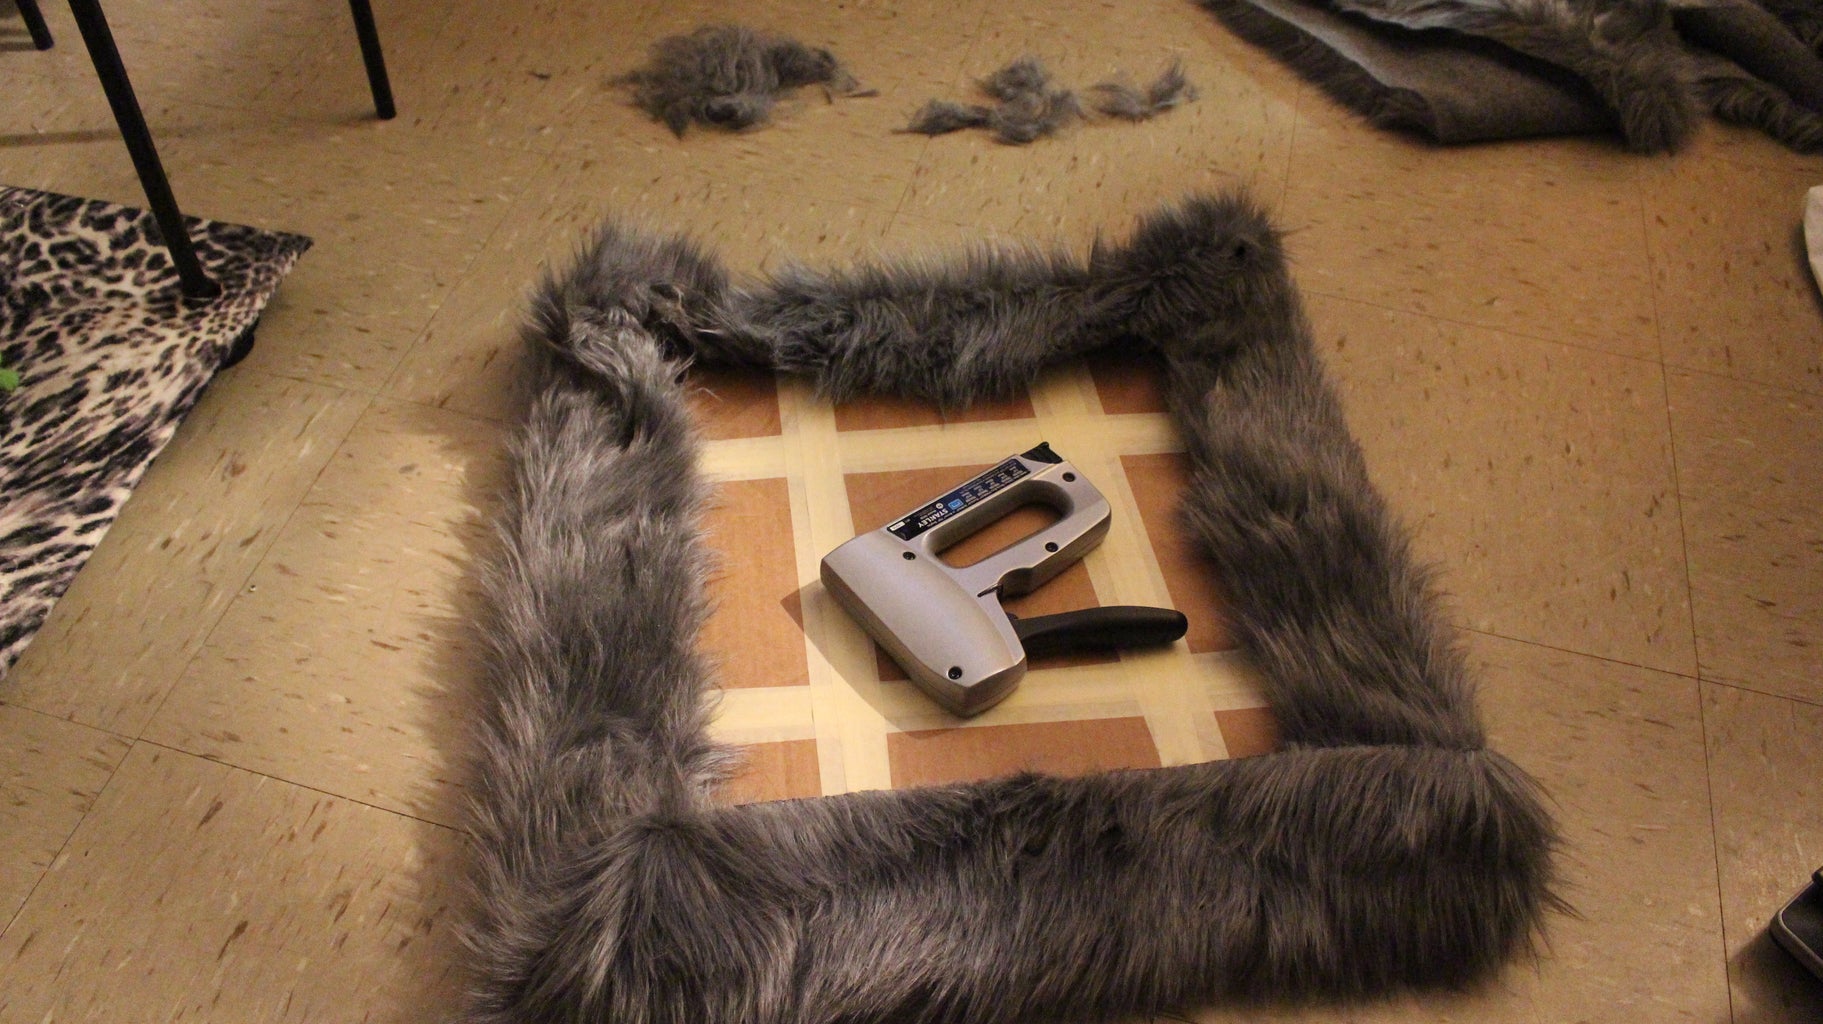
This can be very tricky if you do not choose the right fabric. Because you will be cutting the fabric into strips around all of the perimeters, you might want to choose a no-sew fleece material, wool or another heavy fabric that will not easily fray once it is cut. First you will need to fold your fabric in half, so that you end up with a top piece and a bottom piece. I started by covering the base on the top level and measuring 4” extra inches of fabric (this causes the dip on the inside). It is important to leave the fabric on the base while cutting the strips, as you will need to tuck in your corners. Once you have cut your strips equally, you will now tie off one top and one bottom and double-knot it. It is easiest to keep it straight if you do all eight corners first (working diagonally) and then work your way inward. Tip: Be sure that you double-knot tightly so that your cat doesn’t fall out and collapse the hammock.
Step 2: Part 2


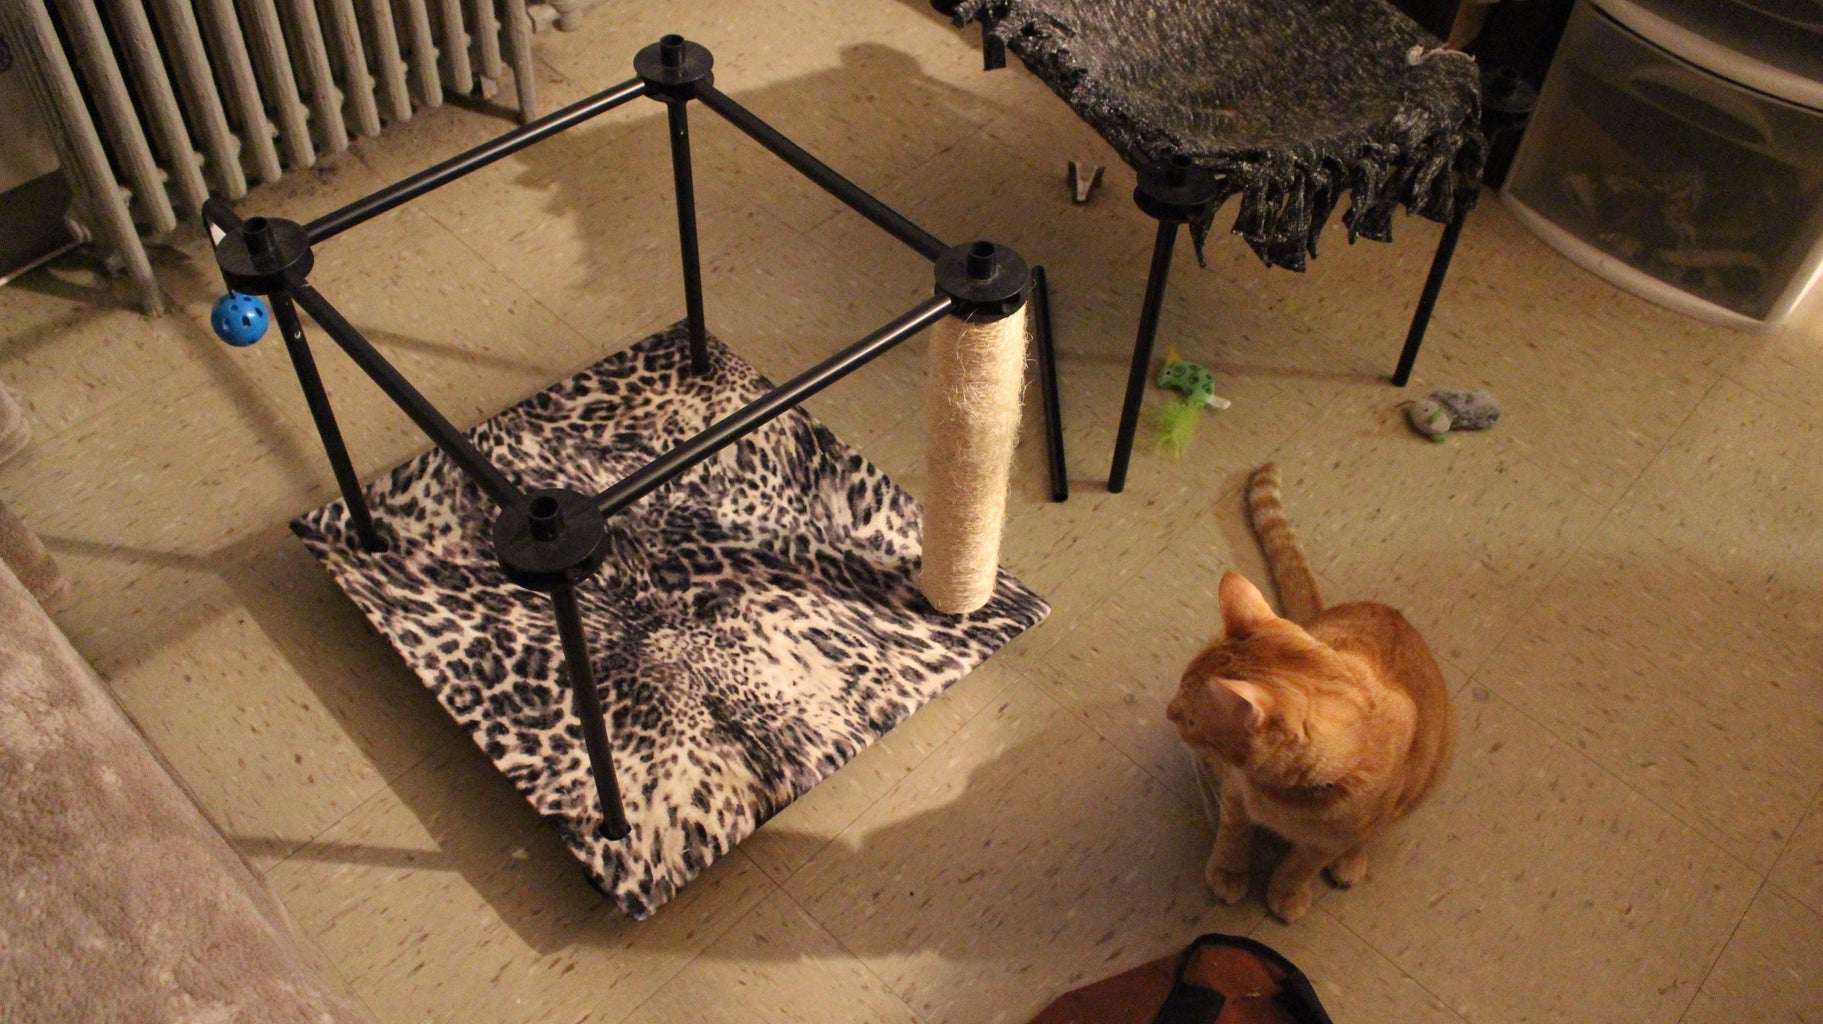


Step 4 – Making the template for the bottom and middle levels
First I sandwiched two pieces of cardboard together for extra durability. I used a highlighter to mark out circles for the holes I would need when making the bottom and middle levels. I then used the ruler to mark 2 inches around all four sides of the cardboard and trimmed off the excess accordingly. Next I used masking tape to adhere the two pieces of cardboard together. I used a knife to cut out the four circles from the corners. Lastly, I stapled the fabric to the cardboard and used masking tape to keep the fabric in place. Tip: Have your cat test it out periodically to see if their weight can withstand the foundation as well as to get them used to their new play apparatus.
Step 5 – Add accessories of your “cat’s” liking
My Lynxx loves feathers, so for her amusement I attached two feathered birds with some leftover remnants of fabric. I added a rope of bells for her to swat at and I added a jingly colorful ball using chain-ball link.
The following DIY Cat Hack was done with love…do-it-yourself and your cat might “Meow You”!

Participated in the
Cardboard Contest 2016

Participated in the
Maker Olympics Contest 2016


