Introduction: DIY Tailor's Ham Sewing Pressing Tool


A tailor's ham is a tool used in sewing to help aid in pressing and shaping garments using heat and steam. You can use it to open up seams or shape fabric.
A tailor’s ham or any other pressing tool needs to be able take the maximum amount of heat and steam your iron can push out. Most pressing tools will have two sides - one from a tightly woven smooth material and one from a tightly woven material with some texture.
Each tool will have 2 layers on each side. The inner layer should be made from a
tightly woven cotton fabric. Muslin works good for this. The outer layer has 2 sides. One side should be made from a tightly woven cotton. Quilting cottons work great for this. The other side is usually made from wool because it can grip onto fabrics. Cotton flannel also works good for this.
For stuffing, the traditional choice is sawdust. Fabric scraps, wool or cotton stuffing, or walnut pet bedding are all good alternatives. The goal is to stuff it very firmly!
Supplies
RECOMMENDED MATERIALS
- 100% Cotton Muslin (Inner/Lining)
- 100% Quilting Cotton, Tightly Woven Cotton Fabric, or Tightly Woven Linen Fabric (Outer)
- 100% Wool Fabric or 100% Cotton Flannel (Outer)
- Sawdust, cotton/wool stuffing, fabric scraps, or walnut pet bedding
- PDF Tailors Ham Sewing Pattern
Thread Be sure to pre-wash and/or pre-shrink all fabrics and make sure there is no color bleeding from the chosen fabric.
Step 1: Printing the Pattern


To print your pattern, open it in Adobe Acrobat. This is free software and can be downloaded from Adobe. Select the Print Icon or select File -> Print
The print dialog box will be displayed.
In the Page Sizing & Handling section of the Print Dialog, make sure the options below are selected.
Make sure Actual Size is selected and Print on both sides of paper is not checked.
Step 2: Assembling the Pattern


Place your two printouts side by side.
Cut away the inside edge from pattern piece where they intersect.
Align the pieces and tape together.
Cut out on the black outer line. The inner blue line marks the SEAM ALLOWANCE.
Step 3: Making the Tailor's Ham - 1

CUTTING THE INNER FABRIC
- Place your pattern on the fabric, aligning the grain, on a folded piece of fabric. 2. Cut 2 copies of the pattern. Set aside.
CUTTING OUTER FABRIC - COTTON SIDE
- Place your pattern on the fabric, aligning the grain, on a single layer of fabric, right side up.
- Cut 1 copy of the pattern. Set aside.
CUTTING OUTER FABRIC - WOOL/FLANNEL
- Place your pattern on the fabric, aligning the grain, on a single layer of fabric, right side up.
- Cut 1 copy of the pattern. Set aside.
Step 4: Making the Tailor’s Ham - 2


ASSEMBLY
- Place 1 layer of cotton muslin on your table.
- Place the quilting cotton layer on top of the muslin right side up, aligning the shapes.
- Place the wool layer right side down on top of the cotton layer, aligning the shapes.
- Place the last layer of muslin on top and align all shapes.
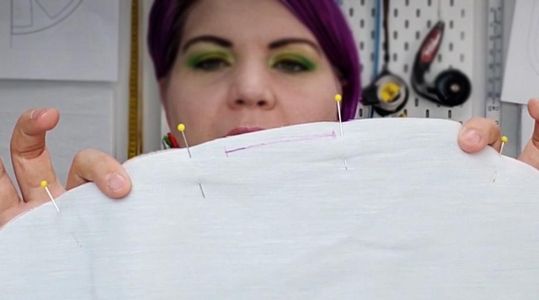
- Pin and mark a space to leave a gap large enough for turning - around 2 inches.
Step 5: Making the Tailor’s Ham - 3


- Sew a 1/4” seam, leaving a 2” gap to turn the whole thing right side out. Use a very short straight stitch.
- Turn the tailor’s ham right side out.
Step 6: Making the Tailor’s Ham - 4

Stuff the tailor’s ham until it is very firm. This needs to hold it’s shape even when pressure is applied to it.
There are several different types of stuffing you can use. The most important thing in selecting a stuffing is that it is able to tolerate heat.
Here are some options for stuffing:
- Sawdust
- Cotton Batting/stuffing
- Wool wadding/batting/stuffing
- Cut up bits of scrap fabric - must be a natural fiber! (Wool, cotton, or silk)
- Walnut Pet Bedding
- Sand (gets heavy though)
You can actually combine stuffings if need be. Stuff your tool until you reach the desired shape and it is very firm to the touch. This is not a stuffed toy! It should not be huggable, it should feel like a real ham, nice and firm.
Step 7: Making the Tailor’s Ham - 5


Hand sew the opening to close up the ham. A hand overcast stitch is used to close up the stuffed pressing tools. Make very small stitches so no stuffing escapes! All done!

Participated in the
Build a Tool Contest


