Introduction: Ghost on a String
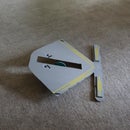
Ghosty slowly climbs a piece of fishing line--reverses direction when his head hits the top, then slowly sinks down and repeats the process.
My wife, Annelle, made the ghost and I made the mechanism. The Arduino motor shield senses extra current when the ghost "binds" at the top and this causes the software to reverse the ghost. After several seconds of slowly sinking downward, the ghost reverses and climbs.
Attachments
Supplies
Arduino Uno
Arduino Motor Shield
Servo motor (metal gear without end stops)
9 volt battery
9 volt battery holder
Velcro
3d printed parts
Six 3mm screws
Heat shrink tubing
Fishing line, 8 pound or stronger
Paper or plastic plate
White cheesecloth
Fabric stiffener
Styrofoam ball (3 inch diameter or larger)
Large plastic bottle
Clear plastic wrap
Seven pipe cleaners
Disposable tin container
Glue
Black felt
Step 1:
Remove screws from servo motor. This motor was selected because 1) It has metal gears, 2) It has no end stops.
Step 2:
Cut wires to motor and potentiometer. Remove circuit board.
Step 3:
Solder wires to motor leads and insulate the connection with heat shrink tubing or electrical tape.
Step 4:
Bring wires out and replace screws on motor.
Step 5:
Connect pulley to servo horn using 3mm screws.
Step 6:
There is a small raised ridge between the two screw holes on each end of the servo motor. File this away (the plastic is soft and this is easy to do).
Step 7:
Mount the motor using four 3mm screws.
Step 8:
Secure the pulley to the servo motor using a screwdriver and the servo horn screw (comes with the servo motor).
Step 9:
Attach the battery/Arduino holder to the motor mount. I melt the pieces together using a soldering iron, but it could be glued.
Step 10:
Thread the long plastic (3d printed) screw into the 3d printed "head."
Step 11:
Thread the head assembly to the motor assembly.
Step 12:
Attach Velcro to the side and end of the battery/Arduino holder.
Step 13:
Secure the battery and Arduino using Velcro.
Step 14:
The 9 volt battery cable goes to the power in terminals of the Arduino motor shield. The motor is attached to + and - for "motor A." The software sketch is loaded to operate the system.
Attachments
Step 15:
Secure fishing line to pulley. I used 8 pound fishing line (more for strength, less for invisibility). I drilled a small hole in the side of the pulley and tied the line through that hole.
Step 16:
Gather material to make the ghost.
Step 17:
Set plastic bottle on paper plate and put the styrofoam ball on the bottle.
Step 18:
Wrap the ball with clear plastic wrap (to prevent sticking).
Step 19:
To make an arm, braid or twist 3 pipecleaners together, then roll up one end to form a hand. Repeat for the other arm.
Step 20:
Using the one remaining pipe cleaner, twist it loosely around the bottle neck and attach arms as shown.
Step 21:
Cut cheesecloth to desired size.
Step 22:
Pour fabric stiffener into the tinfoil container.
Step 23:
Coat cheesecloth with fabric stiffener and squeeze out excess liquid.
Step 24:
Drape cheesecloth over head and arms.
Step 25:
Repeat step two more times.
Step 26:
Allow cheesecloth to dry overnight.
Step 27:
When dry, carefully pull ghost shape away from the bottle and arms. Remove styrofoam head.
Step 28:
Cut out two felt eyes and one mouth. Glue on ghost.
Step 29:
Using scissors, carefully poke small hole in top of ghost's head.
Step 30:
Place mechanism inside ghost body. Attach fishing line to hook on ceiling. Connect battery and ghost will "float away."

Participated in the
Rope & String Speed Challenge


